Voucher Emails
In this article, you will learn how to set up an automatic email flow for sending a voucher to users who sign up for receiving emails from you. Of course, to send out marketing emails legally you need explicit consent from the customer.
This article presupposes that you have already created the following on your solution:
- A voucher list
- A discount triggered by the voucher
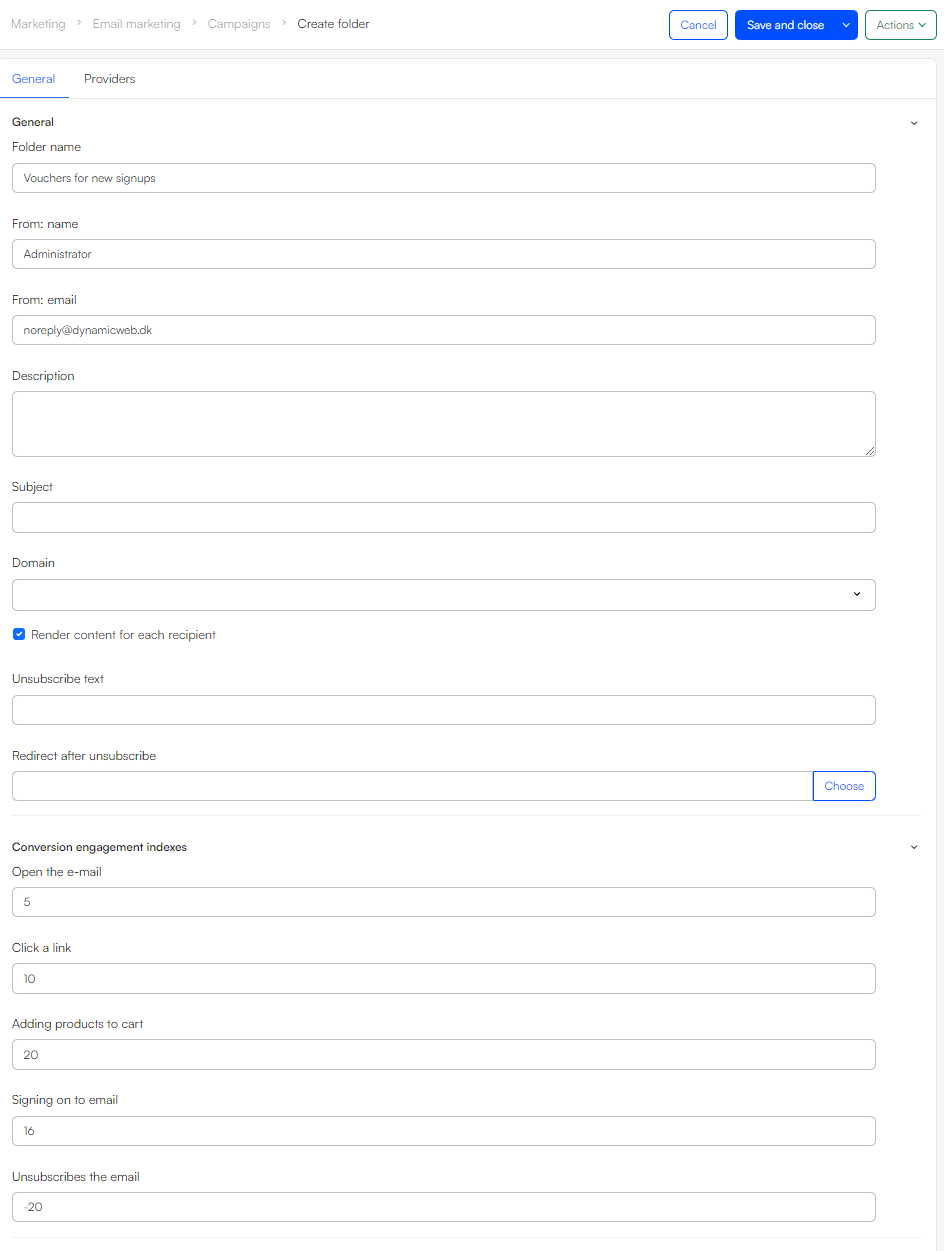
Setting up a campaign folder
Since these types of emails need to have their content rendered for each recipient – because they have unique content for each user – we suggest you create and configure separate campaign folder for them.
To do so:
Go to the Email area
Click on the context menu for the Campaigns node and click Create new folder
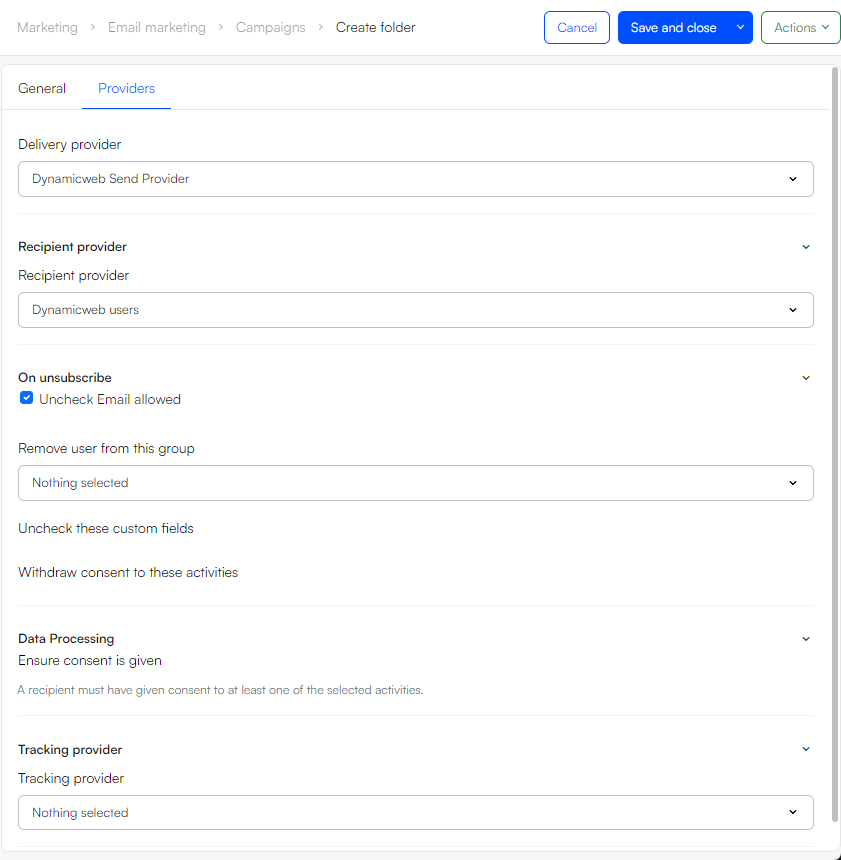
Go through the folder settings tabs:
Click Save and close
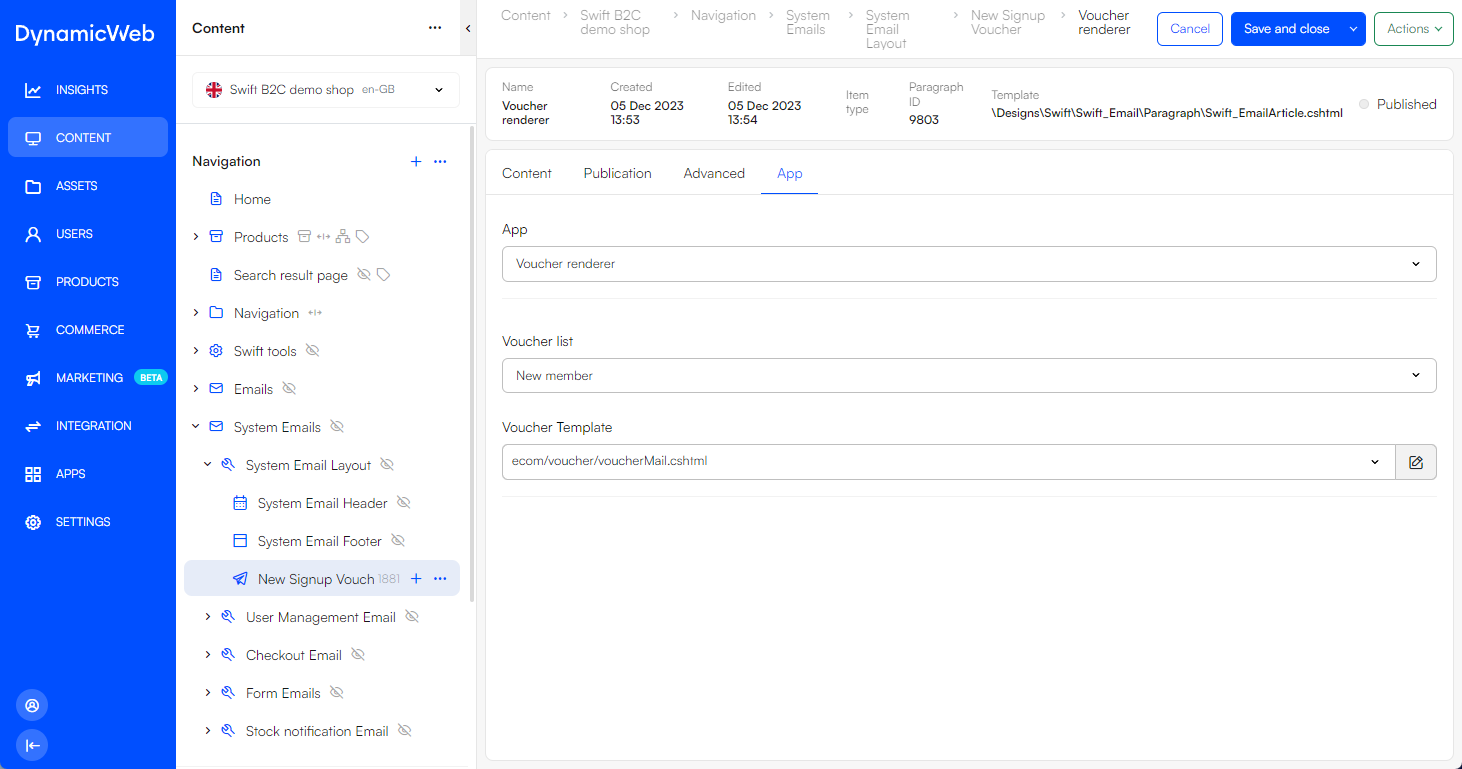
The Voucher Renderer App
In DW10, emails are actually pages which are wrapped in an email template and sent to your recipients.
A voucher email can therefore contain whatever you like – just like other emails – but in order to render the voucher code it must also contain a voucher renderer app.
To do so:
- Create an email page under Content area and add the Voucher Renderer app to it
- Select the voucher list you want to distribute vouchers from
- Select or create a template which fits the overall email template
Creating a 'New Signups' Segment Search
To automate the voucher email flow, you must create a Segment Search which finds users who:
- Have updated their email permission within the previous 24 hours
- Have email permission set to true
- Have not received a voucher email already
To do so:
- Go to Dynamic Segments in email's area tree
- Click on the context menu of Segment Search and choose New segment search
- Add the appropriate rules through root expressions:
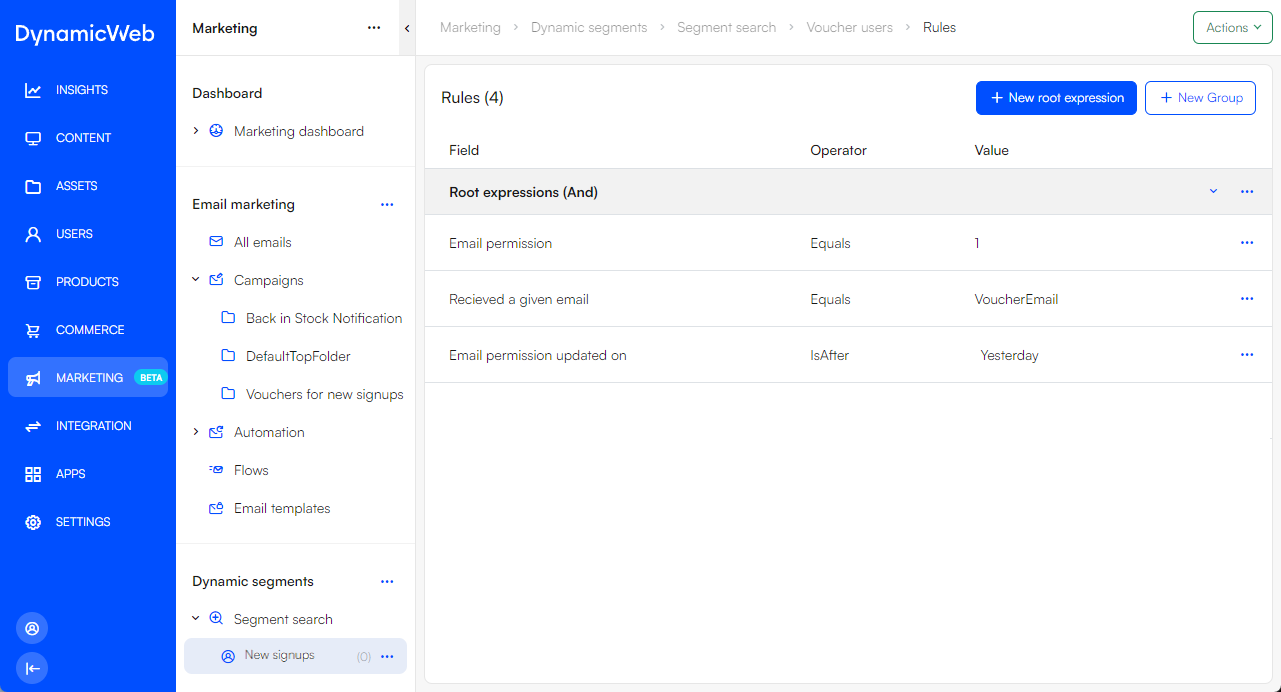
This finds all users who have changed their permission to true within the last 24 hours, and who have not previously received a voucher email.
Scheduling the campaign
Now you have your email-page and segment search configured, you will want to schedule the email-campaign.
First you need to create an email under the newly created folder Vouchers for new signups:
- Click the context menu for Vouchers for new signups folder
- Click Create email
- Configure the settings for the email. Under the Email tab:
- Choose the newly created segment search New Signups as the Recipient groups
- Provide a name and email for the sender of the email
- Provide a subject and pre-header
- Choose the email page with the voucher renderer app attached as the page under Content
- Choose a domain for the email
- Under the Advanced tab:
- Configure email attachments
- Create an unsubscribe text and a redirect page after unsubscribe
- Under content settings Render content for each recipient should already be checked off, and choose Generate automatically from content under Plain text
- Lastly check off Ensure unique recipients to ensure users only receive the voucher once
- The last tab Providers should already be configured correctly from when we created the campaign folder
- Click save and close
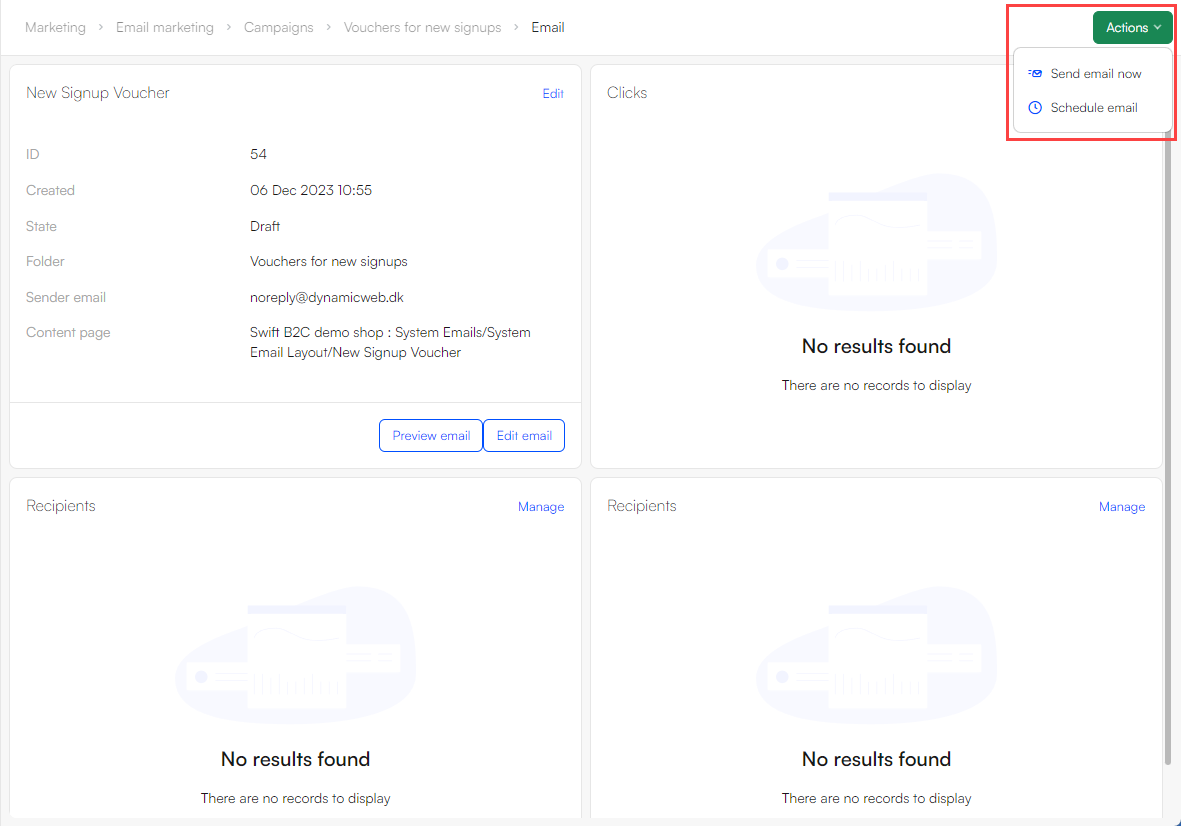
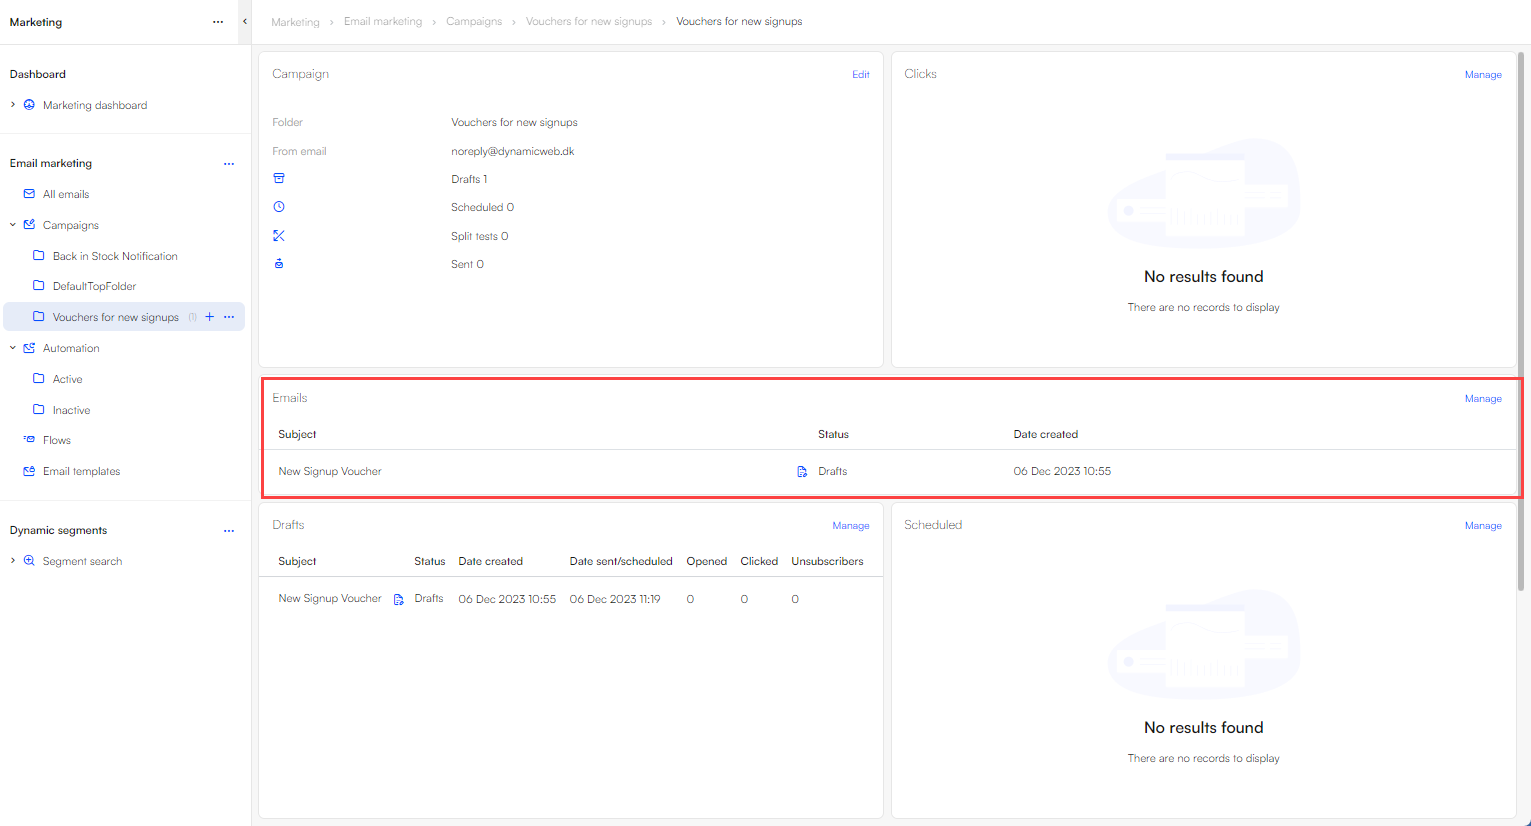
You will now see the email on your dashboard:
Now to schedule the email campaign for future delivery:
- Click on your email under the Emails widget on the folders dashboard
- Click on the action menu in the top right corner and select Schedule email
- Select a date/time and a repetition interval