When a customer adds products to their cart but leaves before checking out, you’ve got a chance to win them back. Dynamicweb lets you automatically send personalized emails with the contents of their cart — increasing the chances of a conversion.
Setting up a Campaign Folder
To begin, create a dedicated folder that can handle personalized email content and target users who abandoned their carts.
To do so:
Go to Email > Email marketing > Campaigns
Click on the context menu for the Campaigns and select Create folder
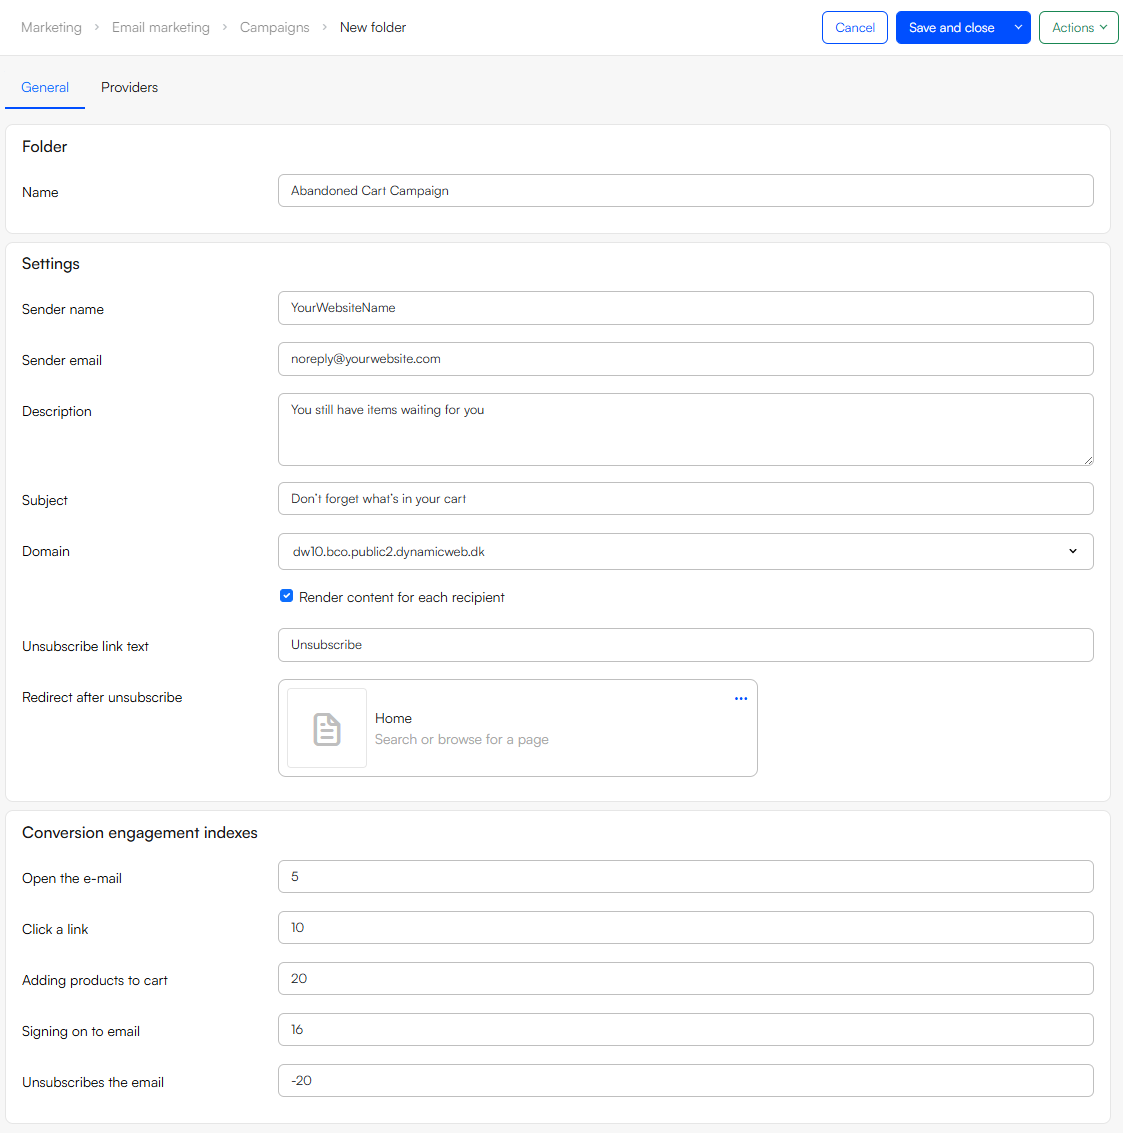
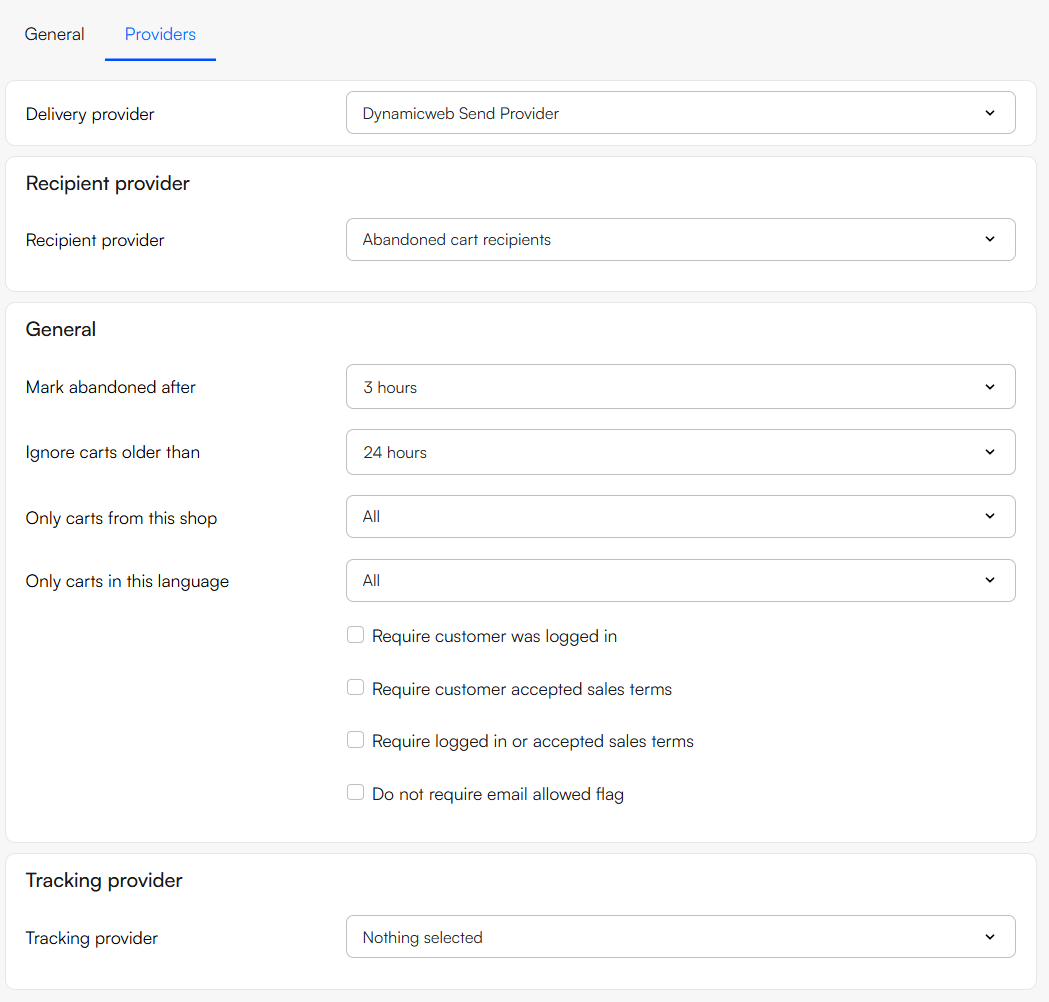
Configure the General and Providers tab:
The Context Order Renderer App
In DW10, emails are actually pages which are wrapped in an email template and sent to your recipients.
An abandoned cart email can therefore contain whatever you like – just like other emails – but in order to render the cart contents and provide a direct return link, it must also contain a Context Order Renderer app.
To do so:
- Create an email page under Content > Emails, create a new page and select email
- Add a column and add a Orderlines paragraph to it.
- Navigate to the App tab and select the Context order renderer app to it
- Select/create an appropriate template for rendering the cart content and a 'Back to Cart' link
Scheduling the Campaign
Now you have your email page and segment search configured, you'll want to schedule the email-campaign.
First you need to create an email under the newly created Abandoned Cart Campaign folder.
So, head back to Email > Email marketing > Campaigns > Abandoned Cart campaign:
- Click the context menu for Abandoned Cart Campaign folder and select Create email
- Fill in the Email tab:
- Provide a name and email for the sender of the email
- Provide a subject and pre-header
- As the Page, select the Abandoned email page with the context order renderer app attached to it
- Select a domain
- Optionally add attachments
- Head to the Settings tab
- Create an unsubscribe text and a redirect page after unsubscription
- Check the Render content for each recipient checkbox and choose Generate automatically from content
- Enable Ensure unique recipients or choose a quarantine period
- The Providers should already be configured correctly from when the campaign folder was created
- Click Save and close
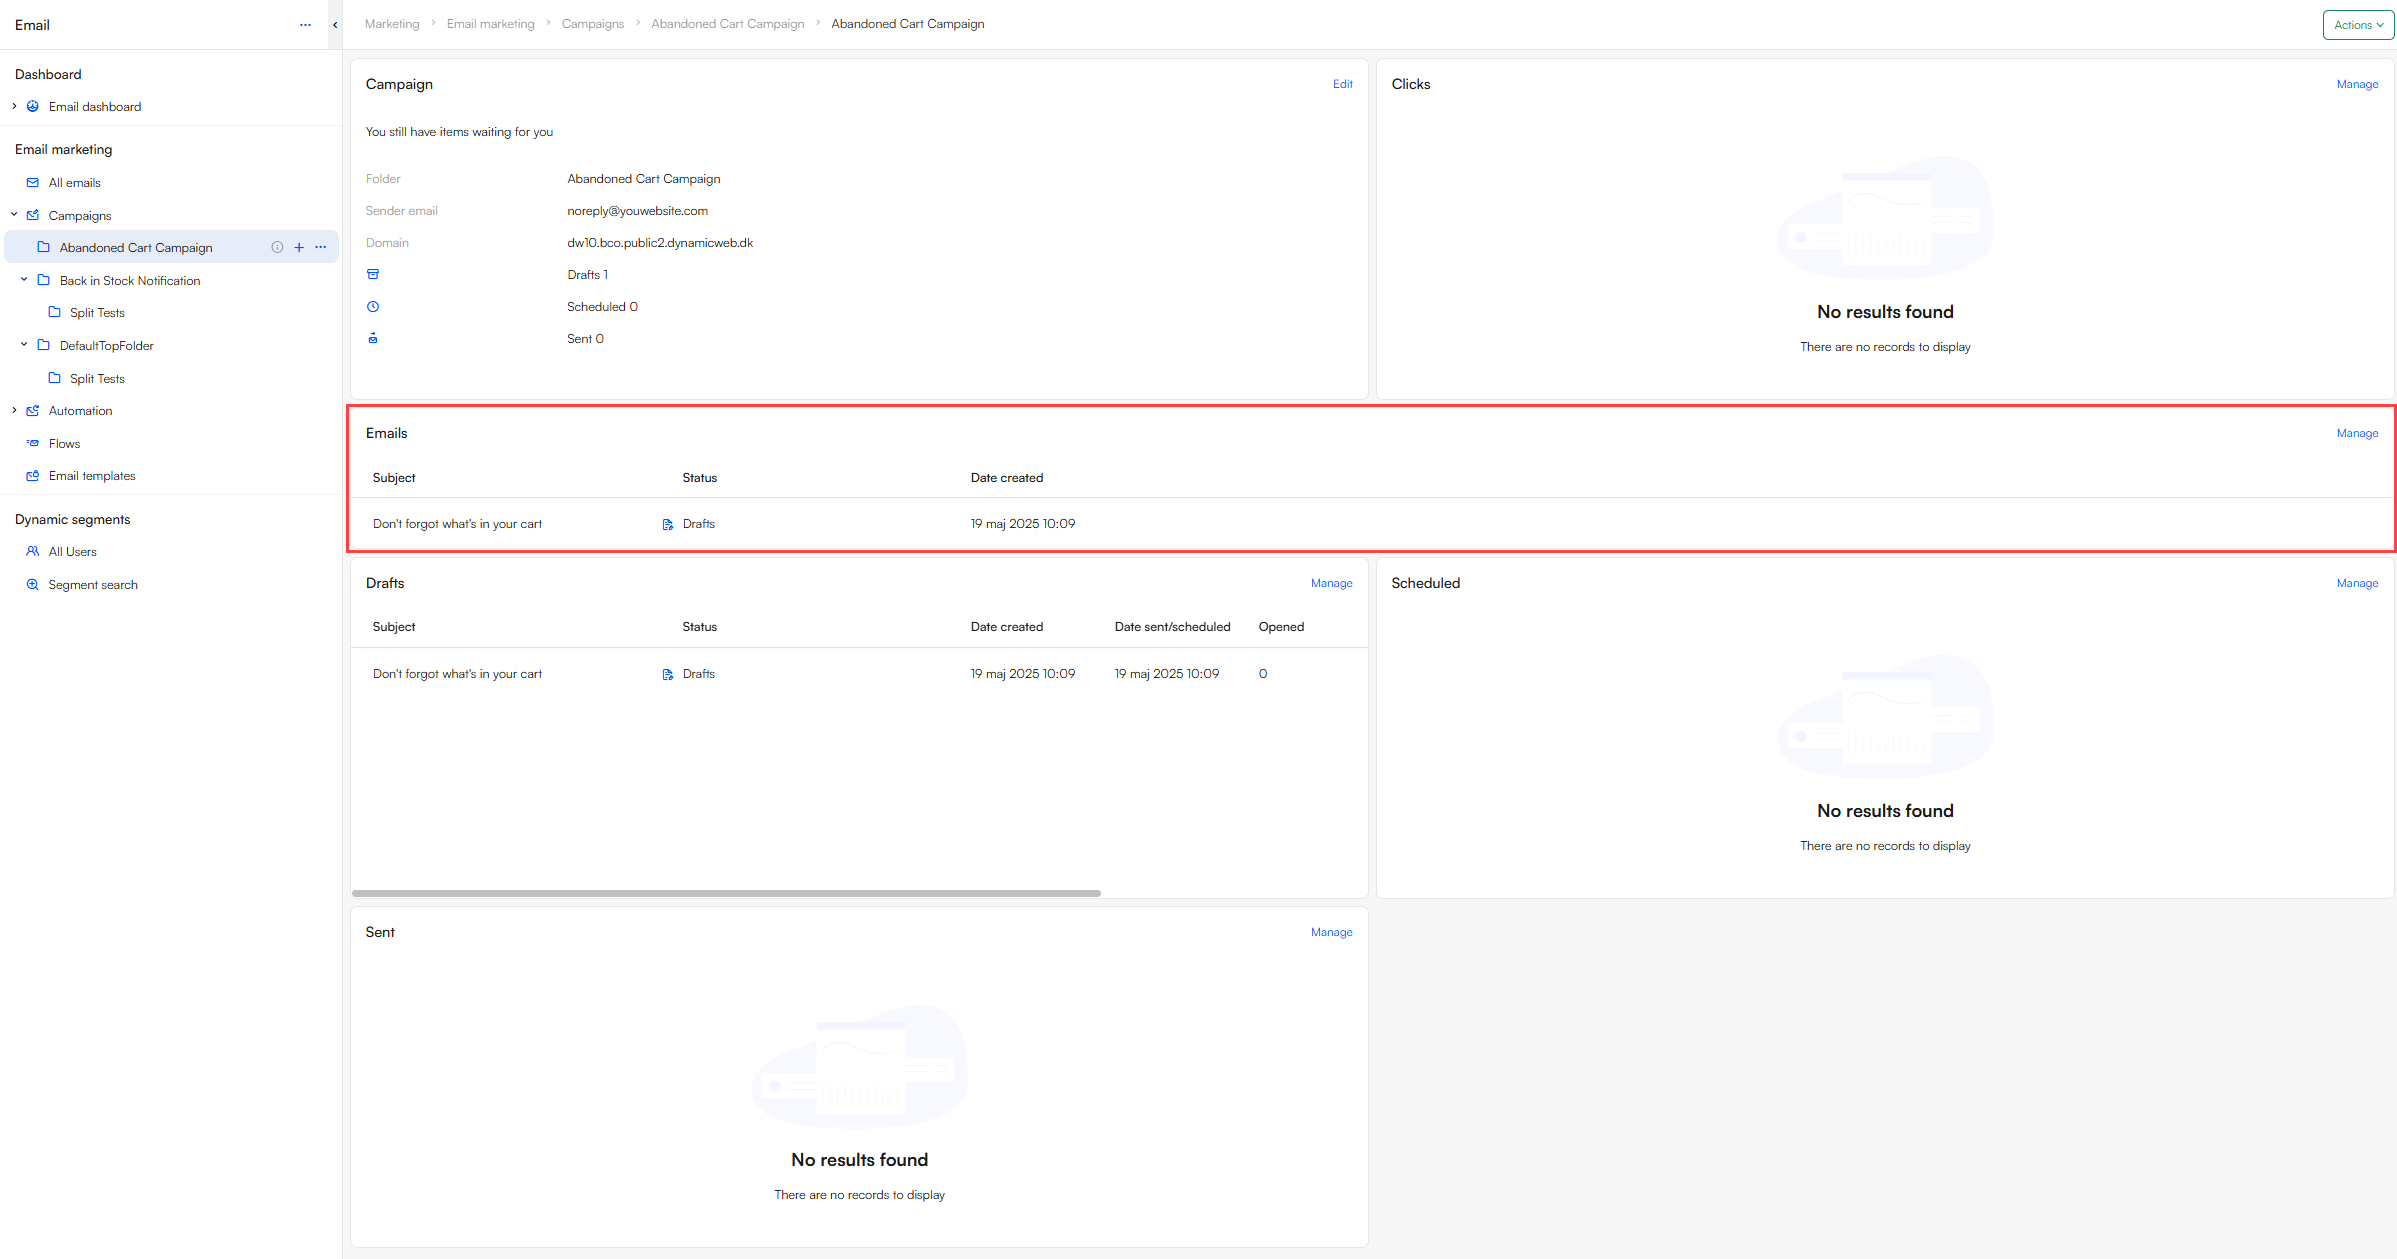
You will now see the email on your dashboard:
Now to Schedule the email campaign for future delivery:
- Click on your email under Emails widget and the folder dashboard
- Click on the action menu in the top right corner and select Schedule email
- Select a Date sent/scheduled, a Timezone, and a repetition interval