Guide 4 - Pages, Articles and Tags
Welcome to the fourth guide in the Swift Design Tutorial, which aims to get you familiar with using Swift and its features to create beautiful websites.
In these guides we focus on what is possible to do with Swift without any customizations, as we believe this is the best way to learn what Swift is all about; simplifying the process of website-building to the point where you can create high-quality prototypes in the fraction of the time it usually takes.
In this guide we will cover:
- Creating inner pages
- Using the Article item type to create authored content like blog posts or news articles
- Working with Article-tags
Let's dive right into the exercises!
Exercise 1: Creating inner pages
Inner pages are individual web pages within a website that diverge from the homepage but share common elements. In a typical website structure, the homepage serves as the central starting point for visitors. Inner pages, on the other hand, serve as additional sources of more specific information. Some common examples of inner pages include:
- About Us
- Contact Us
- Terms and Conditions
As the first exercise, we will build a customer service page.
Firstly, we need to add a folder where we can organize our "pages". This step is essential for creating a structured system that simplifies the process of locating these pages later on.
Right-click the Navigation folder and select 'New folder'. This should open a new tab where you can provide your folder with a name and save it.

Creating an empty page
To create an empty page within the newly established folder, follow these steps:
- Right-click the newly created folder
- Select 'New Page'. This will open a page where you can choose the type of page
- In this instance, select 'Standard Page'
After these steps, you should be left with an empty page.

Step-by-step example
Starting from the top. The first item we encounter is a poster with text, two buttons and a search function. At the moment, it is not possible to add a search function inside a page, but we will add the other.

- Add a one column row
- Add a poster item to the row
- Select the poster image
- Set the title
- set layout to centered
- Set the label for button 1 and 2
- Assign each button with a link
- Set title to Display 5
The poster should now look similar to the original one, just without the search item.

Next up on the page, is a section where the customer can choose the specific assistance they require.

For this section we need:
- 1 one-column row
- 1 three-column row
- 1 four-column row(The reason for using a four-column row is to ensure that the images maintain a consistent size).
Here are the steps to achieve the desired look:
- Add the rows
- Add a text item to the first row
- Set the title
- Set layout to left
- Click save
- Upload the images for the following two rows

- Add an "image item" to all columns and set the image for each
- Set image aspect ratio to fill
- Set the page link. if you don't select a page link, the image will not function as a button.
- Your page should now resemble the original, but still with a noticeable difference in the size of the images. To make the images in the second row slightly larger, you can increase the 'Row width' in the row settings of that same row.
Your page should now look something like this:
![]()
Following this, we will incorporate a section where frequently asked questions (FAQs) are placed. Users will be able to click a specific FAQ, and its corresponding answer will appear to the right.

Unfortunately we can't replicate this exactly, instead we will use the built-in Swift accordion item
- Add a one-column row
- Add a text item to the first row and give it a title like "FAQ"
- Add another one-column row
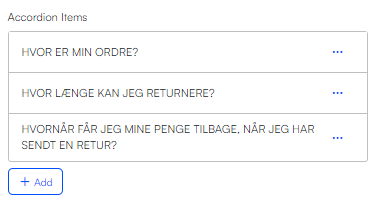
- Add a accordion item to the second row
- Add the questions to the accordion items, by clicking '+ Add' beneath accordion items

- Set the theme. You can create your own theme in order to get the purple colors of the original website

Your page is now complete, and you can proceed to link to it from the homepage or other relevant content pages.
Exercise 2: Building articles
Articles share many similarities with inner pages, with the primary distinction being the addition of metadata, like author, summary and published date. When working with articles, you have the flexibility to employ tags and categories to further organize and classify your content.
Sometimes you want to include articles on your website. Articles serve as valuable tools for informing customers about news, recent events, or creating engaging user stories related to your products.
Prior to creating an article, it's essential to consider the appropriate category in which the article should reside. For instance, an article about apple pie would be fittingly categorized under "Desserts".
Creating an article list
The initial step is creating an article list, which essentially serves as our category. Here's how you can accomplish this:
- Right click 'Navigation' and select 'new page'

- Select Article list page
- Access the page settings by clicking on the pink gear icon located in the bottom right corner
- Give the article list page a title. For the purposes of this tutorial, we will proceed with 'Recipes', but feel free to select a different title if you prefer.
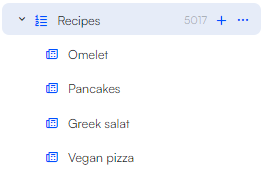
You should now have an article list page that is located in your navigation's folder.

Adding articles to the article list
We will now add an articles within the article list page
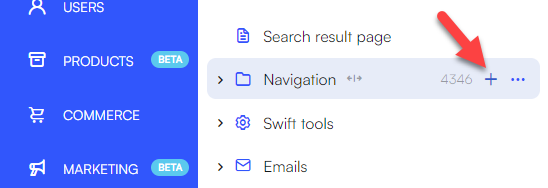
- Click the '+' icon next to the newly created article list page

- Select 'Article' as the item type
- Click 'pink gear icon' in bottom right corner
- Provide the article with a relevant title
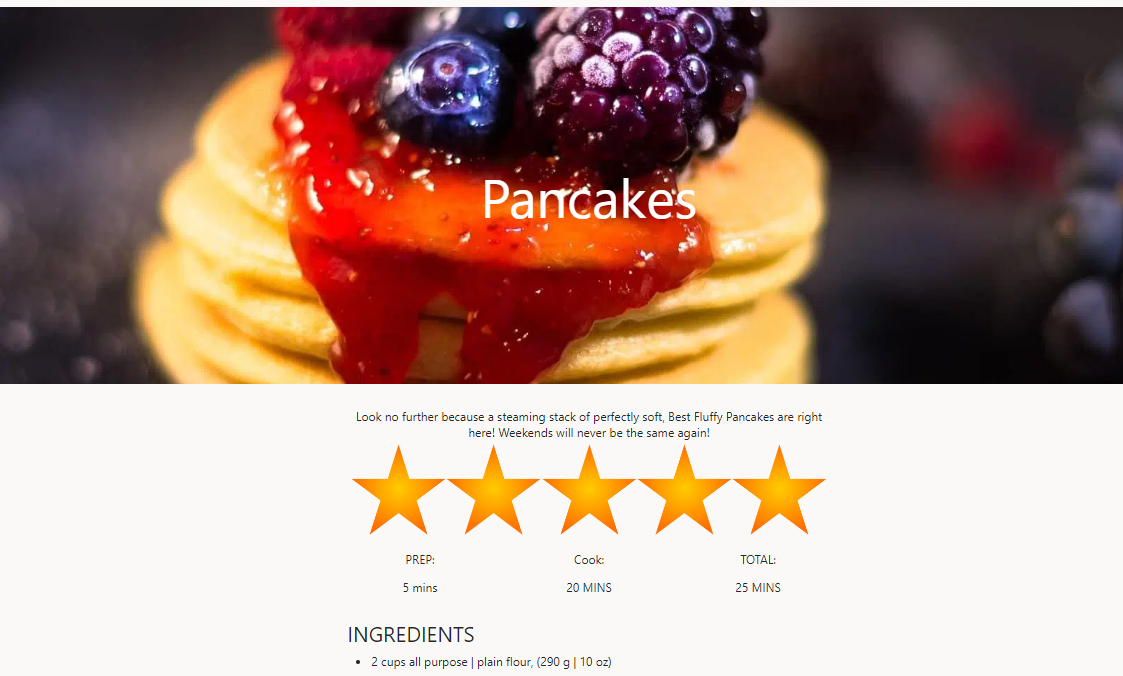
- For instance, in this case, I will be creating an article about pancakes, so i'll set the title as 'Pancakes'
Adding content to the article
We will now add content to our article:
 Here is what the page consists of:
- one column row with an Article header
- one column row with a text item
- one column row with an image item

- three column row with three text items
- one column row with a text item
Create additional articles using the same approach as the one employed for the pancake article

Linking to other articles
In these types of scenarios, articles often include links to other articles at the bottom. So now, we will attempt to create links to other recipes from the pancake article.
- Add a one-column row
- Add an article list item to the row
- Set Article list layout to 'carousel'
- Scroll down to 'Advanced' and set the List source to the article list page you created in step 2-4
This setup will display all the recipes available within that specific article list page:
 Frequently, you may want to display related recipes beneath the current one. This is where tags become valuable. We will delve deeper into this in the next exercise.
Exercise 3: Working with tags
Tags allow you to further sort the article you create. When it comes to using tags for your articles, you have some flexibility in how you structure them. You can either place all your tags in one big container, or, as a more effective approach, organize tags into collections based on their characteristics. For instance, let's consider a book about baking cake. You could categorize your tags into smaller collections like "Flavor", "Occasion" or "Topping".
As an example, within the "Flavor" collection, you might include tags like "Chocolate", "Vanilla", or "Fruit". What sets tags apart from traditional categories is their ability to transcend categories. This means that if a user is searching for recipes with the tag "Chocolate," they will find chocolate-themed recipes spanning different categories, such as chocolate cakes, chocolate chip cookies, or a chocolate drizzle topping for various cake types.
Collections
Let's start by create some collections:
- Go to Content > Swift tools > Article tag folder and click the '+' icon
- Select Article tag collection as item type
- Give the collection a title

- Create all other collection you need.
Once you're finished creating your collections, the next step is adding individual tags within each collection. Here's how you can add tags to your collections:
- Click '+ New paragraph' inside the a collection and select 'Article tag'

- Select article tag as item type
- Provide the tag with a title

- Add the rest of the tags. When you are done adding tags to the collection, it could look something like this:

Using tags on articles
Now that we have created the tags, we are ready to use them on articles. We will use the pancake recipe article.
- Go to the article page
- Click the 'pink gear icon' in the lower right corner
- Scroll down to tags and select the tags that fit the article

Now when we want to add related recipes beneath an articles, we can use tags.

In summary, tags provide a flexible way to categorize and organize articles. You can structure tags by creating collections based on different attributes. Tags have the advantage of crossing categories, allowing users to find articles with specific tags across various types, making it easier for users to discover related content.