Running in Azure
How to deploy a DynamicWeb 10 solution to Azure App Services (Azure Web Apps).
In this document we will look at two scenarios:
- Deploying a new DW10 solution to Azure
- Moving an existing DW10 solution to Azure
To follow this guide you must have access to:
- An active Microsoft Azure subscription
- A working DW10 solution
Databases created by the DW10 Installer should work on Azure App Services out of the box - the same should be true for recent versions of DynamicWeb Swift.
Note
Azure Alternatives
This article describes how to install DynamicWeb on Azure App Services and Azure SQL. It is also possible to use Azure VM which is a virtual Windows server. These 2 options are very different. If you need to install DynamicWeb on an Azure VM, refer to the normal installation guide of DynamicWeb.
It is also possible to host DynamicWeb on other cloud services like Amazon AWS and Google Cloud. In both scenarios, choose a VM instance of a Windows machine as described under requirements and follow installation steps in the normal installation guide.
New Installation
Deploying a new, clean DW10 solution to Azure involves:
- Creating a web app
- Creating an SQL Server
- Uploading the DW10 application
- Configuring the DW10 application
- Running the DW10 installer
These steps are described below.
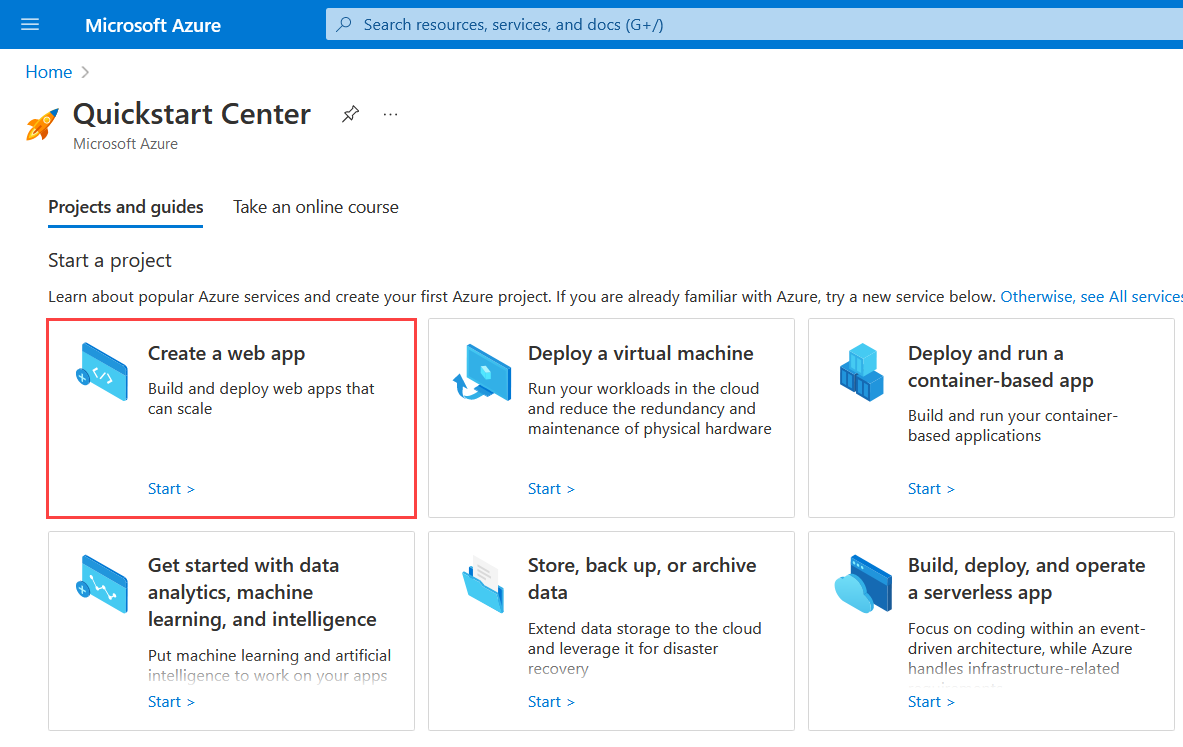
Create the web app
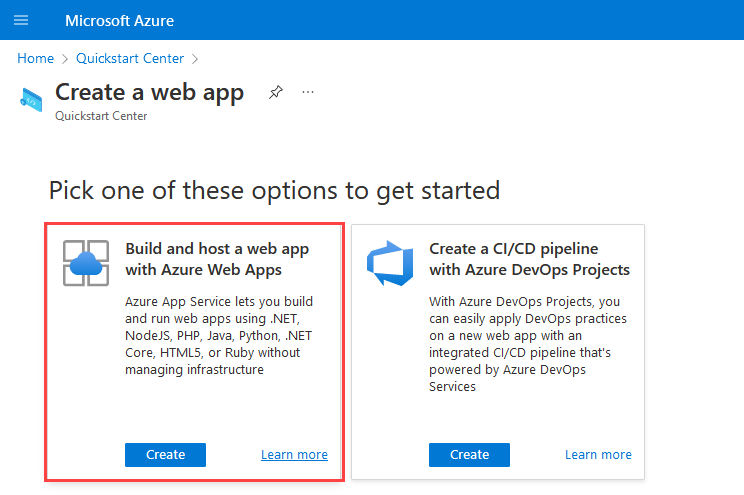
Create a web app
Select Build and host a web app with Azure Web Apps
On the Create Web App form:
- Create new Resource Group (1)
- Name the instance (2)
- Publish: Code (3)
- Runtime stack: .NET 8 (4)
- OS: Windows (5)
- Region and pricing plan: as appropriate
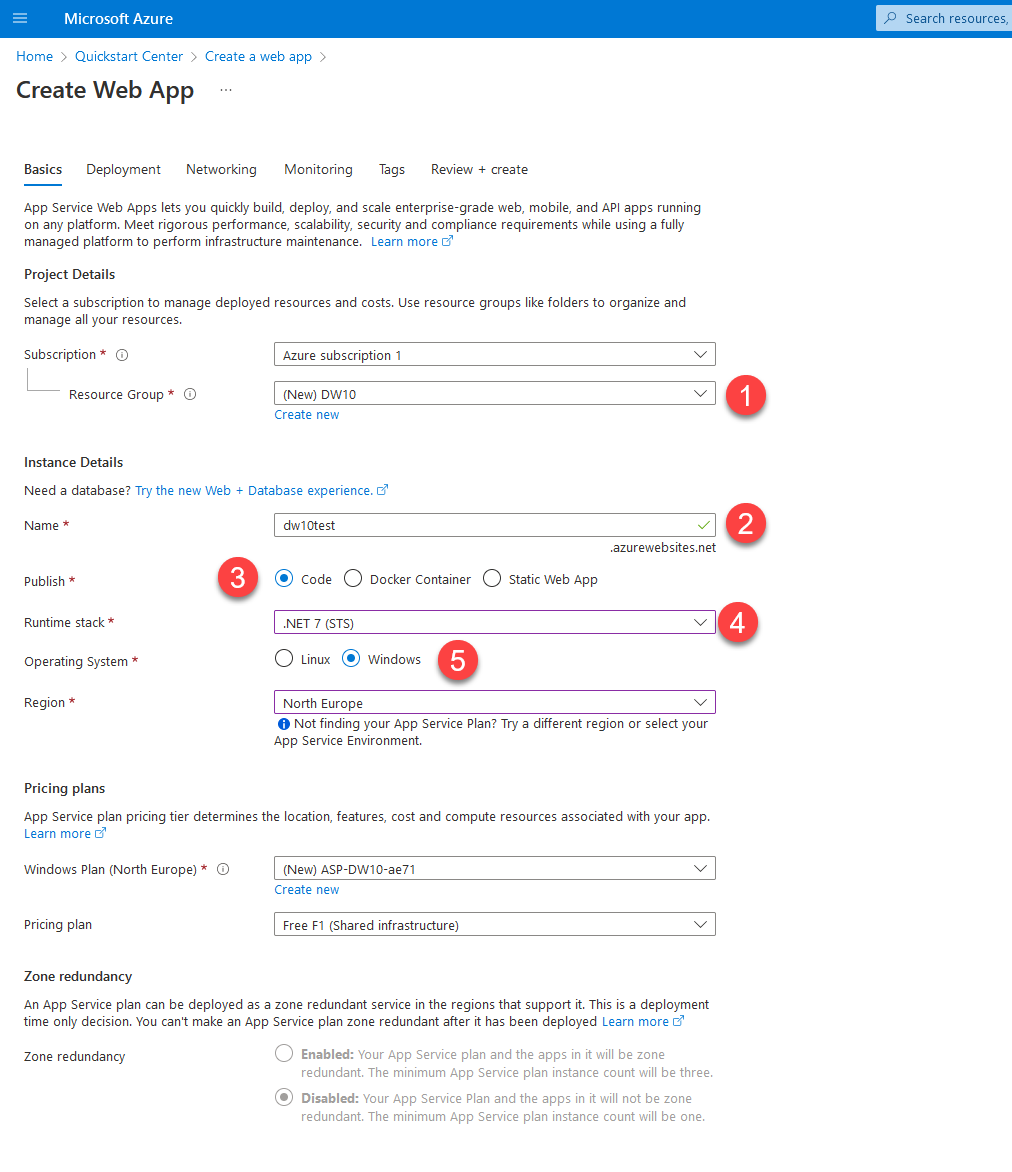
In this example guide we won't need to configure anything else related to monitoring, networking, etc. Create the web app.
Create SQL Server
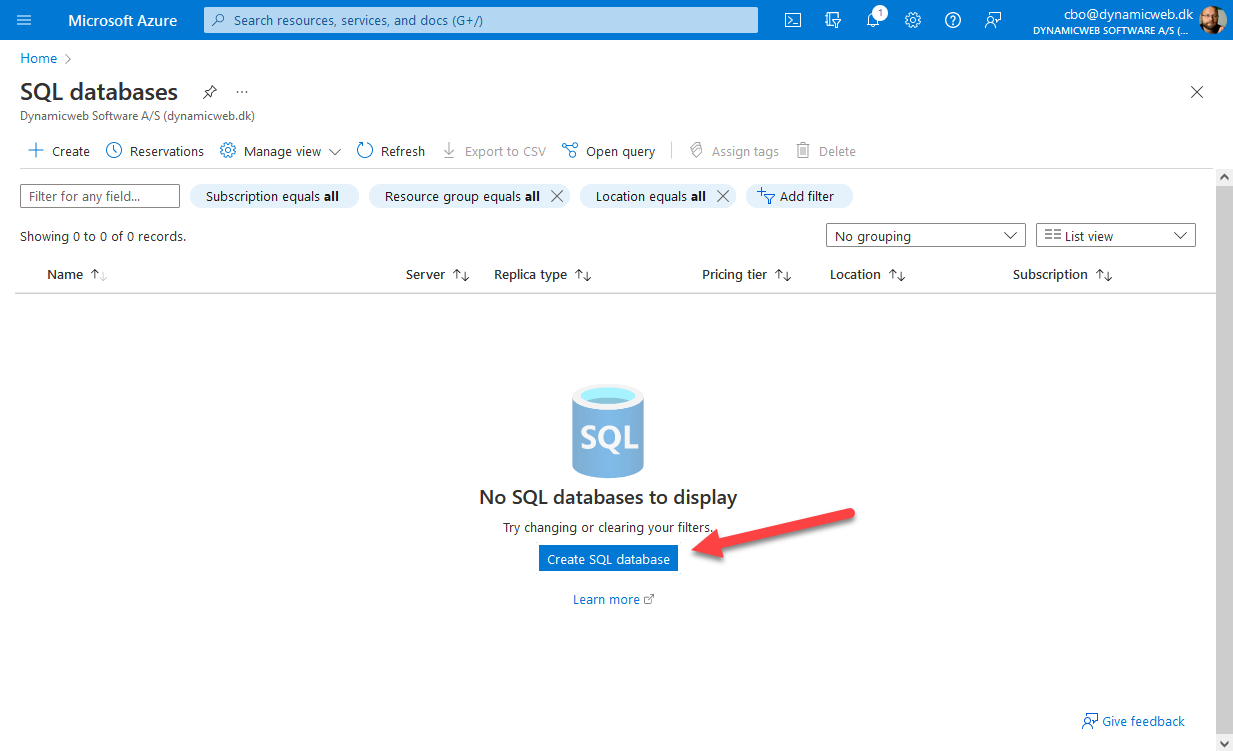
While the web app is being deployed you can create an SQL Server instance with an empty database:
- Go to Azure Services and open the SQL databases tool

- Click Create SQL database
- In the Create SQL Database form:
- Select a subscription and resource group (1)
- Provide a database name and select or create a server using SQL authentication (2)
- Set SQL elastic pool to No (3)
- Select a billing plan (4)
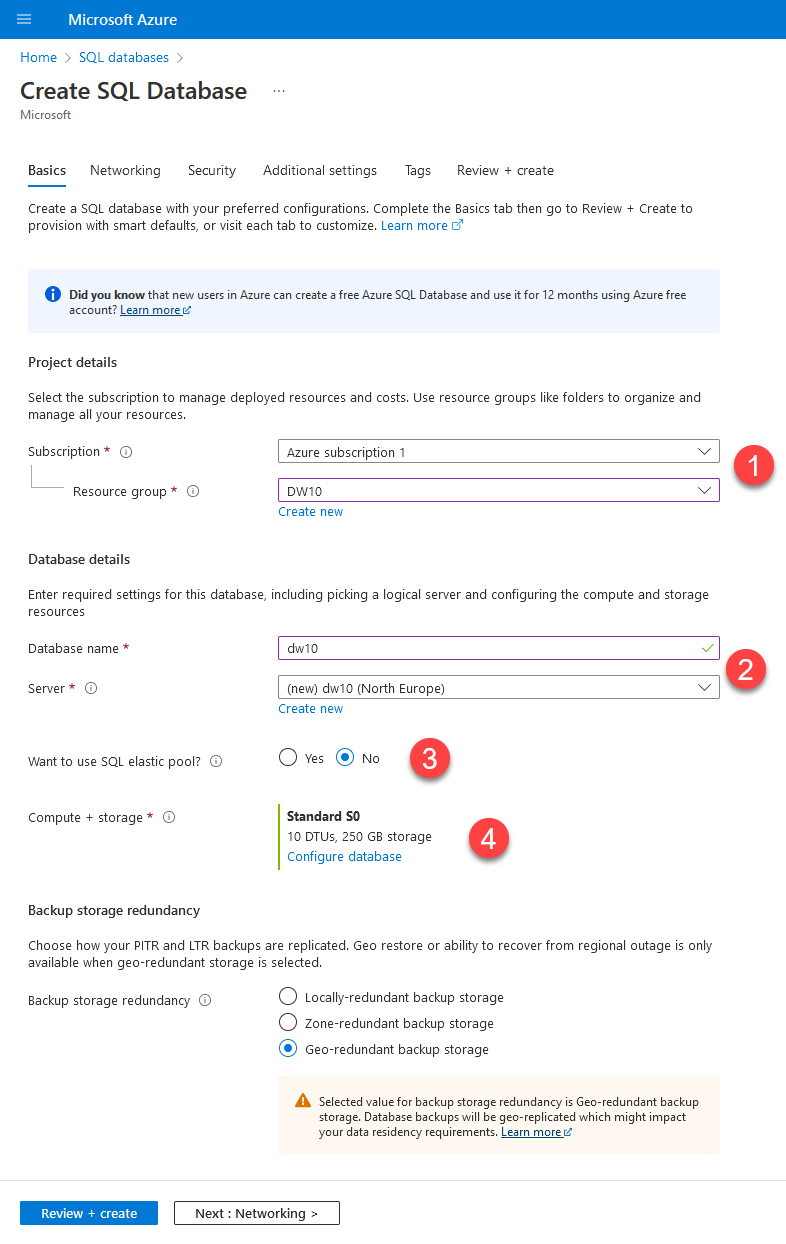
- Review and create the new SQL server and database
Configure the web app
Your web app should now be deployed - time to tweak the default configuration:
- Open the Web App and navigate to the Configuration section
- Switch to the General Settings tab and ensure that:
- .NET version is set to .NET 8
- Platform is set to 64 Bit (license permitting)
- FTP Basic Auth Publishing Credentials is set to On
- FTP State is set to All allowed
- Save
Upload the DynamicWeb application
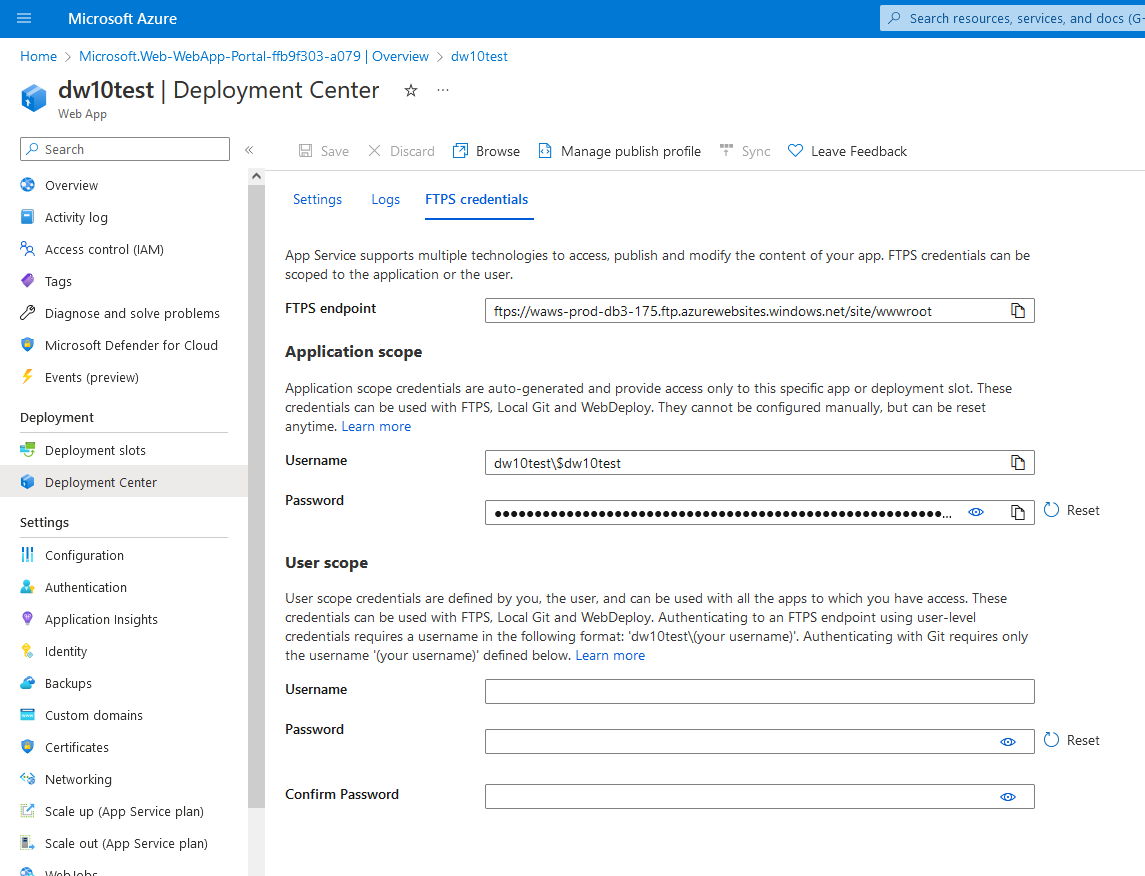
Once both the web app and SQL server has been deployed, open the web app and navigate to the Deployment Center to find the FTPS credentials:
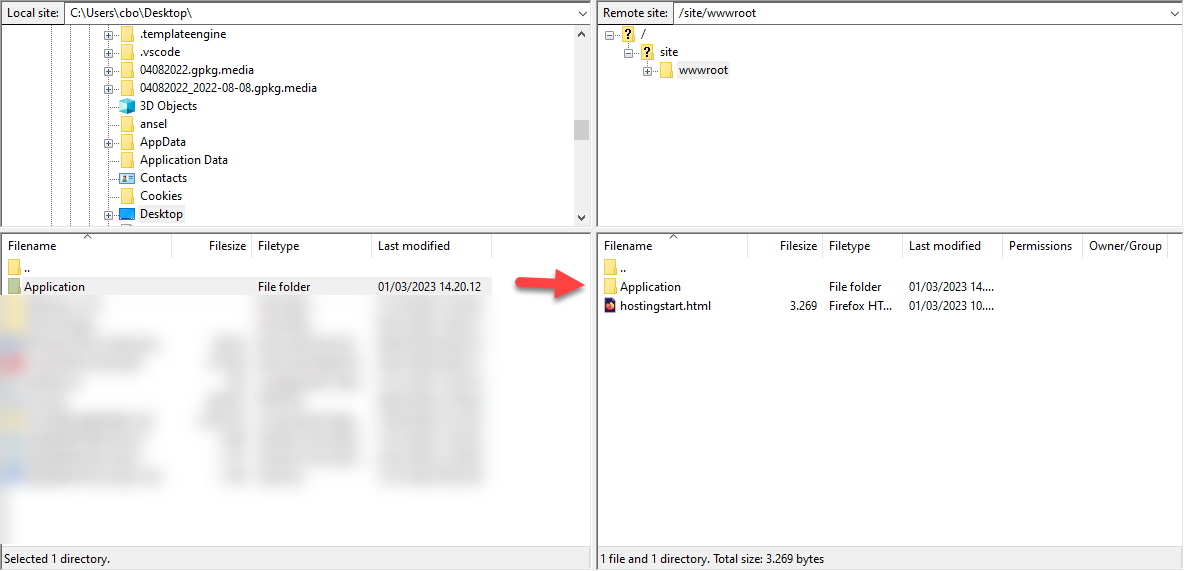
 Then use whatever FTP client you prefer to connect to app service storage and upload the DW10 application folder.
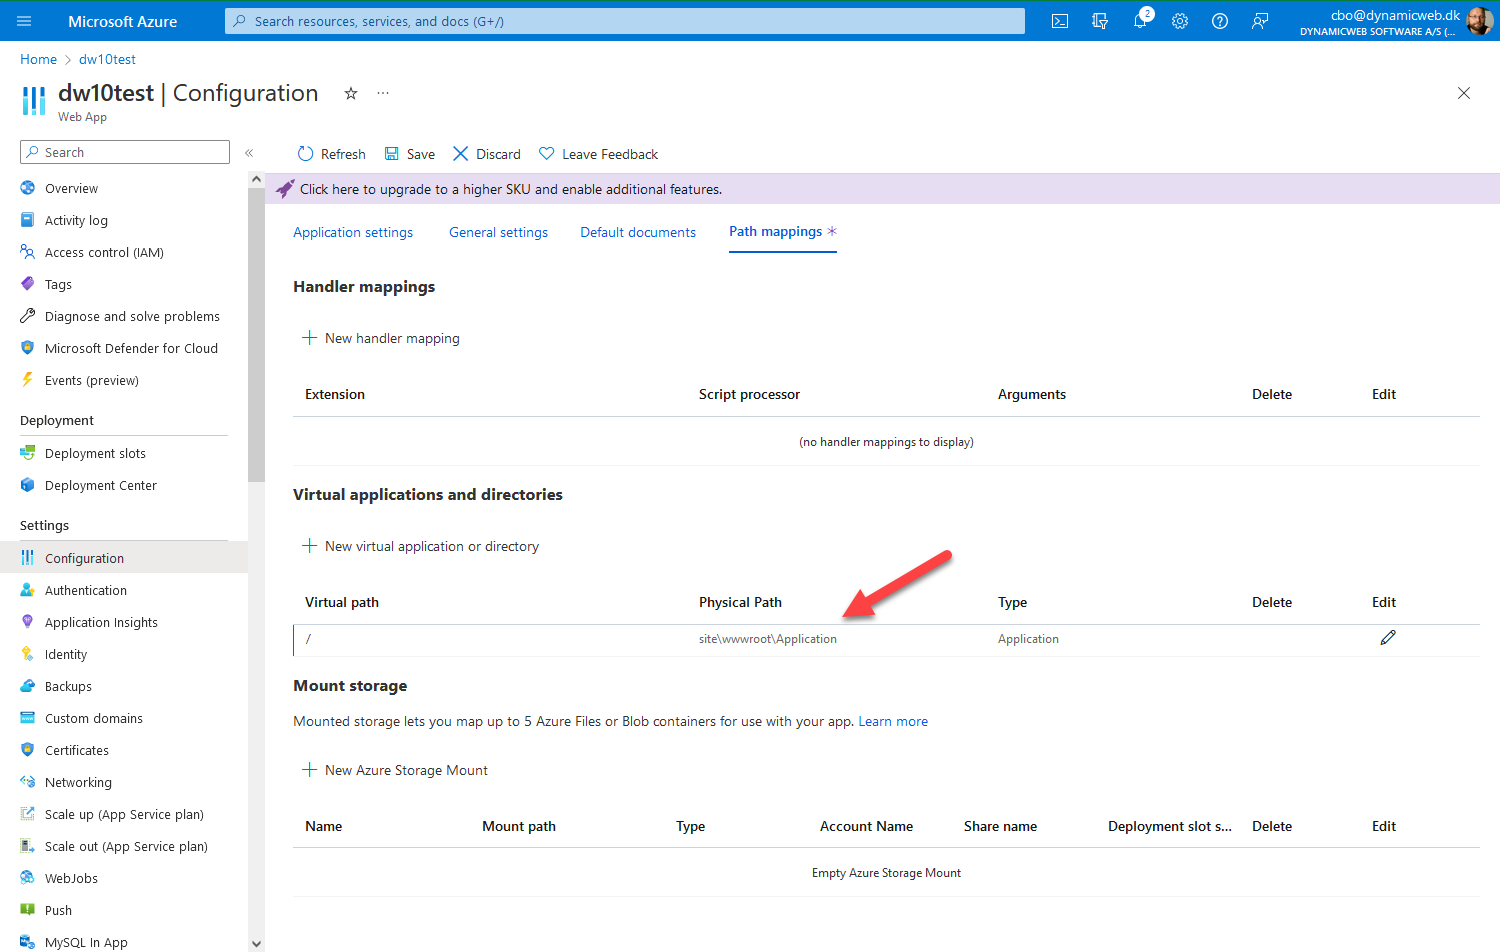
Once the application is uploaded, open the Configuration section again and:
- Switch to the Path Mappings tab
- Under Virtual applications and directories edit the root path to point to your application folder
- Save
Run the DynamicWeb 10 Setup Guide
You can now run the DynamicWeb 10 setup guide:
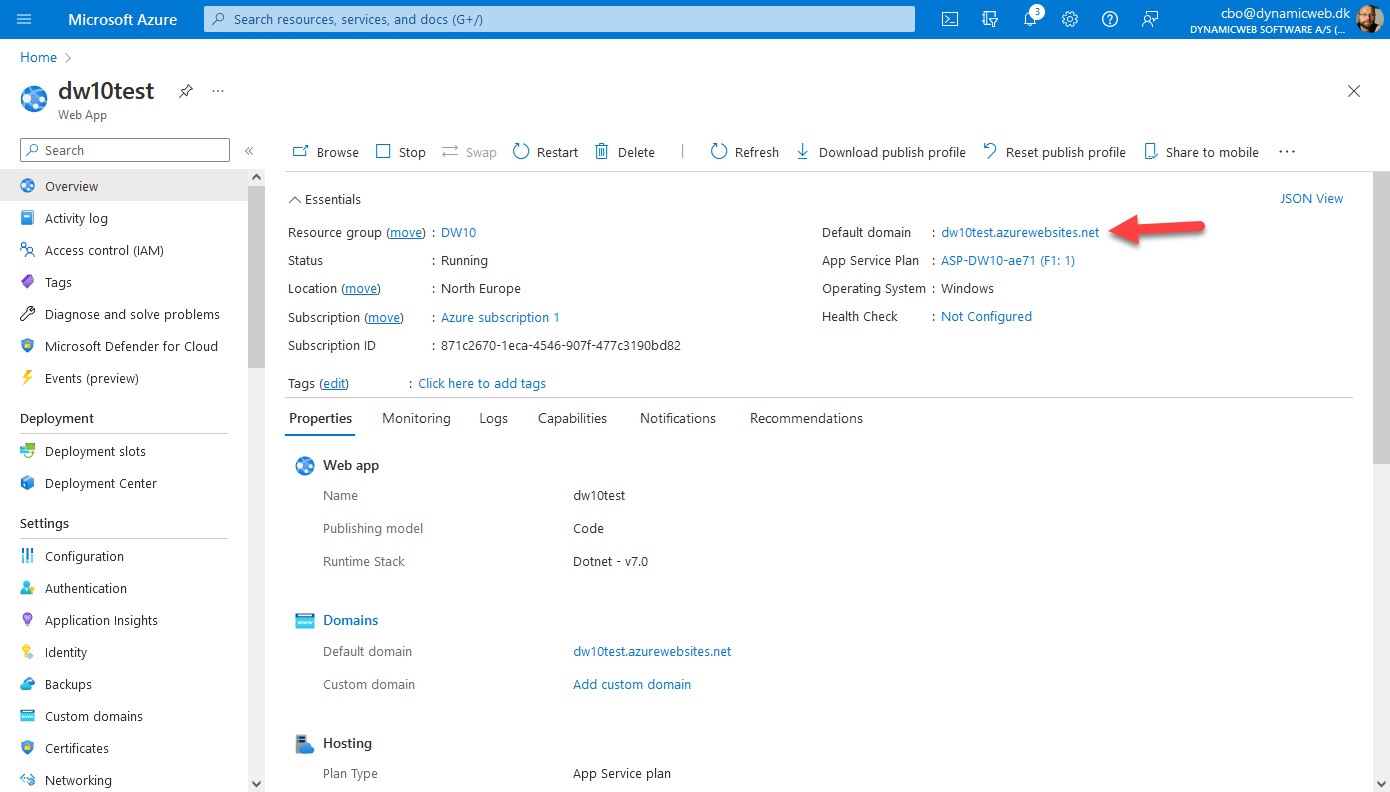
- Open the web app Overview
- Find the solution URL and access it
- When you get to step 3 - Setup Database:
- Select Azure database as the database type
- Fill in the connection settings with your Azure SQL details
- Proceed through the rest of the steps as normal
Once completed you can log in to the administration, install a license, and work with the DynamicWeb 10 solution as per normal.
Deploying an existing solution
To deploy an existing solution to Azure Web Apps you should follow the guide above until the application has been configured then stop, without running the DW10 Installer.
You can then:
- Migrate the existing db to Azure
- Upload the existing Files-folder
- Connect the solution to the uploaded database
Migrating the db to Azure
To migrate your existing database to Azure:
- Open SQL Server Management Studio and locate your database
- Right-click it, choose Tasks > Deploy Database to SQL Azure
If the migration fails, examine the logs and fix whichever issues exist and try again.
Upload the Files-folder to Azure
Next you must upload the Files-folder of the existing solution:
- Connect to your app service storage using an FTPS client
- Navigate to the Application-folder and upload the Files-folder to it
You can place the Files-folder elsewhere, of course, but then you ned to create a virtual folder reference in the Azure app settings interface.
Connect the application and db
Finally, connect the application to the db:
- Connect to the FTP
- Browse to the Files folder and open GlobalSettings.Database.config
- Locate the Database-section and fill in the connection details with the connection properties from the Azure SQL server:
- Password
- Username
- Database
- SQL server
Recommended Configuration
Here are the recommended instances and configuration options for Azure Web App and Azure SQL:
- Minimum recommended Azure Web App tier
- Small websites w/o Ecommerce: S1
- Small Ecommerce sites: S2
- Larger Ecommerce sites: P2 minimum
- Minimum recommended Azure SQL tier is S2 - scale to larger S-instances as required by the load on the site. Consider a vCore instance for improved performance.
- Consider disabling overlapping recycling by adding the WEBSITE_DISABLE_OVERLAPPED_RECYCLING setting to appSettings - set the value to 1. This is to avoid potential locking issues in integrations, config files and Lucene index files - see here.
Here are the recommended email-related configurations:
- Please ensure that Do not use SMTP pickup directory is checked under Settings> System> Web & Http > SMTP on the solution, as this feature is not supported on Azure.
- Configure an external SMTP server on the solution (Settings> System> Web & Http > SMTP) for sending our system emails such as receipts, password recovery emails, etc.
- Configure an Email Marketing Delivery Provider using e.g. sendgrid, as the default SMTP server will be slow.
Please also note that DynamicWeb staff will not have access to solution hosted in Azure, and that we do not have access to the same tools for debugging, performance optimization, and investigations as we do on our in-house Cloud environment. Should you need assistance that require us to access your solution, you should be prepared to provide copies for debugging purposes.