Product indexes
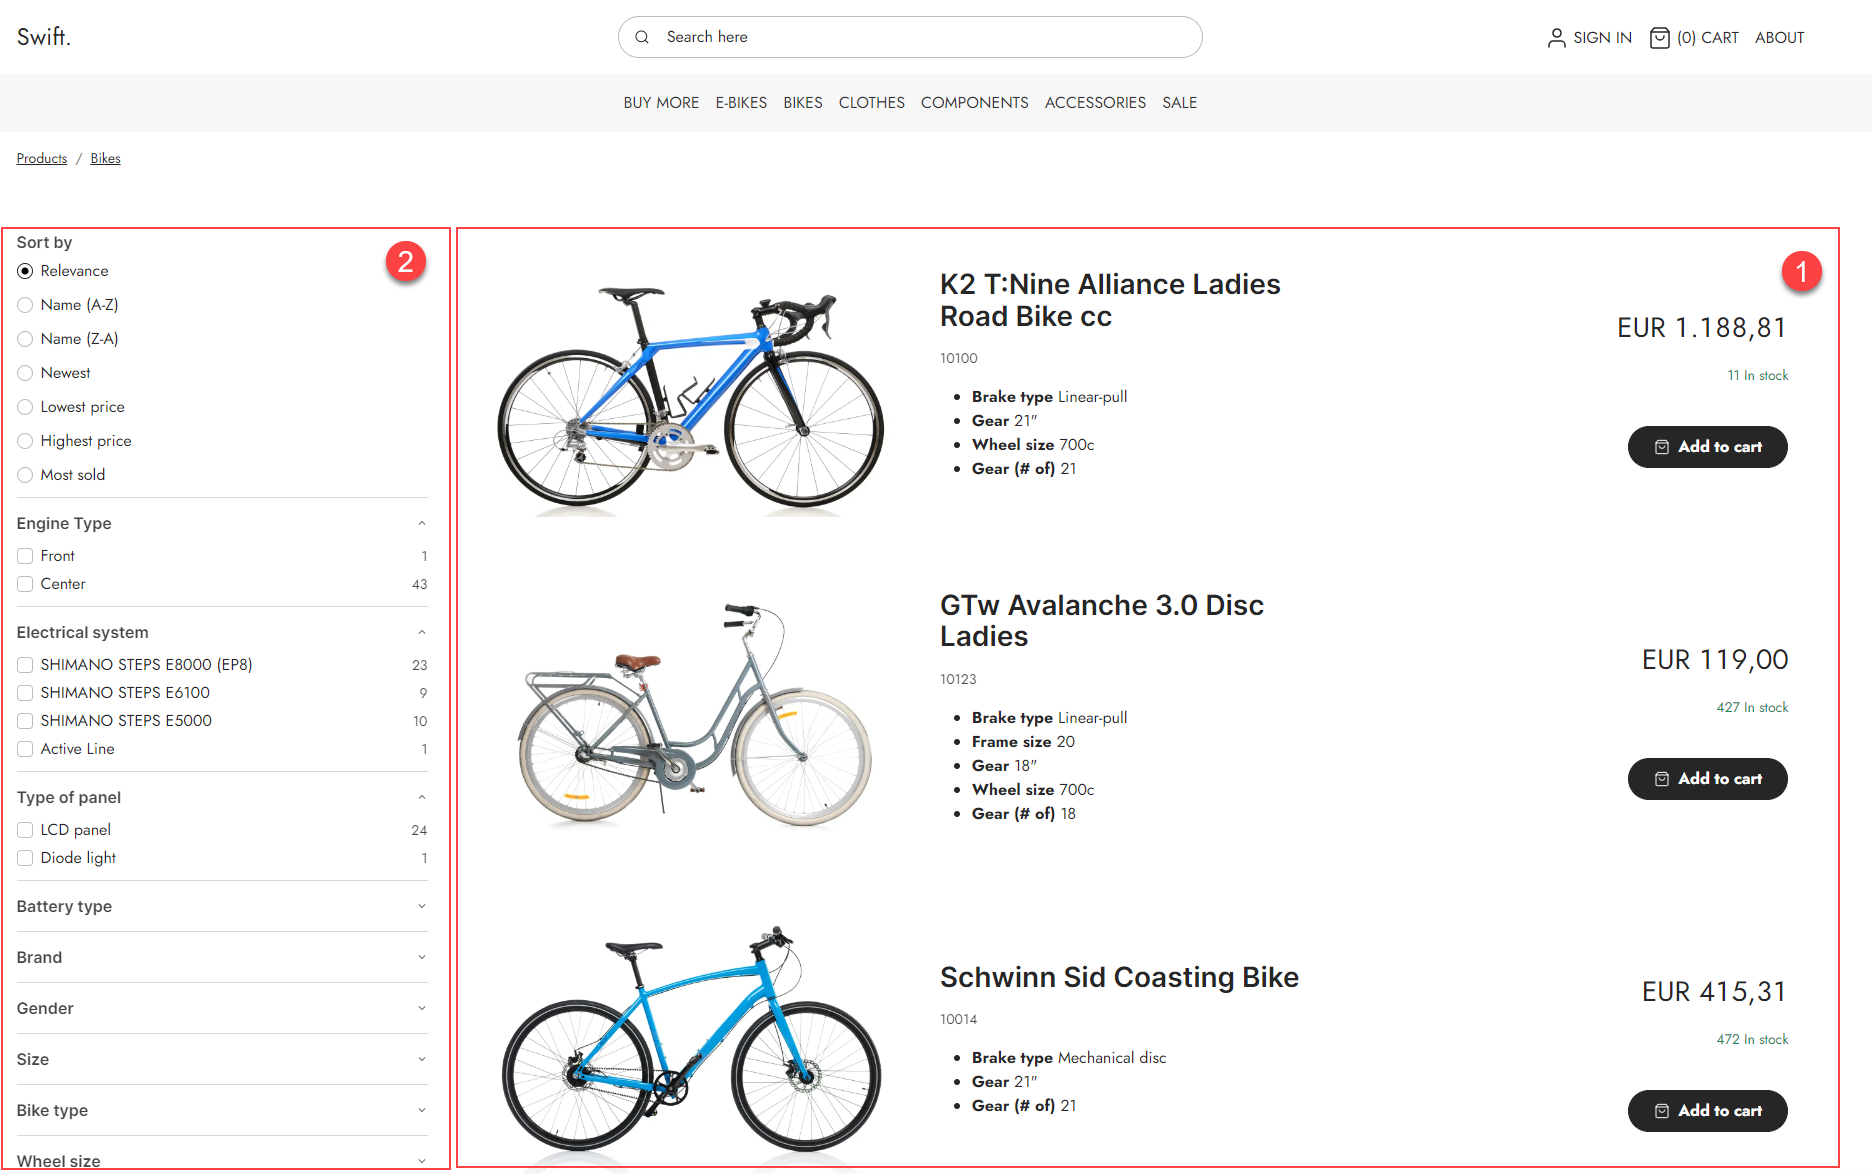
A product index is an index of product data on a solution – typically all standard and custom product fields as well as a lot of generated fields with additional information which is useful when publishing products to frontend (1), rendering facets (2), and for backend tasks in e.g. PIM.
 To create a product index:
- Go to Settings > Repositories and open/create a repository.
- Under the indexes section, click manage.
- Click New index.
- Provide a Name to the index.
- Select a Balancer
- Dynamicweb.Indexing.Balancing.ActivePassive - selects the next instance on the list of instances – so if instance A is unavailable (building, has failed), instance B will be used unless it’s unavailable, in which case instance C will be used, and so on.
- Dynamicweb.Indexing.Balancing.LastUpdated - directs operations to the most recently updated index, ensuring users interact with the freshest data.
- Click Save and close.
On solutions with heavy traffic and frequent product data updates we recommend using the LastUpdated mode to ensure that visitors are always shown the most recently updated product data. On solutions with only two instances (the vast majority of solutions) it is not necessary to select a balancer mode, as the “other index” will always be used when an index is unavailable.
Adding Instances
An instance refers to a specific file stored in the file archive. When a query is executed, it's this file that gets searched. It's common for instances to be rebuilt regularly to incorporate the latest changes to product data. For this reason, it's recommended to maintain at least two instances. Having multiple instances ensures that while one is being updated or rebuilt, the other remains available for searches.
To create two instances:
- In the Indexes section, enter the Index you want to add an instance to.
- Click the Actions button the on top right corner and select Manage instances.
- Click New instance.
- Provide a name – you could call the first instance ‘A’ and the other instance ‘B’.
- Select the LuceneIndexProvider.
- Specify a folder to place the instance file under.
- Click Save and close.
- Repeat the process for the second instance.
Once created, an instance will look like this:

When an instance is built a set of index files are generated under System > Indexes > YourIndexName > YourInstanceName – but before you can build it you must create a build configuration.
Adding a Build Configuration
So now that you have two instances you want to build them – to do so, you need to create a build definition. Each type of index has a specific builder associated with it – in the case of a product index this builder is helpfully called the ProductIndexBuilder.
To add the build configuration:
- Enter the Index in which you want to create a Build.
- Under the Builds section, select Manage.
- Click New build.
- Provide a name.
- In the Builder section, select Dynamicweb.Ecommerce.Indexing.ProductIndexBuilder.
- This opens a selection of builder settings.
- Select a Builder action:
- Full rebuilds the whole index.
- Update rebuilds the products which have edited in the timespan between the current time and the HoursToUpdate builder setting.
- UpdateWithIds is a mode used by the system to update smaller batches of products as they are saved in e.g. PIM.
- Review the builder settings.

- Set up Notifications if appropriate
- Click Save and close
Now, a build button has been added to your instances:

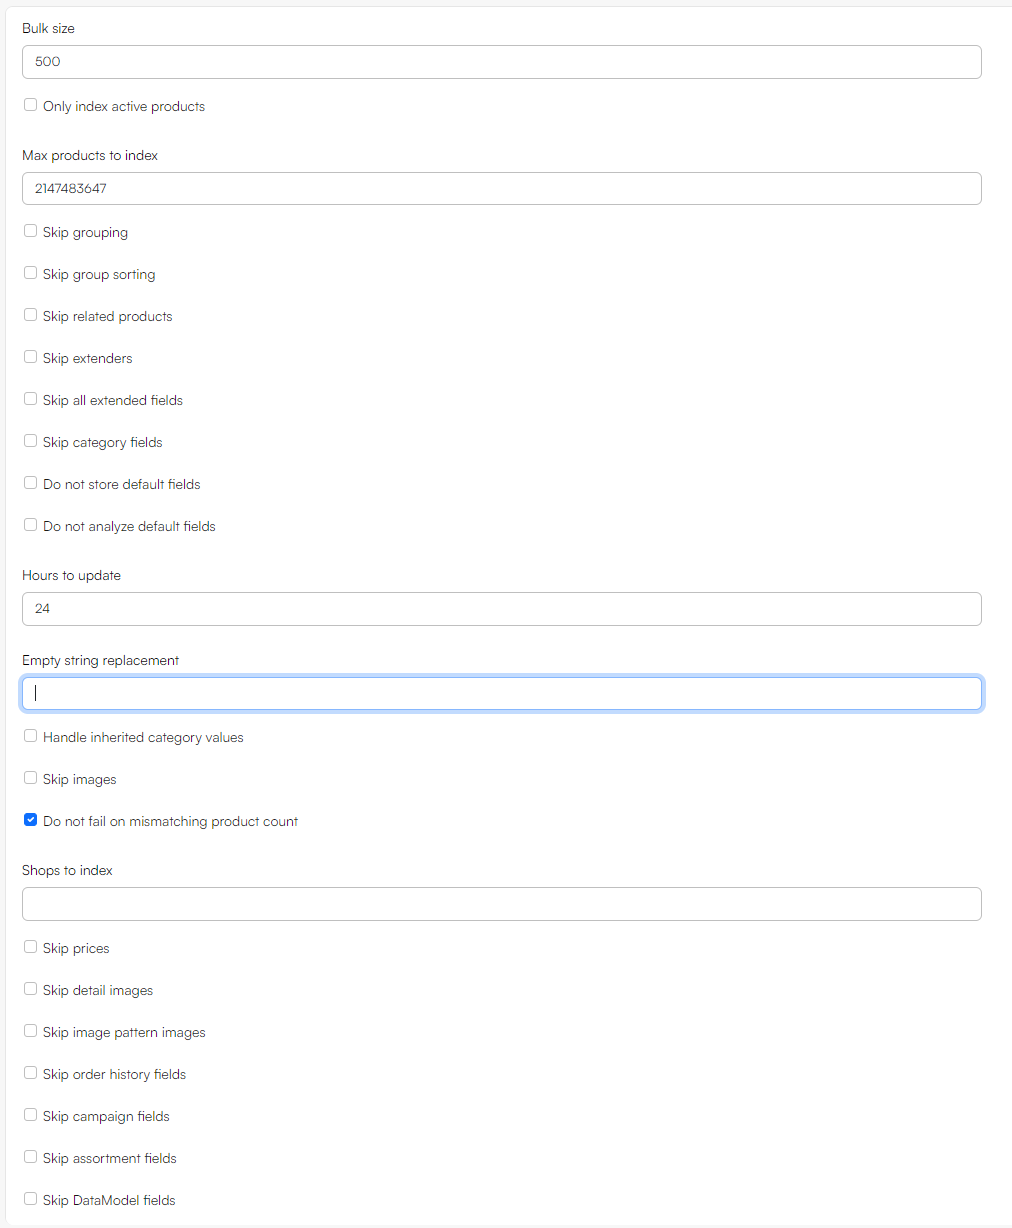
The following builder settings are available – please review carefully to see if any of them are relevant for your setup:
| Setting | Value | Comments |
|---|---|---|
| BulkSize | Integer – default is 500 | The number of products being built at a time |
| OnlyIndexActiveProducts | Boolean – defaults to unchecked | If checked, only active products are indexed |
| MaxProductsToIndex | Integer – default is 2147483647 | The maximum number of products to index |
| SkipGrouping | Boolean – defaults to unchecked | If checked, the fields "GroupIDs", "ShopIDs", "GroupNames","GroupNumbers", "GroupDescriptions", "PrimaryGroupSort", "ParentGroupIDs", and "ParentGroupNames" are skipped |
| SkipGroupSorting | Boolean – defaults to unchecked | If checked, group sorting fields are not indexed – this may improve performance. |
| SkipRelatedProducts | Boolean – defaults to unchecked | If checked, related products are not indexed |
| SkipExtenders | Boolean – defaults to unchecked | If checked, no custom Extenders can extend (update, remove, add) the fields in the index |
| SkipAllExtendedFields | Boolean – defaults to unchecked | If checked, the fields "CampaignStartTime", "CampaignEndTime", "CampaignShowProductsAfterExpiration", "IsVariant", "ManufacturerName", "AssortmentIDs", and "StockLocationProductAvailable" |
| SkipCategoryFields | Boolean – defaults to unchecked | If checked, all product category fields are skipped |
| DoNotStoreDefaultFields | Boolean – defaults to unchecked | If checked, schema extender fields are not set to stored by default |
| DoNotAnalyzeDefaultFields | Boolean – defaults to unchecked | If checked, schema extender fields not set to analyzed by default |
| HoursToUpdate | An integer – set to 24 by default | If combined with the builder action Update, only products updated within the hours specified here are rebuilt |
| EmptyStringReplacement | String – default is an empty string | NULL values are not indexed by Lucene, so to be able to locate an empty field you need to index it with a dummy value – this dummy value can be specified here. |
| HandleInheritedCategoryValues | Boolean – defaults to unchecked | If checked, inherited product category values are indexed. This is very slow, so please don't set this to true unless you really need to. |
| SkipImages | Boolean – defaults to unchecked | If checked, image paths are not indexed |
| DoNotFailOnMismatchingProductCount | Boolean – defaults to unchecked | If checked, building an index will not fail even if the product count before indexing and after indexing is different. This may be desirable if an import job happens while the index is being built. |
| ShopsToIndex | Comma-separated list of shop IDs | This setting makes it possible to create indexes which only contain products from the specified shops/warehouses. |
| SkipPrices | Boolean – defaults to unchecked | If checked, product prices are not indexed |
| SkipDetailImages | Boolean – defaults to unchecked | If checked, Details images are not indexed |
| SkipImagePatternImages | Boolean – defaults to unchecked | If checked, image pattern images are not indexed |
| SkipOrderhistory | Boolean – defaults to unchecked | If checked, details about the order history of products are not indexed |
| SkipCampaign | Boolean – defaults to unchecked | If checked, campaign information is not indexed |
| SkipAssortments | Boolean – defaults to unchecked | If checked, assortments are not indexed |
| SkipDataModelFields | Boolean – defaults to unchecked | If checked, Data Model Fields are not indexed |
| SkipProductTranslations | Boolean – defaults to unchecked | If checked, three generated fields related to product translations are not indexed |
Now you’ve specified how you want the index to be built – next, you should specify what you want to include in the index.
Adding Fields
Lucene indexes are composed of small documents, with each document divided into named fields which contain either content which can be searched or data which can be retrieved. Each field added to the index can therefore be stored, indexed, and analysed depending on what you want to use it for:
- Stored fields have their values stored in the index.
- Indexed fields can be searched, the value is stored as a single value.
- Analysed fields have their values run through an analyser and split into tokens (words).
Generally speaking:
- A field you want to display in frontend must be indexed
- A field where you want to search for part of the value in free-text search must be analysed
- A field which are to be published using the Query publisher should be Stored
- A field you want to display as facets should be indexed, but not analysed
To make things (a lot) easier for you, we’ve created a default set of fields typically used in product indexes – this default field set is defined in something called the ProductIndexSchemaExtender.
To add the fields from the schema extender to the index:
- Click the Fields tab
- Under the Fields section, click Manage
- Click New index field and select Schema extender
- Provide a name
- Provide a system name
- In the Field section, select ProductIndexSchemaExtender
- In the Settings section, select the fields you want to Exclude - all available fields are included in the index schema if none of the options are selected
- Click Save and close
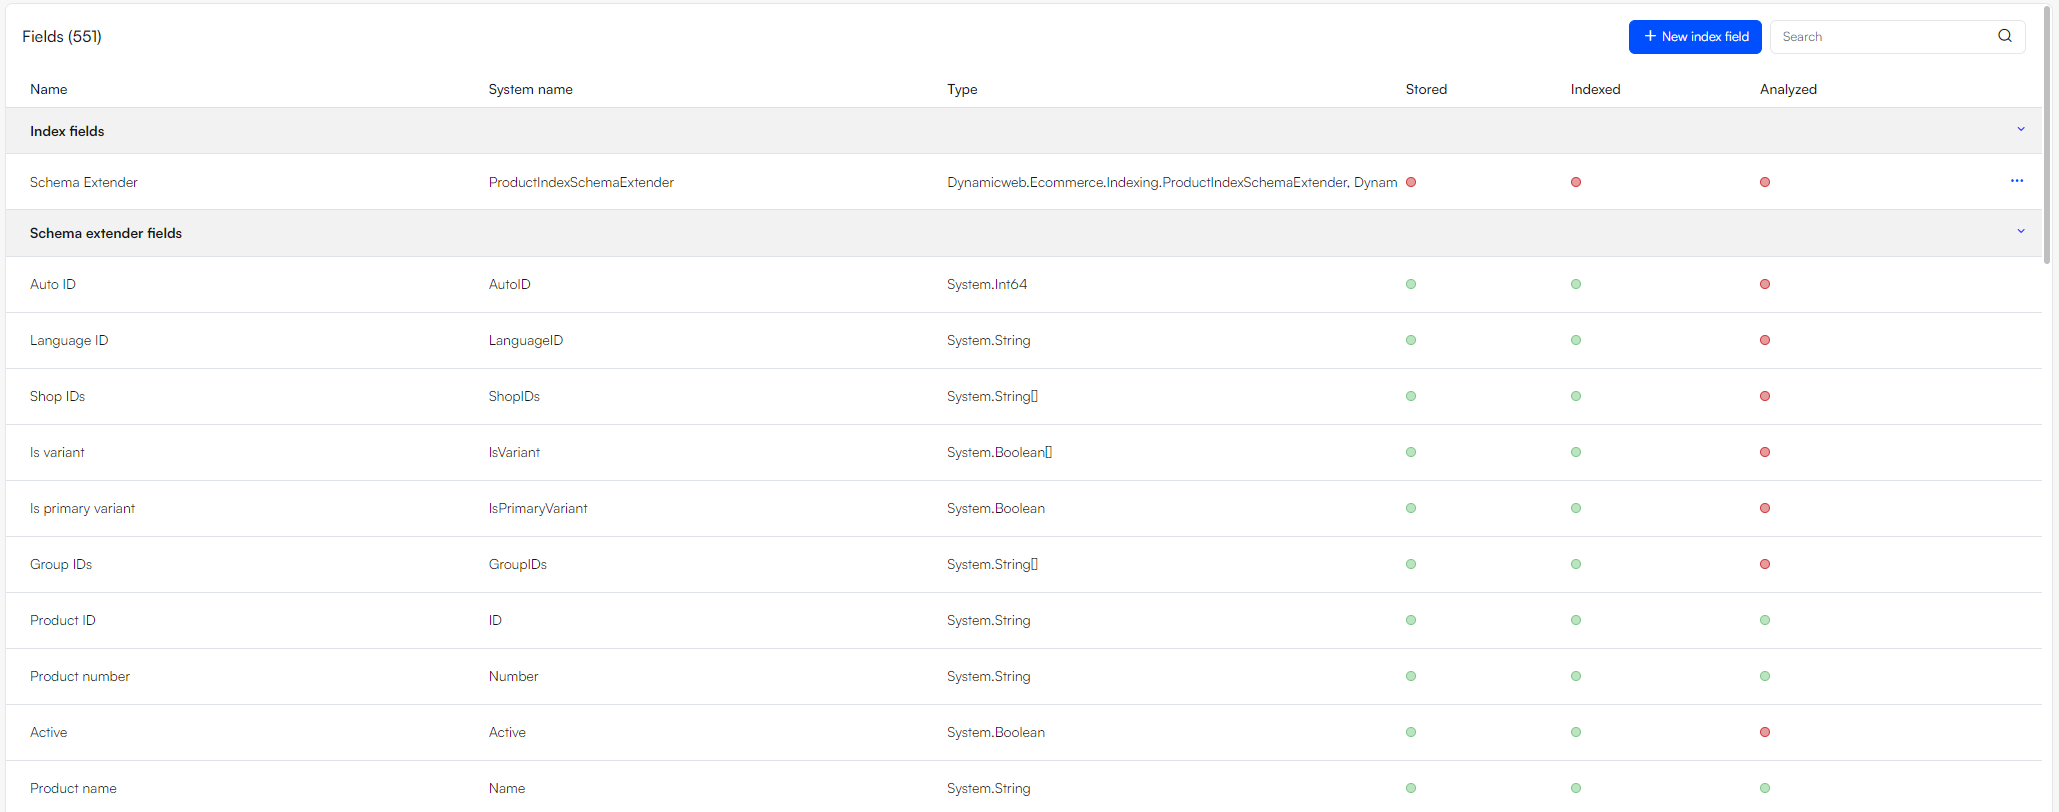
This adds a whole bunch of fields to the index.
 Most of these fields are standard product fields and various types of custom fields such as product category fields, but there’s also a whole bunch of fields which are generated whenever the index is rebuilt e.g. the BoughtWithProducts field, the GroupIDs field, and many others. For each field you can see the Name, System Name, Source and Type – and whether the field is stored, indexed and analysed.
Many of the String-type fields created by the schema extender are analysed by default. This is great if you want to include them in e.g. a free-text query – but it may be a problem if you want to e.g. create facets based on the field. Fortunately, you can also add fields to the index manually – see the Custom Fields article.
Building the Index
Once you’ve added instances, a build configuration, and a set of fields to the index, you should build it – to do so, click the Build button beneath each instance you want to build.
 Of course, you don’t want to do this manually every time – you want to do a combination of the following:
- Rebuild the index every time an integration job has been executed
- Rebuild the index every time a product is saved in Products
- Rebuild the index on a schedule – see the article on tasks
Optimizing the Index
Speed is king, and once a project moves into the staging and production phases you may well find that you want to go faster. If that’s the case, you can tweak some of the build configuration settings and improve performance.
Enter your Build by:
- In the Indexes section, select Manage
- Select the index
- In the Build section, click Manage
- Enter your build
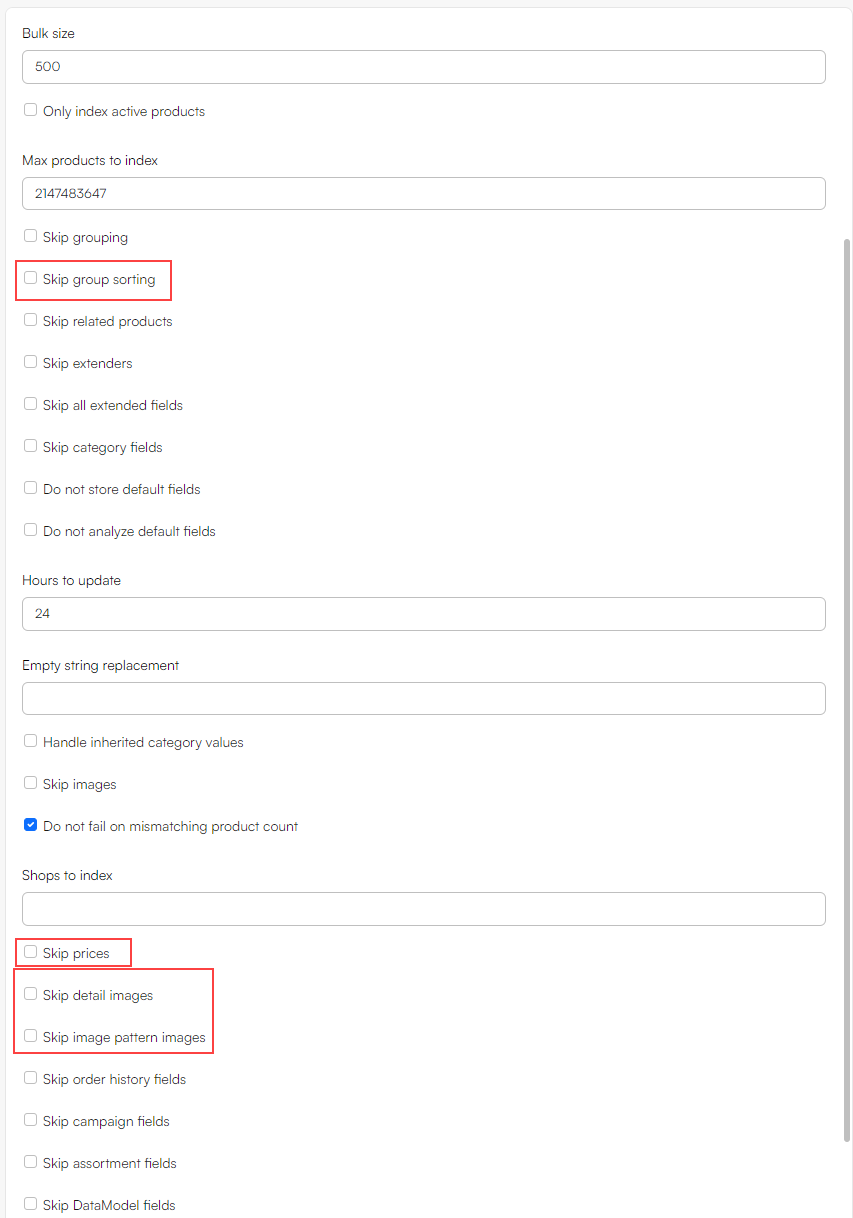
Here are some of the settings which will give you the most bang for the buck:
- Skip prices - By default, we index prices – but only base prices, so unless you’re going to do some fairly complicated logic in frontend to account for e.g. discounts you may want to check this box
- Skip details images or Skip image pattern images - Solutions typically either use images from image patterns or the so-called detail images. Skip the one which isn't in use
- Skip group sorting - if the solution does not use group sorting fields in frontend, you can disable this to improve performance
In general, it’s a good idea to review the various build configuration options and see what data you want to use.
