Forms for Editors is the tool you use to build forms and collect data from your website visitors in a structured way — contact forms, sign-ups, surveys, support requests, file uploads, and more.

Working with forms is a two-step process:
- Build the form in the backend (this article) — you define the fields, validation, and how the data is stored.
- Publish the form to a page using the Forms for Editors paragraph app — that's where you decide how it looks in frontend, what happens after submit, and which emails are sent.
This article covers step 1: creating and managing forms in the administration interface.
Tip
Build the form first, then add it to a page. The paragraph app simply references a form you've already created here, so nothing will show up in frontend until both steps are done.
A typical workflow
If you're setting up your first form, the path usually looks like this:
- Create a form and give it a name (e.g. Contact us).
- Add the fields you need — name, email, message, a consent checkbox, etc.
- Mark which field is the email field (so receipts can be sent to the visitor).
- Decide which fields are required.
- Publish the form with the paragraph app and configure the after-submit behavior and emails there.
- Test it, then watch the submissions come in under Form data.
The rest of this article explains each of these steps in detail.
Forms
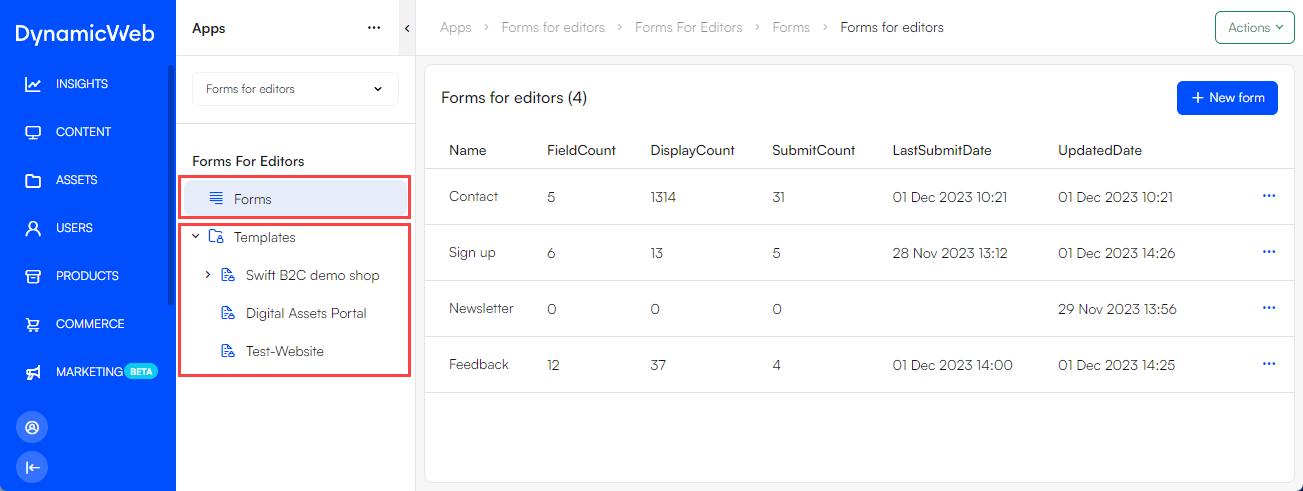
The Forms node is where you create forms and work with existing forms.
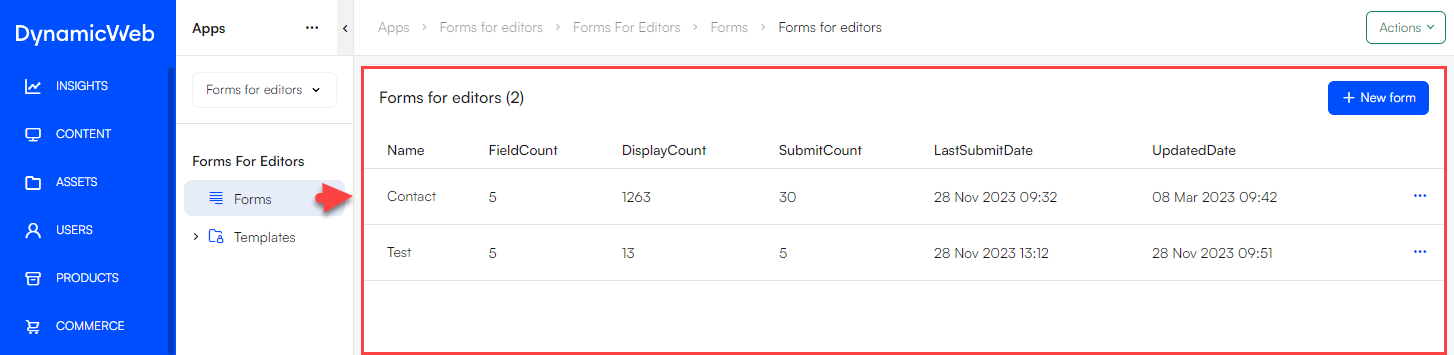
When you click this node you will see a list of all existing forms with key information:
- Name
- Form fields count
- Number of displays and submits
- Last submit
- Last edit
From the action menu you can use the manage columns option to customize what you want to see in the list - and the save view and select view options to save and switch between saved list view configurations.
From this view you can do the following:
- Create a new form
- Edit existing forms
- Inspect form data
- Copy a form
- Delete a form
All of the above functionality, except creating a new form, is accessed via the context menu of an existing form.
Tip
Copy is your friend. If you need several similar forms — e.g. a contact form per market or per landing page — build one good form, then copy it and tweak the copy instead of starting over.
Creating a form
If you want to create a new form:
- Click New Form
- Fill in the general form settings:
- Provide a Name — this is for your own reference in the backend; it is not shown to visitors
- Select an Email field — the field whose value is treated as the visitor's email address. This is what the paragraph app uses to send receipt emails and to drive the Get from Email field options. You can leave it unset now and come back once you've added an email field.
- Select a Default template — the frontend template used to render the form if the paragraph app doesn't specify one. Leave it on the automatic/system template unless you have a reason to override it.
- Specify the Max submits per user allowed — a global limit for the form itself (the paragraph app can set a stricter, per-page limit on top of this). Leave blank or 0 for no limit.
- Add a CSS class which will be added to all input fields — handy for styling
- Add a hardcoded input field size in pixels — applied to fields that don't set their own size
- Set an Icon for required field
- Save
Note
The Email field, Default template and Max submits are the settings most worth getting right up front:
- No email field → no receipt emails can be sent to the visitor.
- Max submits is enforced both when the form is shown and when it's posted, so it's a simple way to cap entries on, say, a competition or limited sign-up.
The form is now created but does not have any form fields. Click it in the list to open the form workspace:
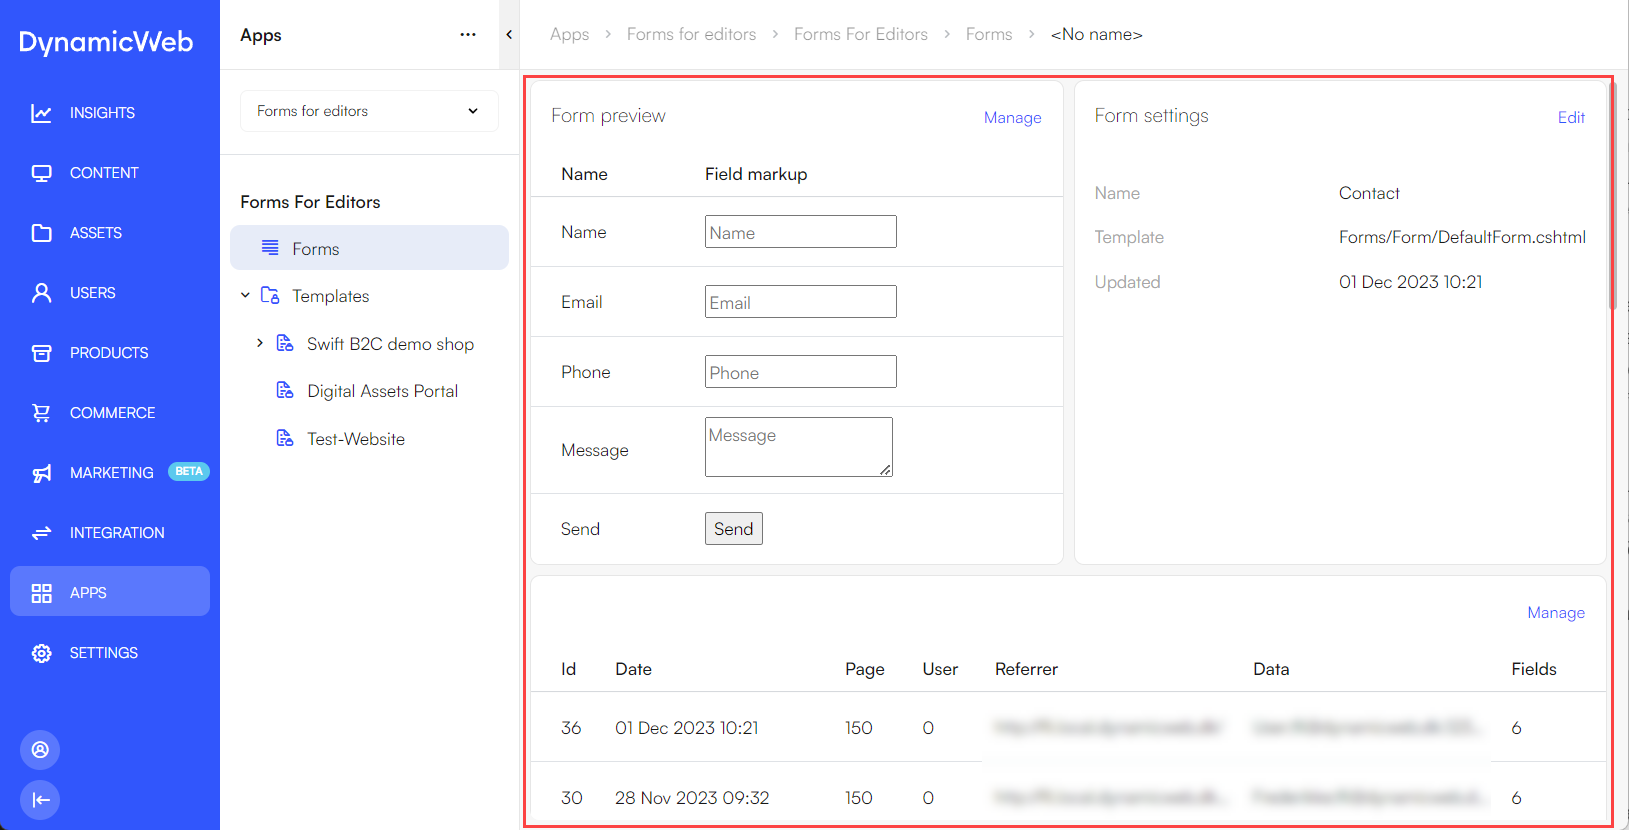
The form workspace is made up of three widgets:
- Form preview - manage form fields and see a preview of the form
- Form settings - edit the general settings for the form
- Form data - get an overview of the data and further inspect it
If the form does not have any form fields the Form preview and Form data widgets will display No results found.
Form fields
Fields are the heart of the form — each one is a question you ask the visitor or a piece of data you want to capture.
To create or alter form fields first click Manage on the Form preview-widget - then:
- Click the New form field button
- Choose a field type (see the field types table below)
- Configure the field in the following tabs:

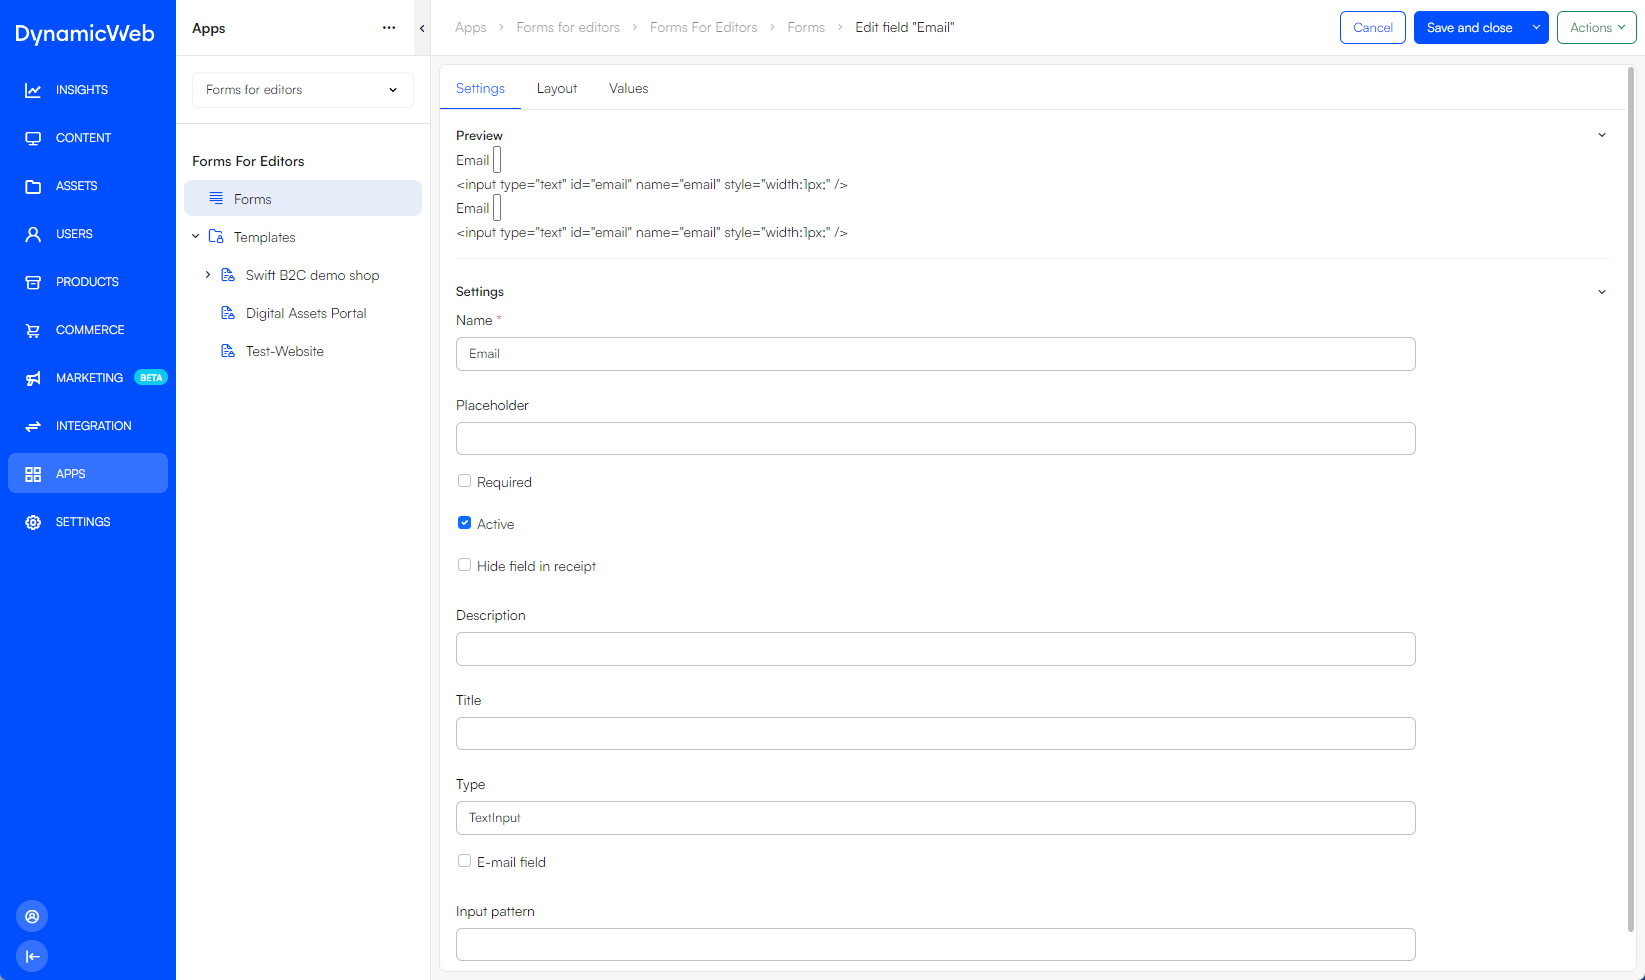
On the Settings-tab you control the basics of the field:
- See a preview of the field, both rendered and as the html element
- Set the Name — this is the label shown to the visitor (and the basis for the field's system name)
- Set a Placeholder — greyed-out hint text shown inside the field
- Toggle the field's behavior:
- Required — the visitor must fill it in before they can submit
- Active — inactive fields are kept on the form but not rendered or saved; useful for temporarily disabling a question without deleting it
- Hide field in receipt — the field is collected, but left out of the receipt email sent to the visitor (e.g. internal-only data). It is still included in the notification email to you.
- Add a Description and a Title (the title becomes the field's HTML
title/tooltip) - Change the field type. If you pick a text-style type you can also tick E-mail field to mark this field as the form's email field — this is the same setting as Email field in the form settings, and it's what the Get from Email field option in the paragraph app refers to.
- Specify a value for the Input pattern — a regular expression the browser validates the input against (supported on text, password, search, email, url, tel and date fields)
Field types
When you create a field you pick a type. They fall into four groups:
| Name | Group | Description | Used for |
|---|---|---|---|
| Text | Field | A text field for entering a single line of text | Name, address, email, subject, etc. |
| Text area | Field | A multi-line text field | A message, a comment, a multi-line address |
| Checkbox | Field | A single checkbox | Accepting terms, opting in, consent. To have it unchecked by default, set the default value to unchecked. A checkbox can also be tied to a consent activity. |
| Hidden | Field | A field that isn't shown | Passing temporary/session data or storing already-known information |
| Password | Field | A masked input field | Capturing a password, e.g. when creating a user |
| File | Field | A file selector | Letting visitors upload files such as a CV or a document. Multiple files are allowed; see the paragraph app upload settings for where files are stored and which file types are allowed. |
| Select | List field | A dropdown of options | Picking one value from many |
| Radio button | List field | A set of options, pick one | Picking exactly one visible option |
| Checkbox list | List field | A set of checkboxes, pick several | Picking one or more options |
| Send | Button | A submit button | Submitting the form |
| Reset | Button | A reset button | Clearing the form |
| Body text | Element | Static text on the form | Instructions, intro text, section headings |
| Image | Element | An image on the form | Decoration or visual guidance |
| Page shift | Element | A page break | Splitting long forms into steps (must be supported by your form template) |
Note
List fields (Select, Radio button, Checkbox list) are the only field types that have options. After creating one, add its choices in the options area on the field editor.
Consent checkboxes
A checkbox field can be connected to a data-processing activity in the system. When you do this, submitting the form with that checkbox ticked records the visitor's consent for that activity automatically — the mechanism behind GDPR-style opt-ins such as "I accept the privacy policy" or "Sign me up for the newsletter".
The consent is recorded against the visitor's user account, their email, or their anonymous visitor id, depending on what's available at submit time. See Consent & data-processing activities for the full behavior.
System names and templates
Every field has a system name — a technical identifier derived from the field name (and made unique automatically). You normally don't need to think about it, but it matters in two cases:
- When you build a custom frontend template for the form, you reference fields by their system name.
- When you design a notification or receipt email from a page, you insert submitted values using
{{Field.<SystemName>.Value}}— see Using a page as the email.
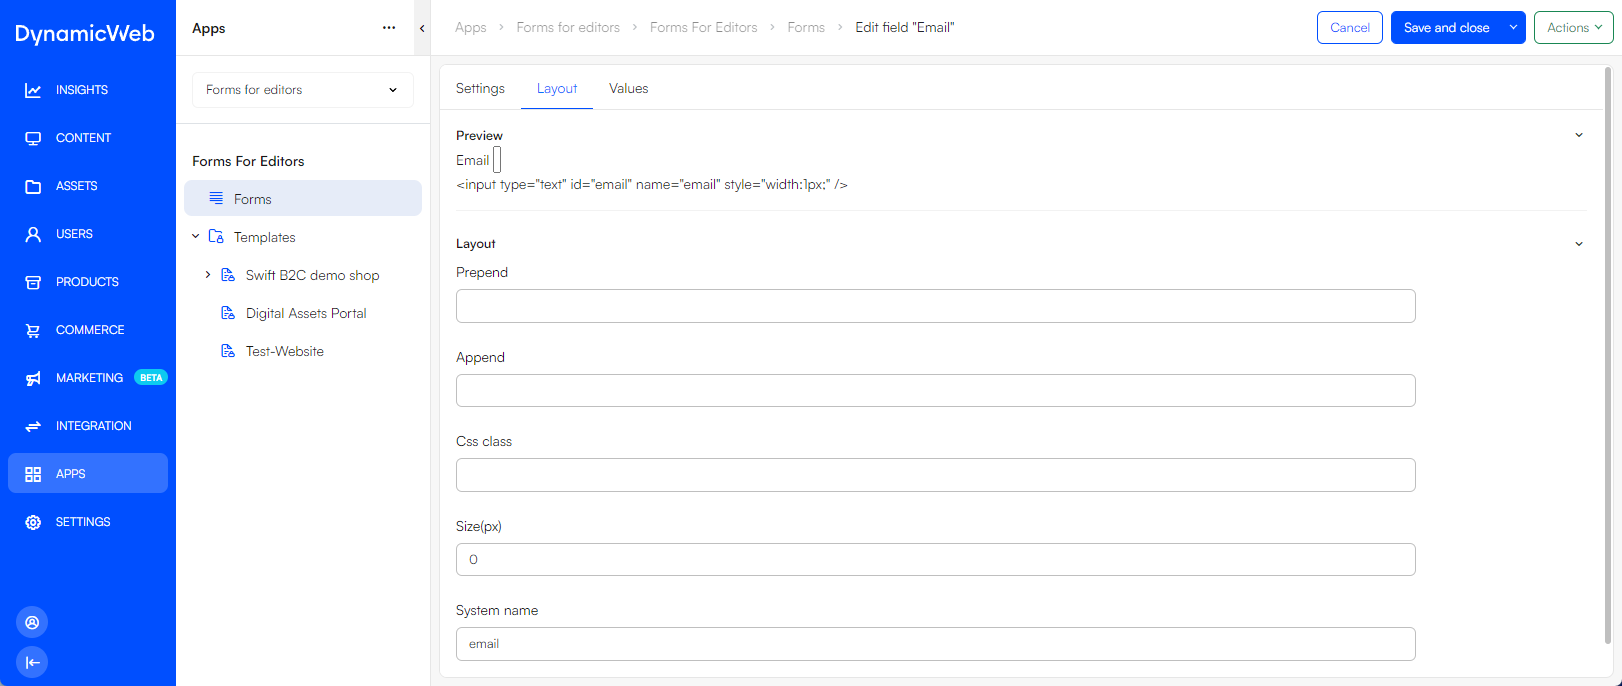
If you intend to use either, give important fields a clean, stable system name on the Layout tab so your templates don't break if you later rename the visible label.
Form data
When a form has been filled out and submitted the form data is stored in Dynamicweb. This is where you review what visitors have sent.
There are two ways to access form data:
- Right-click a form in the Form area and select Form data
- Open the form and click Manage in the Form data-widget workspace
Either way will take you to the Submits overview:
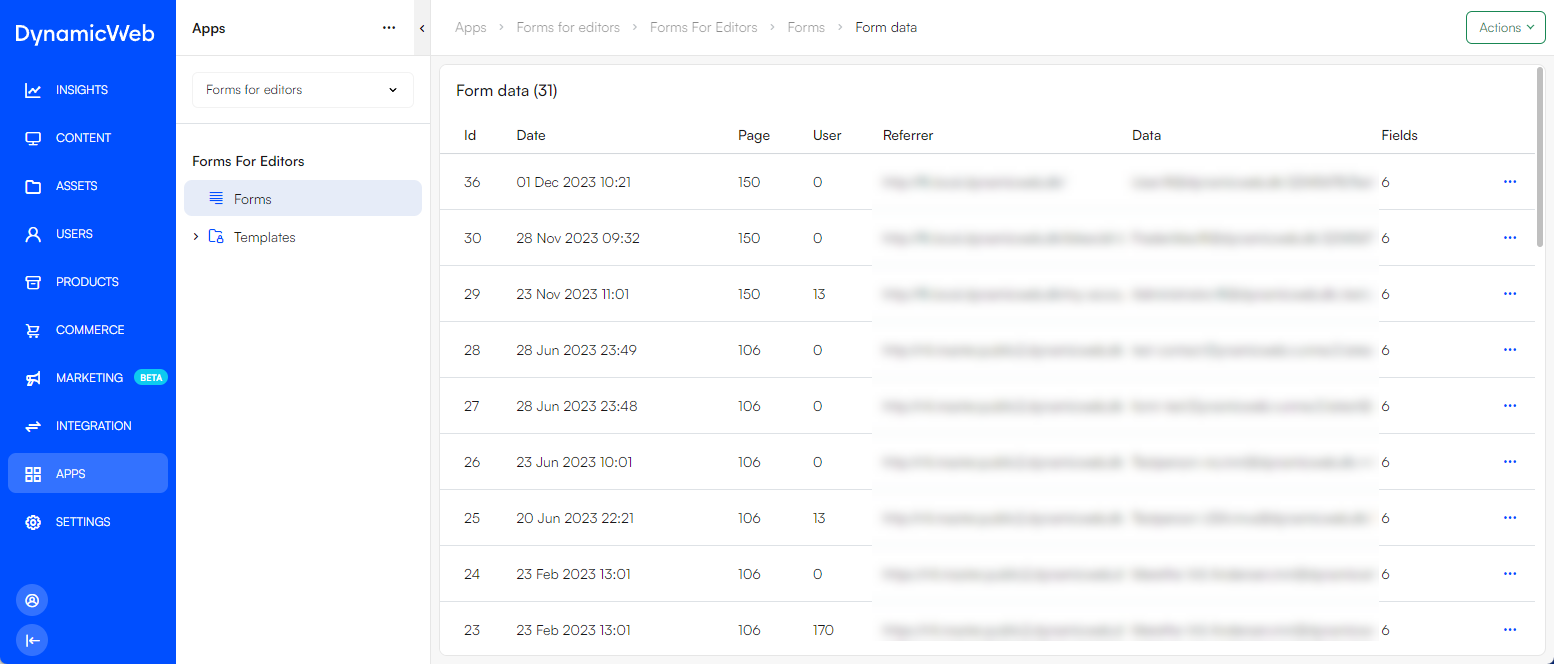
From the Submits overview you can see all submits for the current form, including:
- The submit ID
- The date and time of submission
- The page id of the page from which the form was submitted
- The user number of the submitter (if the user is registered)
- The referrer
- A summary of the form data (click the data column to see the full data for each submit)
- The number of fields filled out in the form
From the context menu, you can export the submitted data as either a .csv or a .xls file, or delete any checked submits if necessary.
Tip
Exporting to .csv or .xls is the quickest way to hand a batch of submissions to a colleague or import them into another system. Deleting submits is permanent — export first if you might need the data later.
Templates
The Templates area is where you can override the system template and select a specific template for the forms on your different websites:
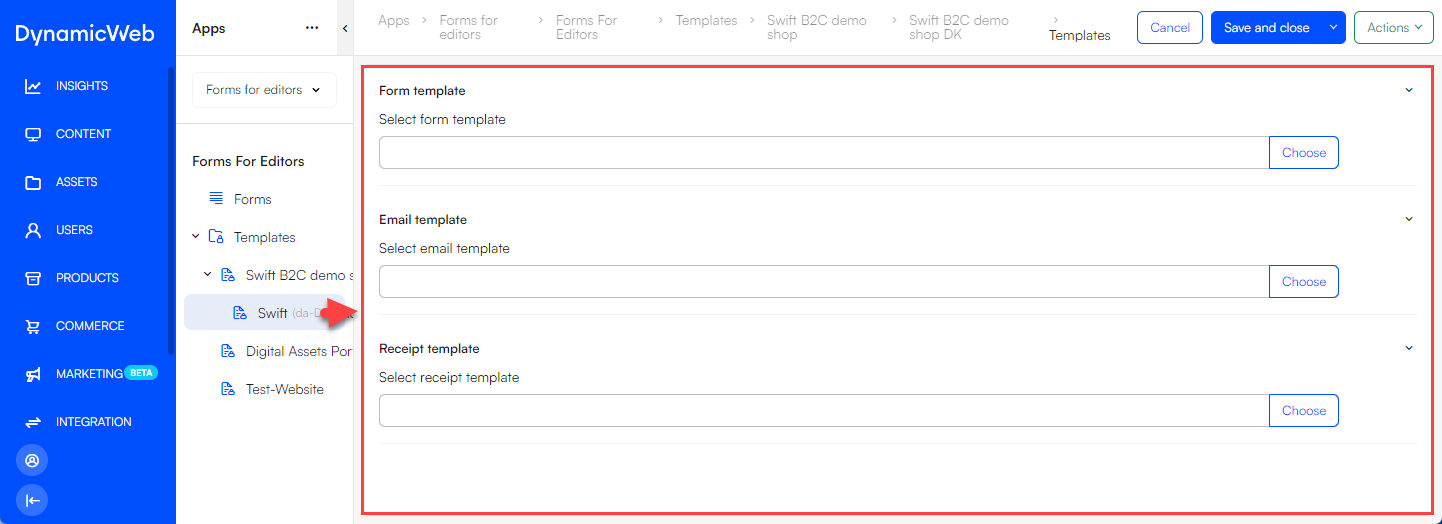
Your websites are nodes under the Templates folder, and when you select one you can configure a:
- Form template — how the form itself is rendered
- Email template — the notification email sent to you
- Receipt template — the receipt email sent to the visitor
The Forms for Editors app has an automatic option which uses a built-in system template to render the form, receipt or email content in frontend, if no specific template is selected. If you want a custom look across a whole website, set it here once rather than per paragraph.
As with other hierarchies, the more specific option "wins":
- If the form has a template specified in the form settings, it is used
- If not, the template specified here in the Templates area for the website is used
- If no such template is selected, the original system template is used
Note
Individual paragraphs can still override all of this in the paragraph app settings, which is the most specific level of all.
Next steps
Once your form is built, head to the page where you want it and add the Forms for Editors paragraph app to a paragraph. There you'll choose this form and configure what happens on submit, the notification and receipt emails, max-submit handling, file uploads, and optional user creation. For the full settings reference, see Forms for Editors for implementers.