This is a step by step guide on how you connect Business Central to DynamicWeb PIM.
It requires:
- You have installed the DynamicWeb PIM Connector from Microsoft Appsource
- A working DynamicWeb 10 solution, with the latest versions of 'PIM for Business Central connector' installed
This can be done trough the DynamicWeb appstore.
Start the configuration in Business Central
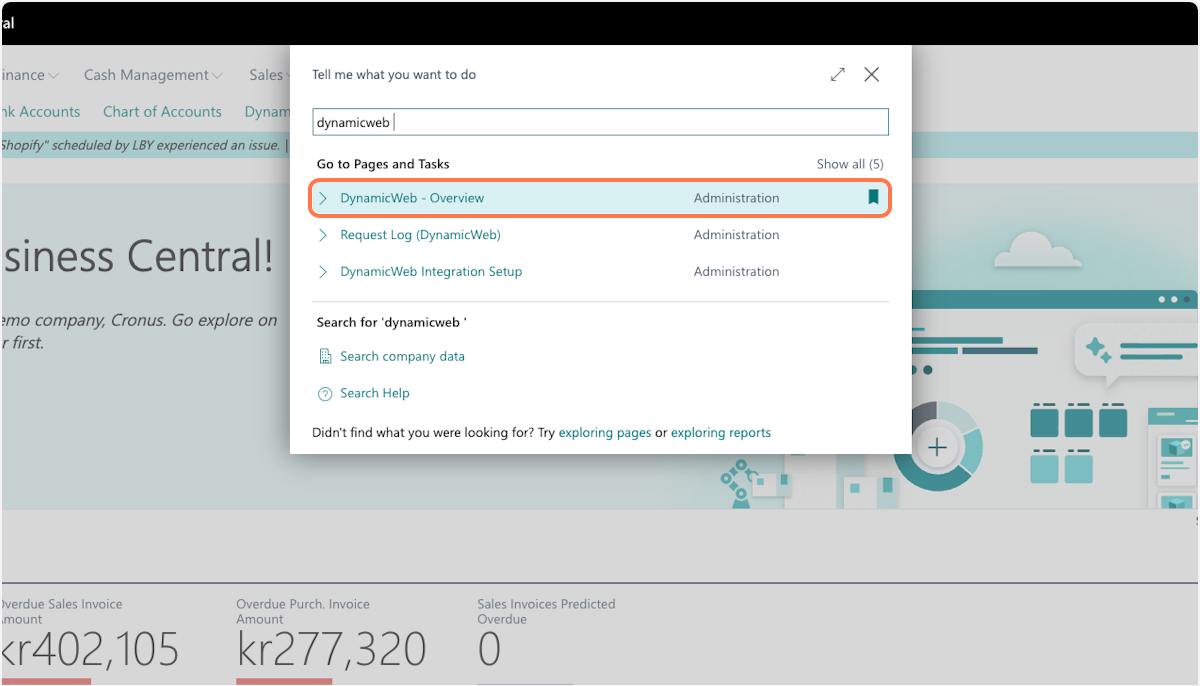
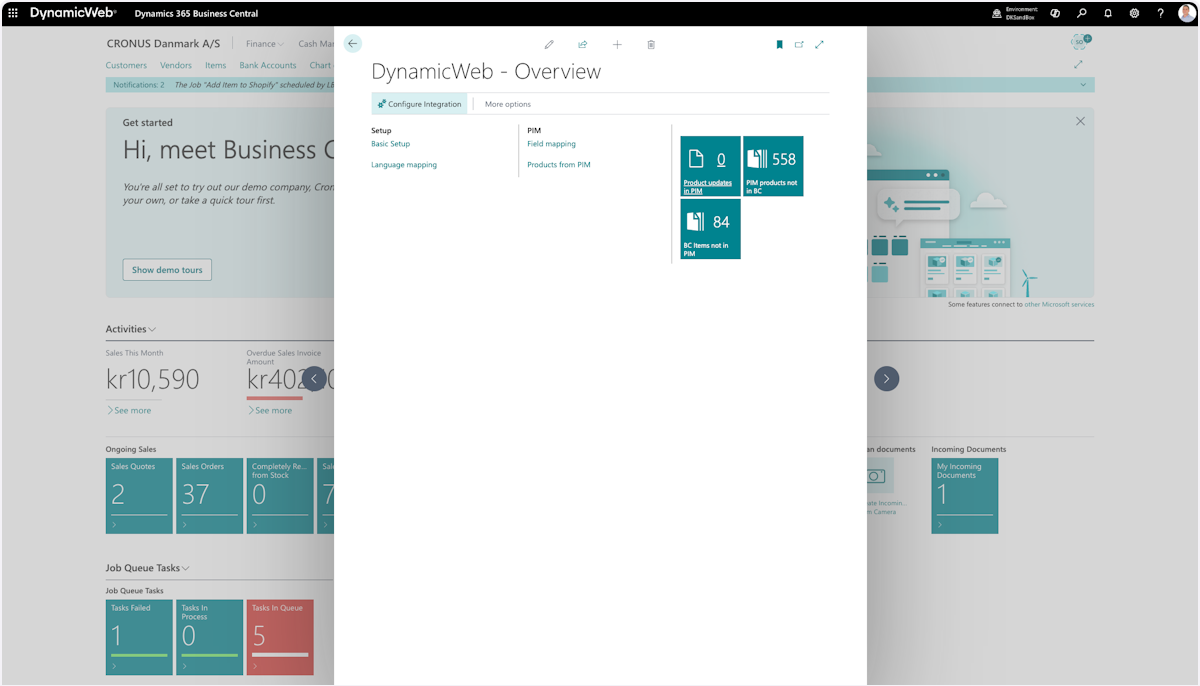
1: After installing, search for the DynamicWeb overview
2: Type "dynamicweb"

3: Click on DynamicWeb PIM - overview
4: Start the configuration
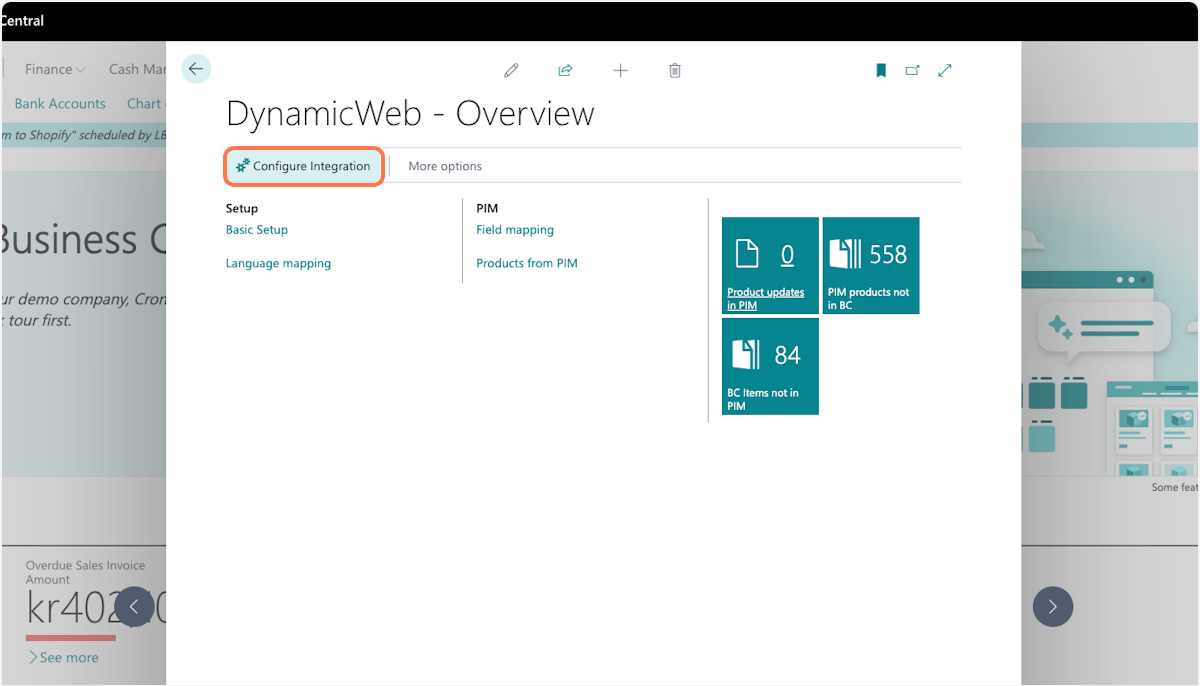 Bookmarking the page will make it easier to return to the overview page
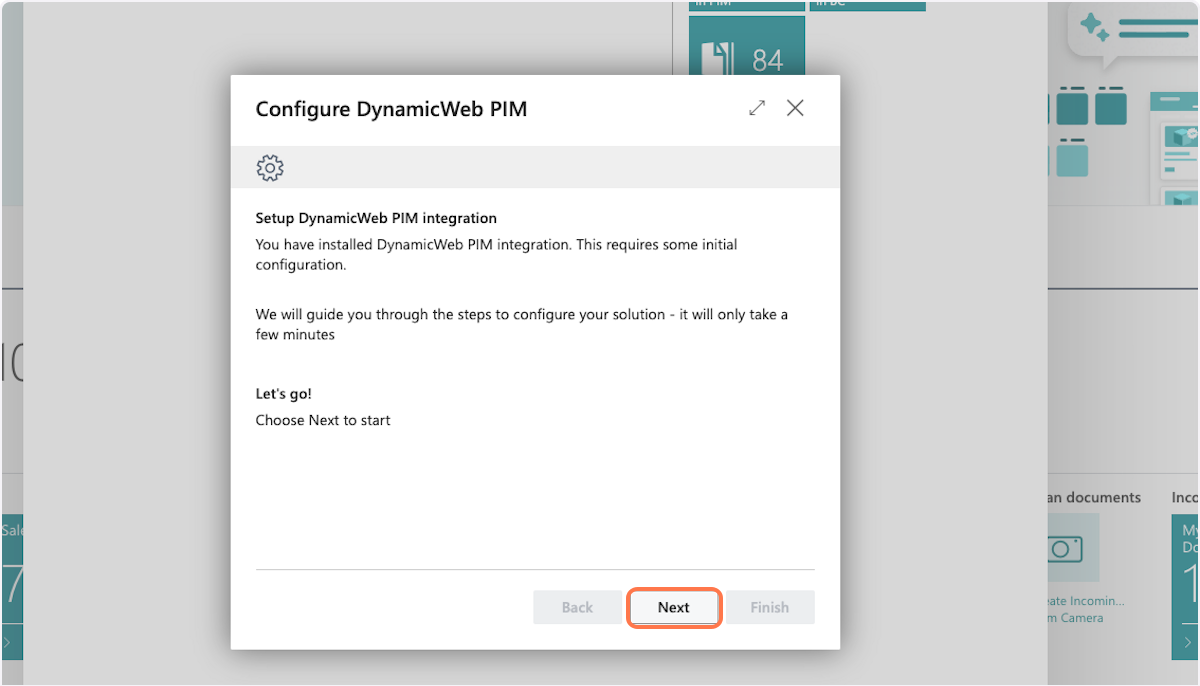
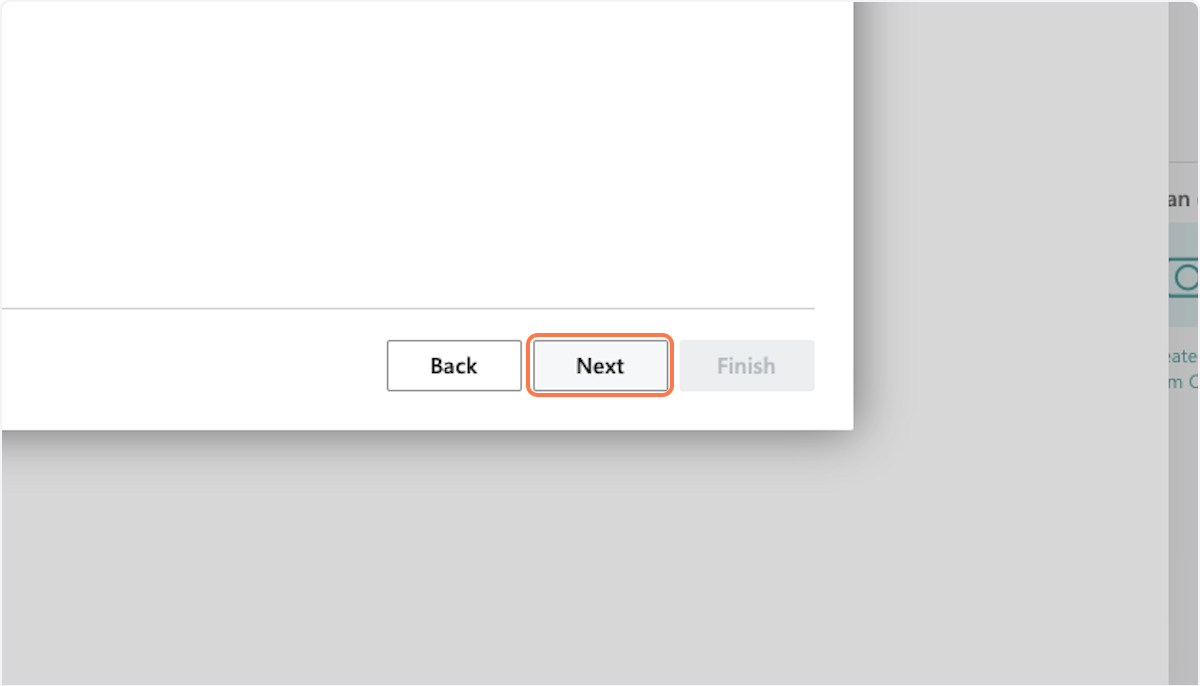
5: Click on next
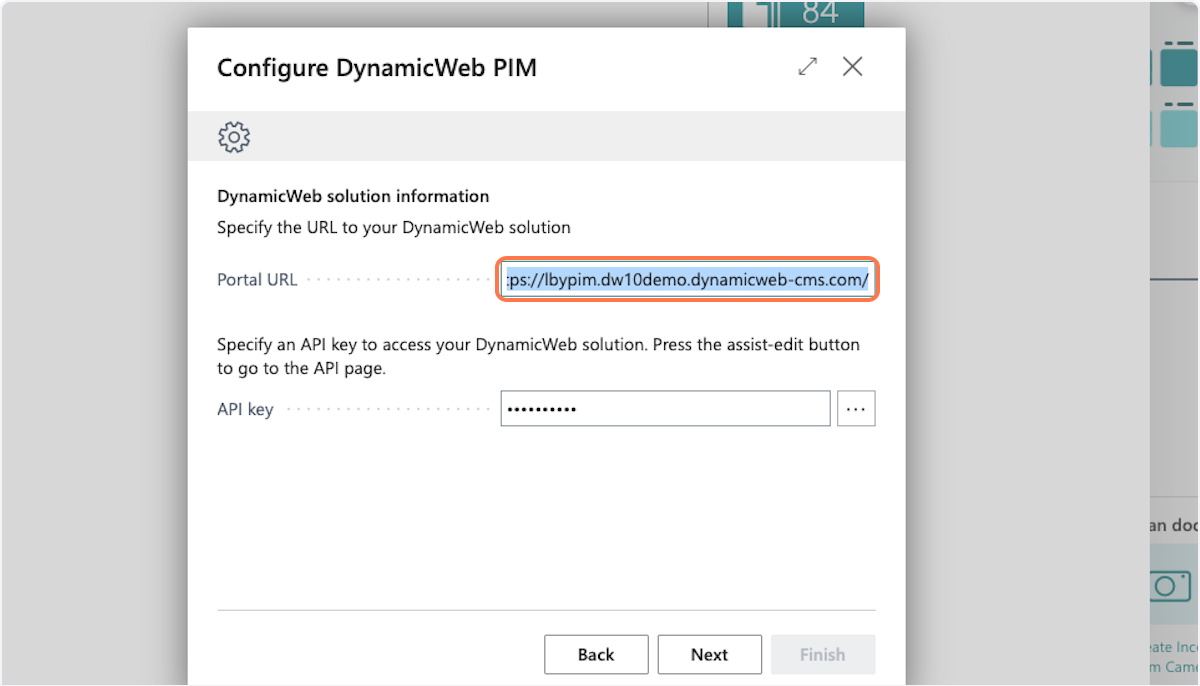
6: Insert the URL for the DynamicWeb PIM solution
 If you don't have a solution to connect to, contact your Partner Account Manager or DynamicWeb Care
7: Type in the API key generated in DynamicWeb PIM
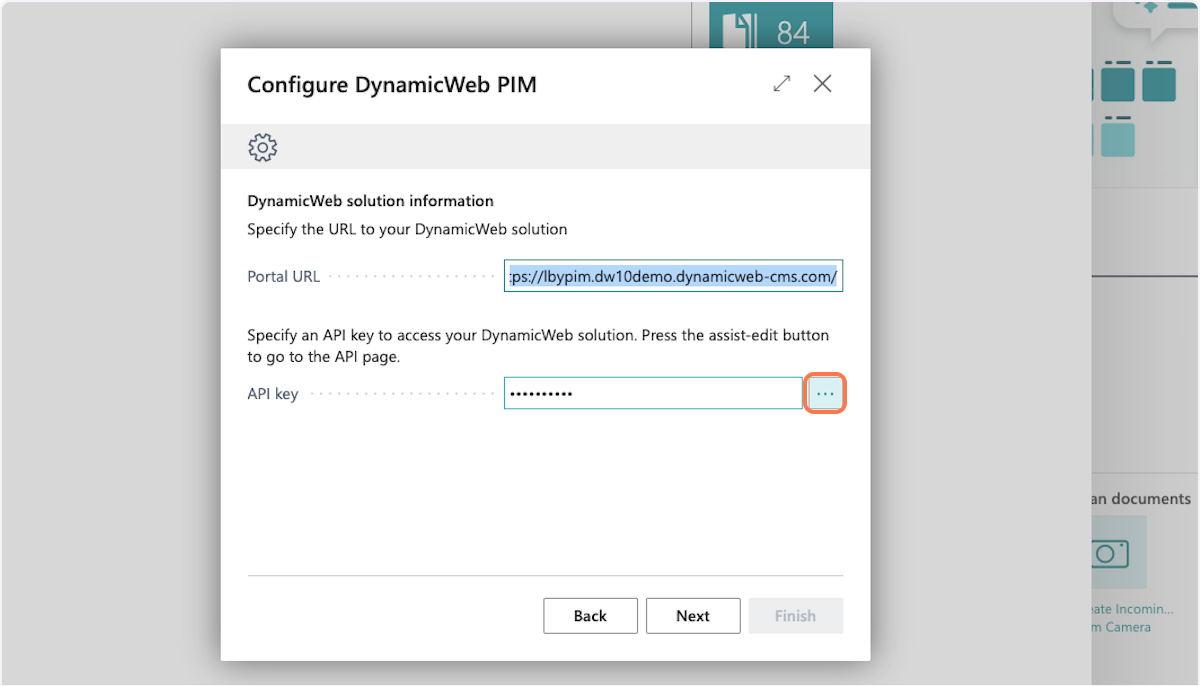
- If you don't have an API key, click the 3 dots. It will open DynamicWeb PIM for you to generate one, and move on to step 8.
- If you already have an API key move on to step 13
Generate the API key in DynamicWeb
8: Sign in to DynamicWeb PIM
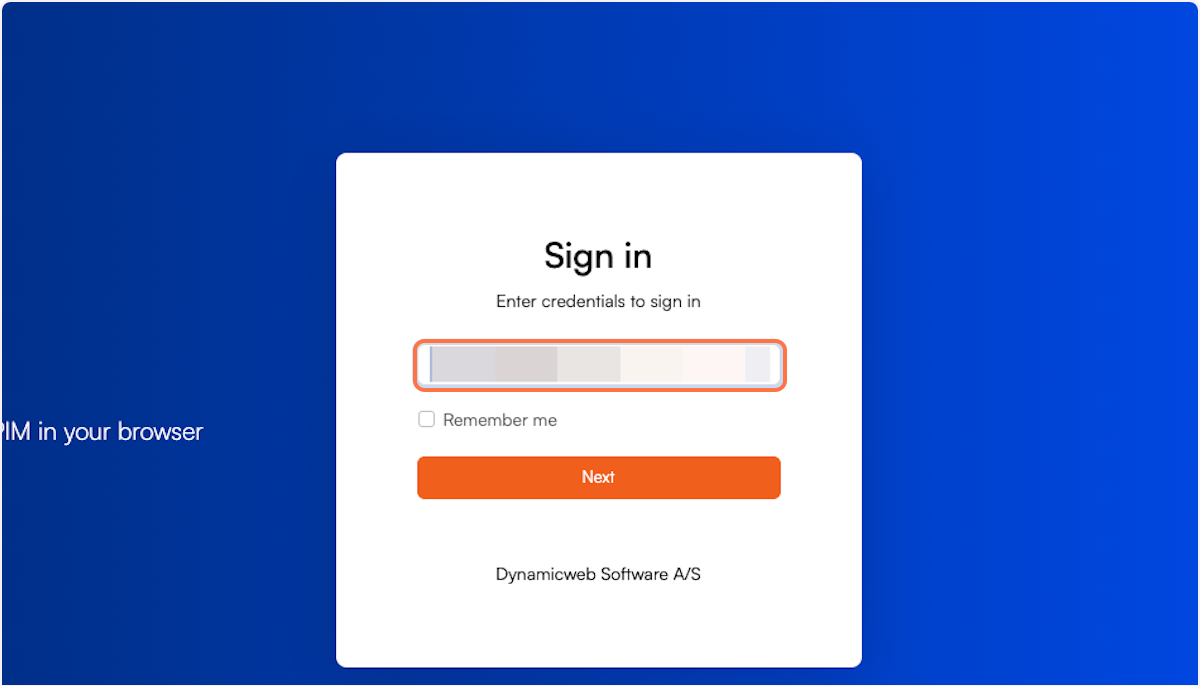 Clicking the 3 dots next to the API key input opens DynamicWeb PIM, you will be prompted to sign in. If you already are signed in it will just open the API key page in DynamicWeb PIM.
Note
Log in with a user with admin rights to make sure your API key gets the correct rights in DynamicWeb PIM.
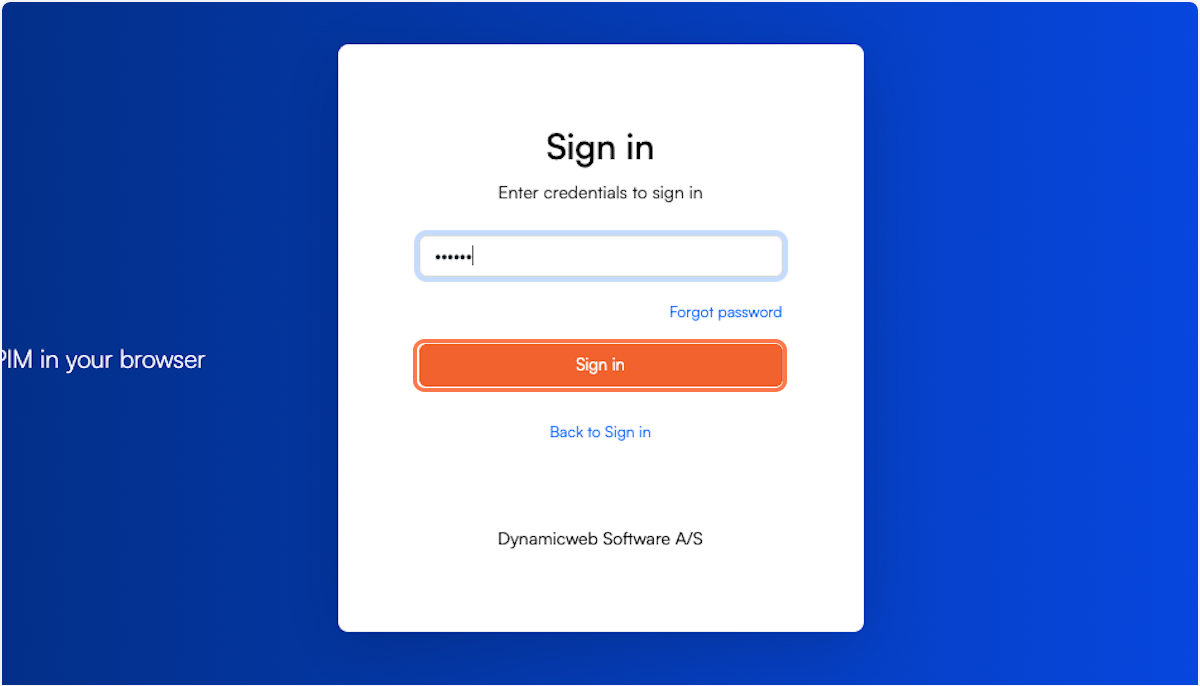
9: Enter password and sign in
10: Click on generate new API key
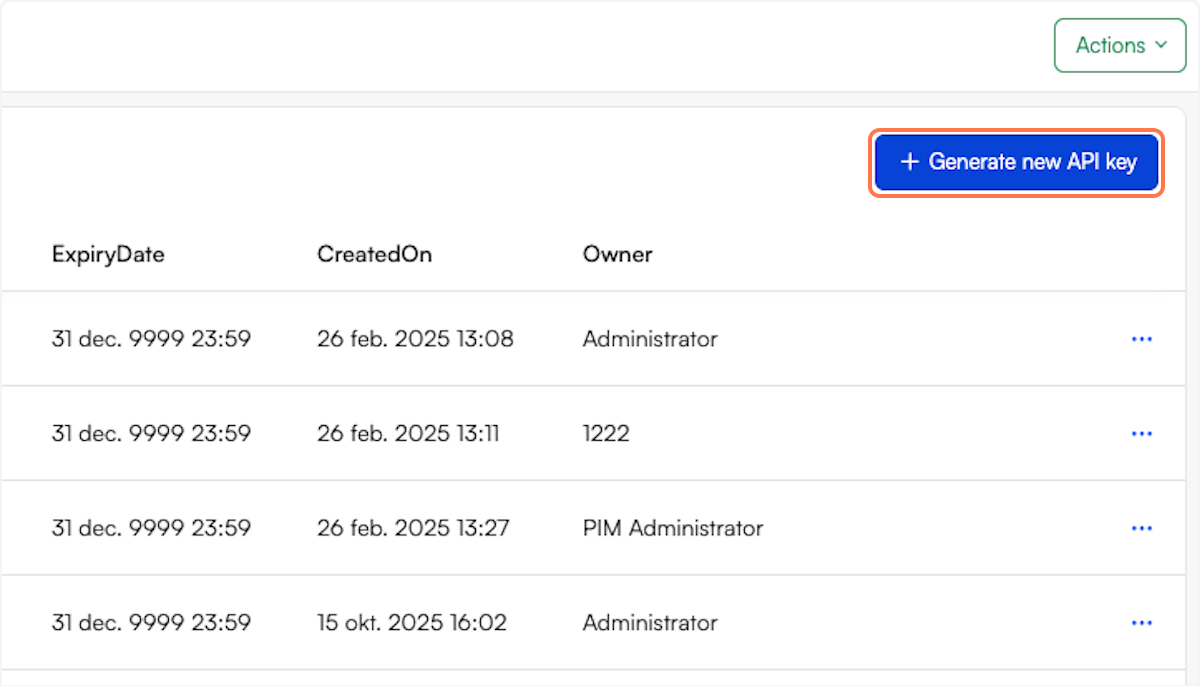
11: Enter info on token
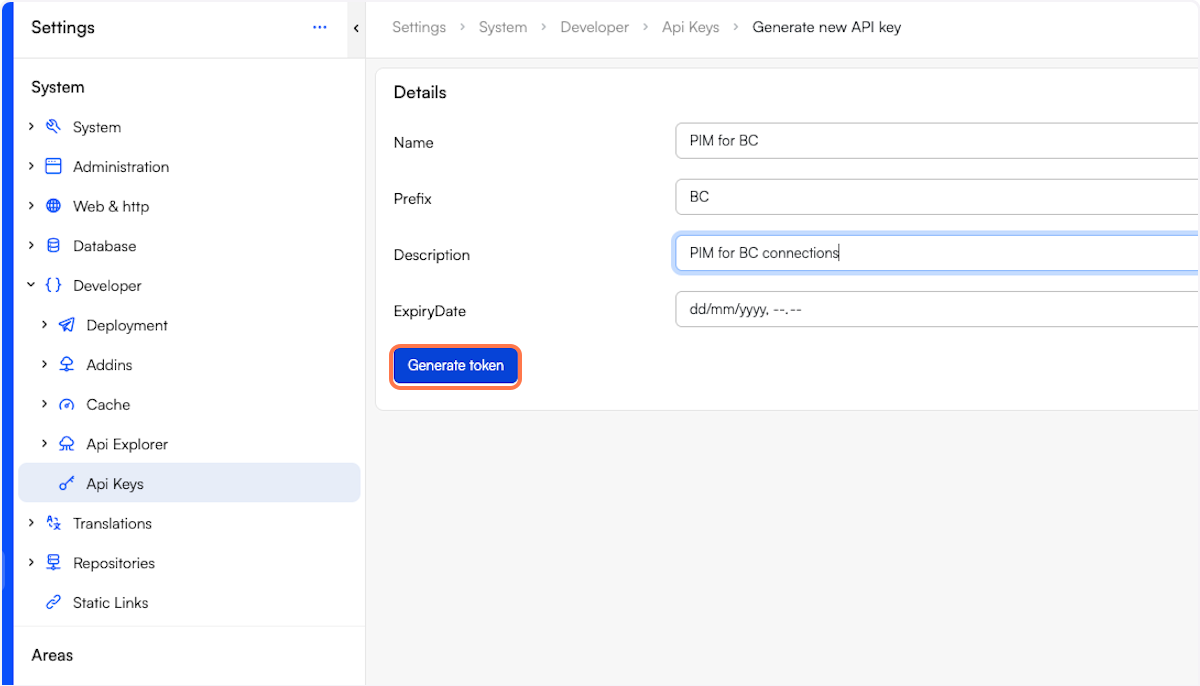 Add a name, prefix, description and if needed an expiry date.
12: Copy the API key
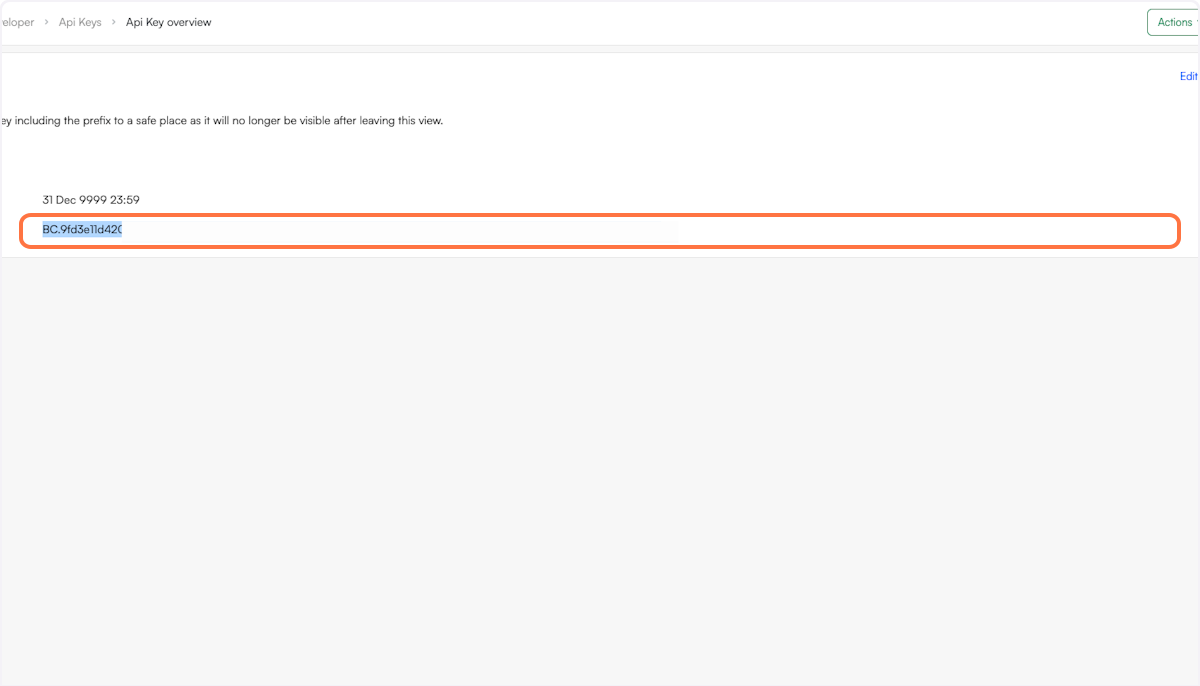 It's important to copy the API key at this point, as it is not possible to go back and get the same API key again.
Note
If you lose the API key, you need to generate a new one.
Finish the configuration in the Business Central
13: Paste API key
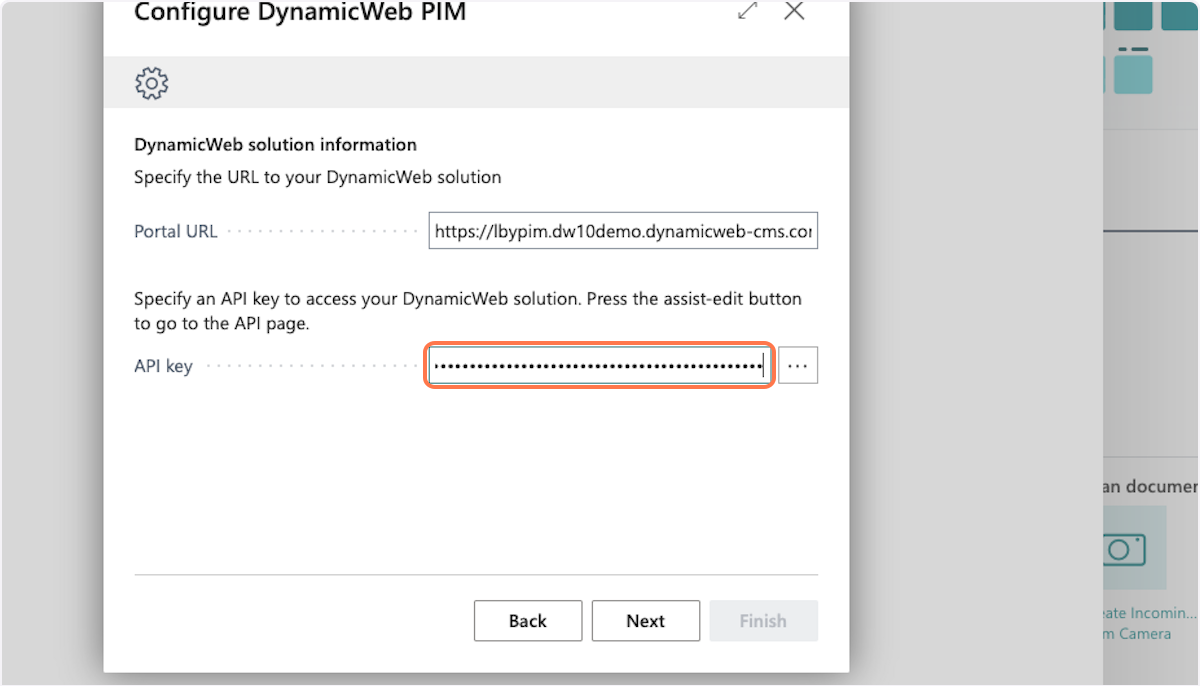 Paste the API key from DynamicWeb PIM into the API key input in the wizard in Business Central, and click Next.
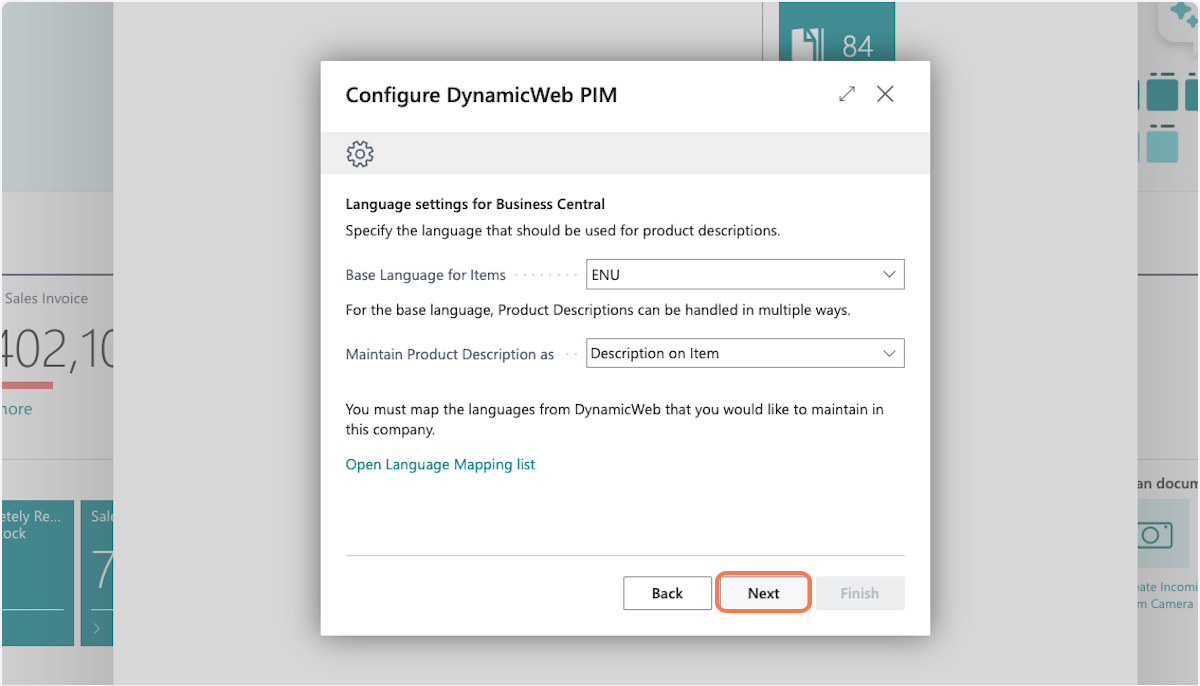
14: Set Business Central base language
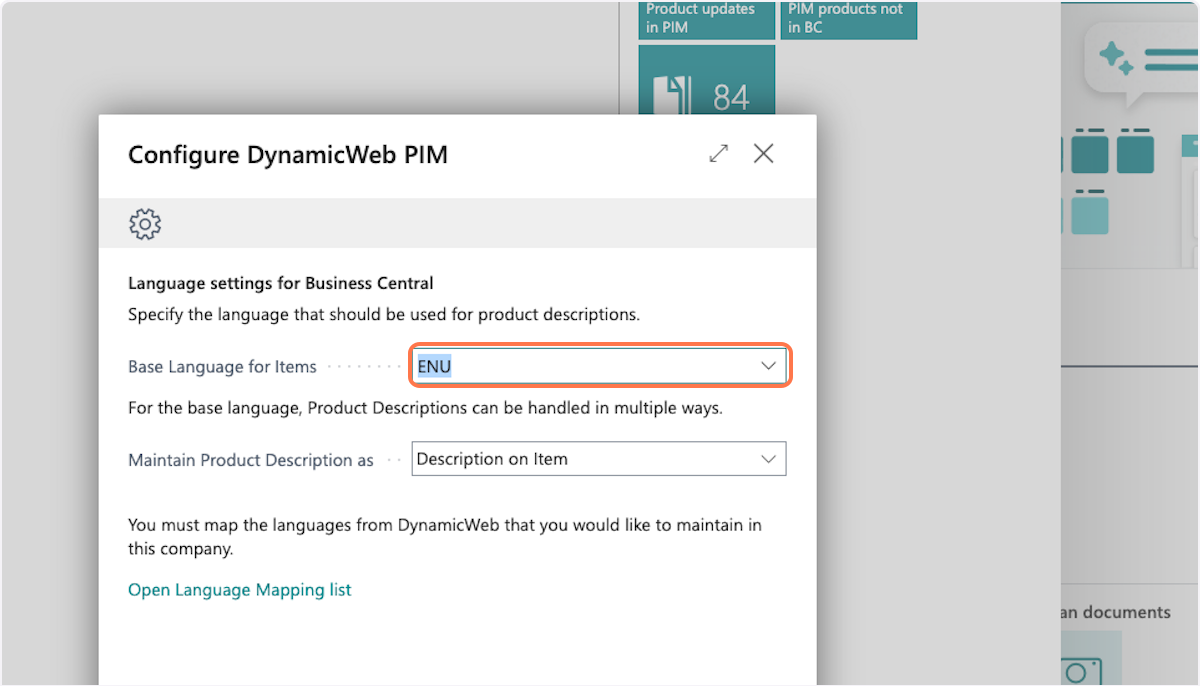 Choose the language that is your main language in Business Central.
15: Decide how to maintain item descriptions in Business Central
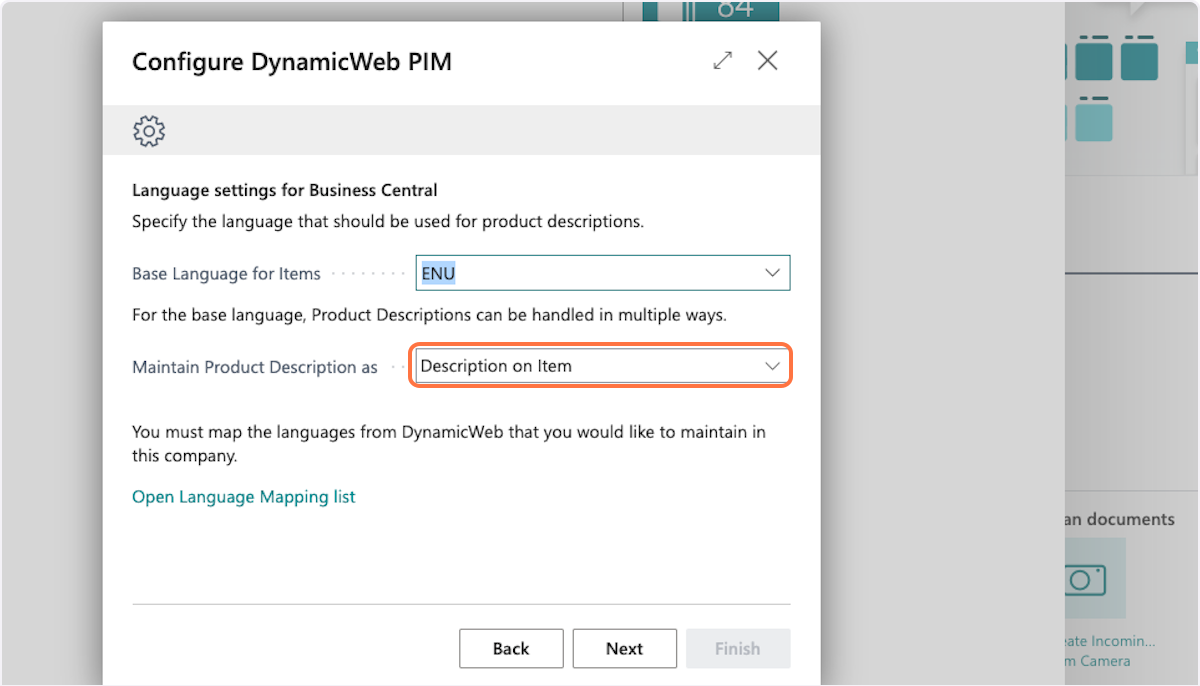 Choose how to maintain the item description in Business Central:
Description on item
- DynamicWeb PIM will update the item description on the Item Card, with the language that matches the base language chosen.
- (Matching these languages between Business Central and DynamicWeb PIM is done in next step.)
Language translation
- Will create an item description translation on the item, and thereby not edit the item description on the Item Card.
Note
This is only for the base language chosen, all other languages will be created as translations. There might be scenarios where you don't want to change the item description in Business Central as it holds information used elsewhere in a process, but you still wish to get a translation on the matching languages.
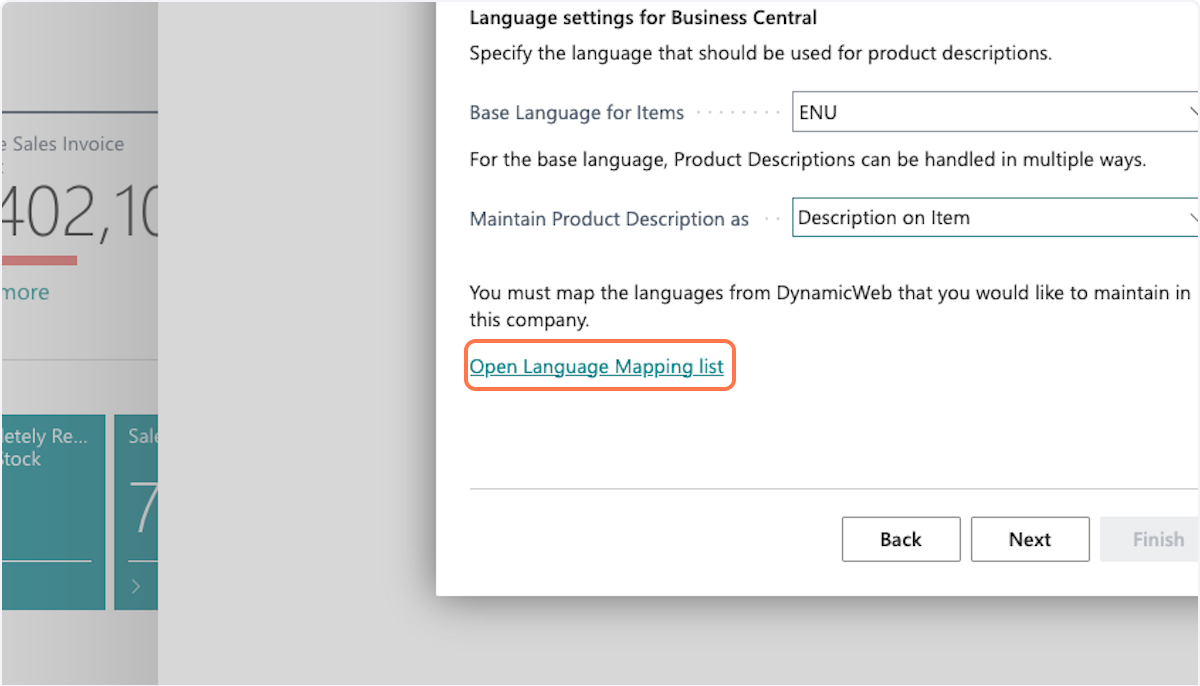
16: Click on open language mapping list
17: Map languages
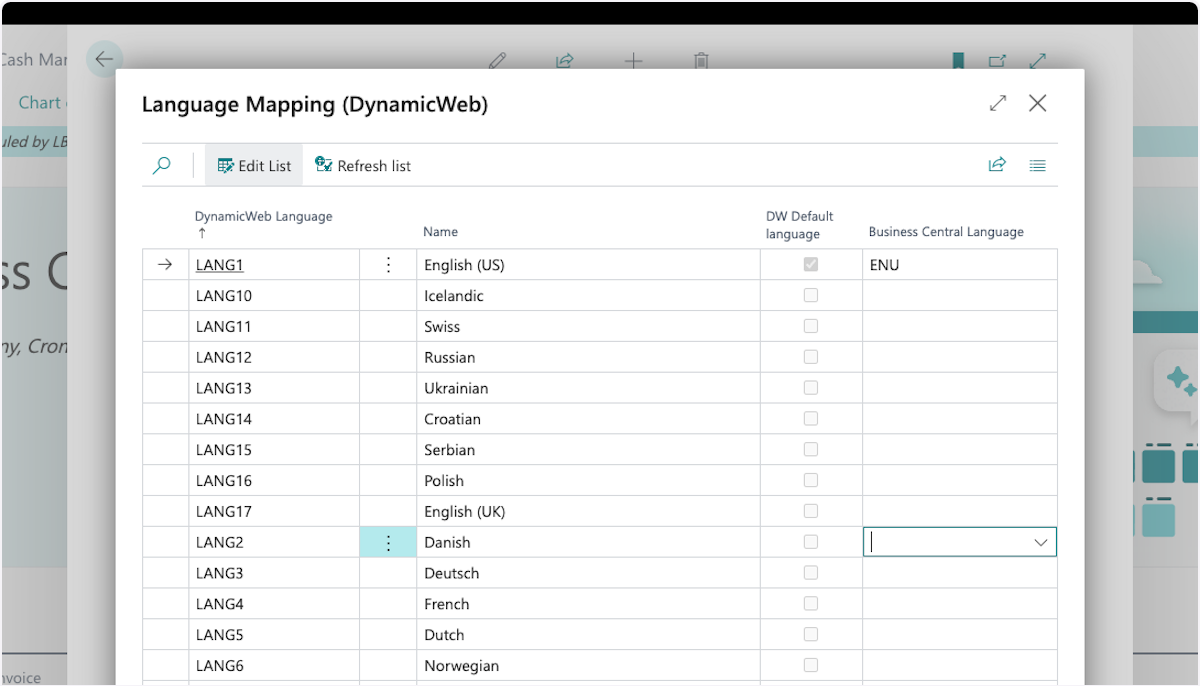 In this step you can map all the languages from DynamicWeb PIM to your languages in Business Central. As aa minimum you should match the language you chose as base language for Business Central. Once mapped, click close.
18 Click on next
19: Choose a default item template
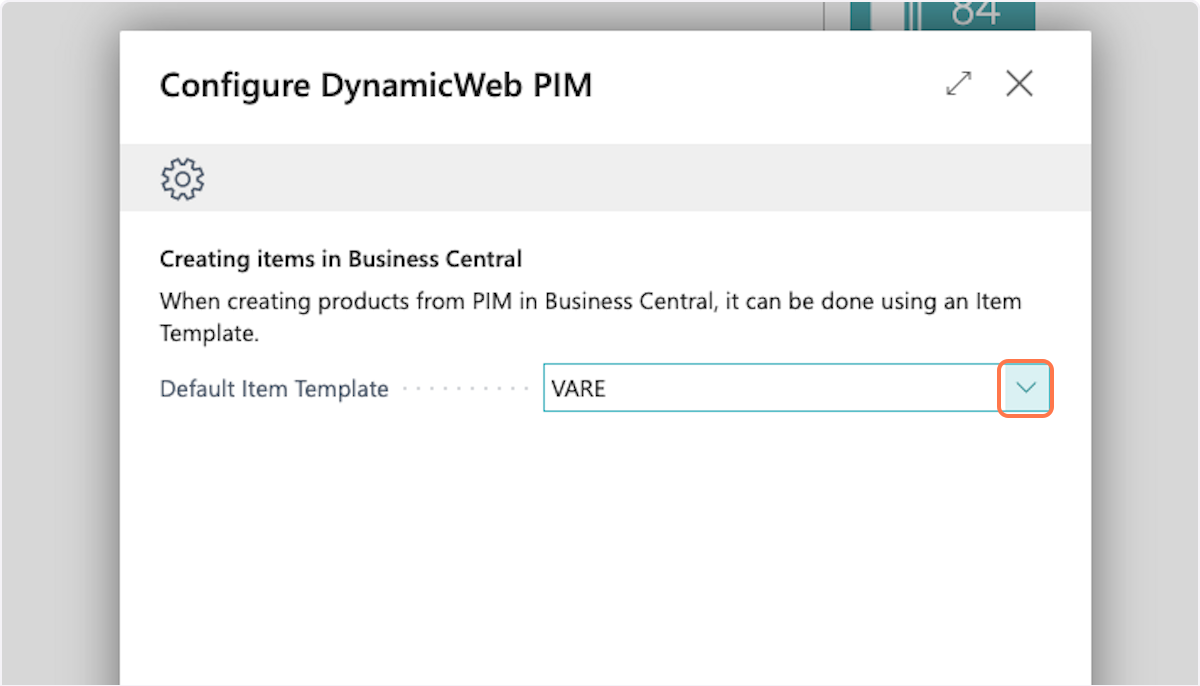 This will be the default choice when creating items in Business Central from DynamicWeb PIM. Click next, when done.
20: Control which items to synchronize
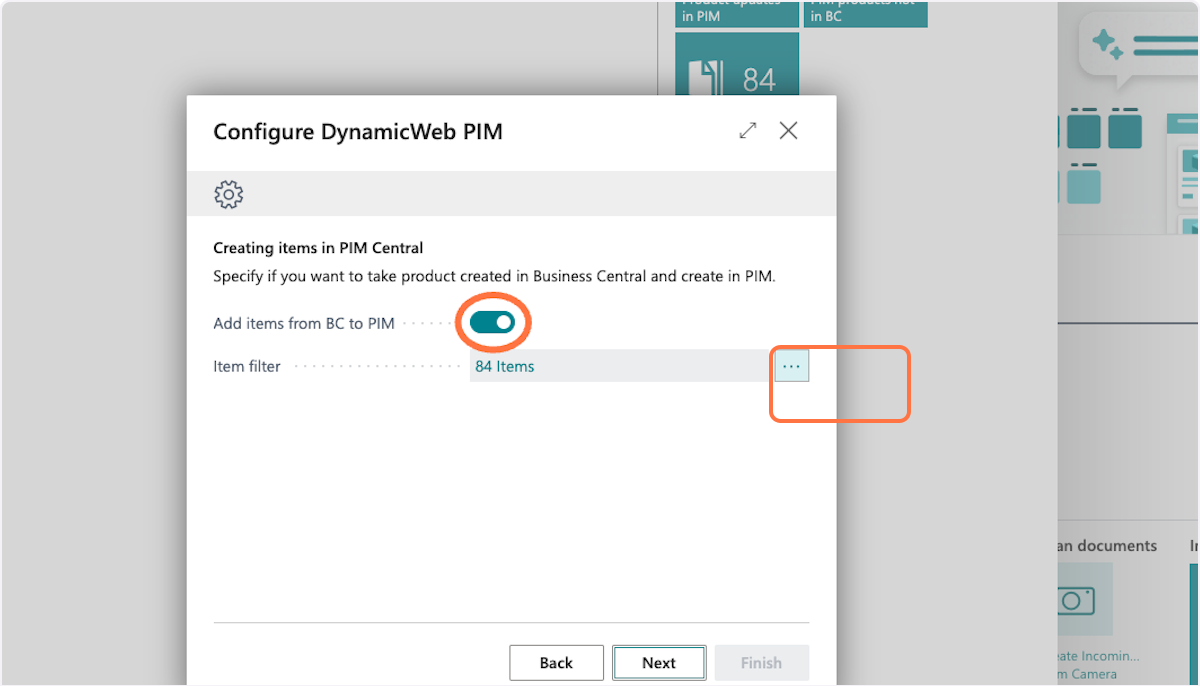 If you are adding items from Business Central to DynamicWeb PIM, enable the "Add items from BC to PIM". Then you get the option to control which Items will be synchronized, by adding a filter.
21: Click on 'Add a new filter' on a field
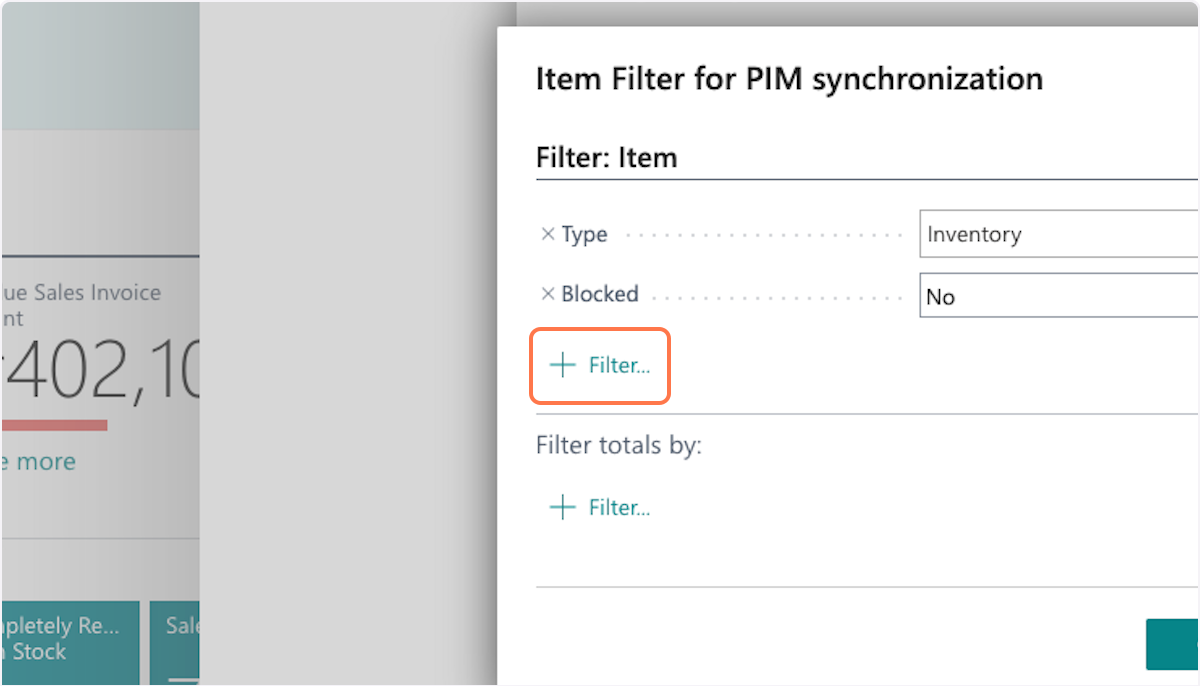 The default filter setup is:
- Type=Inventory
- Blocked = No
But you can add additional filters as needed. Click OK, when done.
22: Click on next
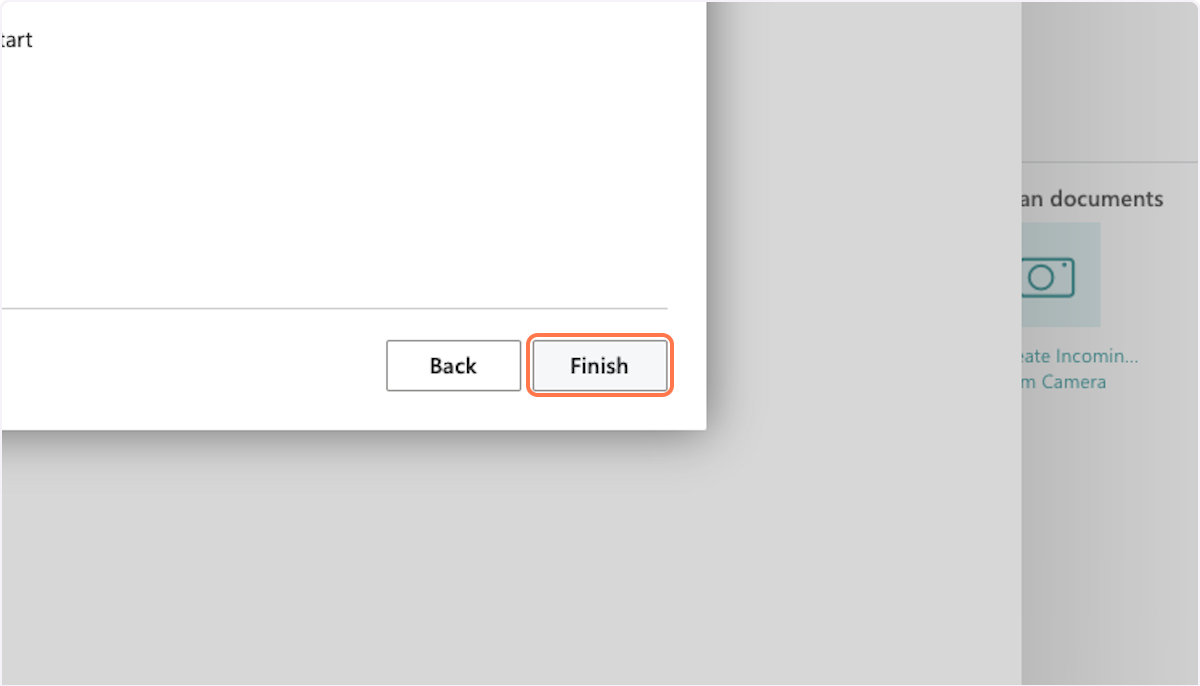
23: Click on finish
26: Done You are now done setting up the connection between DynamicWeb PIM and Business Central.
 You are now done setting up the connection between DynamicWeb PIM and Business Central. You can now move on to creating the right field mapping.
You can now start using the DynamicWeb PIM Connector for Business Central read how to here