Working with integration activities is a fundamental part of pretty much any integration project. Using activities you can import and export data on a scheduled or on-demand basis.
An activity always consists of a source and destination provider. Providers can be mixed and matched to your liking - knowing which combinations of providers are best suited for the scenario requires knowledge about the wide range of integration providers available in DynamicWeb 10.
Important
Please ensure that all IDs you set explicitly during an import - e.g. ProductID - contain the characters Aa-Zz and/or 0-9 ONLY. Using any other characters may cause the application to fail or behave in unexpected ways.
Creating an integration activity
When creating an integration activity you have the option to either add a fully custom activity from scratch or to use an integration blueprint as a high offset for a common integration scenario. When choosing the latter approach, many choices, such as provider pairing and data mappings, will already have been made for you, but either way knowing the fundamentals of how integration activities work is useful, since you can always edit and modify an activity to fit your project. Learn more about working with integration blueprints here.
To add a new activity from scratch, click New custom activity in the top left corner of the Activities list screen or click the "+" icon in the activities tree node.
Activity groups
When working on a large solution or one with several distinct integration projects, it may be handy to group related activities. You can add a new group from the context menu in the activities tree node.
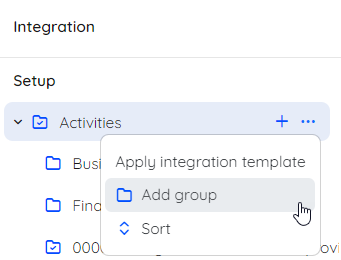
Groups can contain subgroups, which inherit the Source and Destination providers from their parent group all the way up to the root group unless you set different providers on the subgroup.
The general tab of the activity edit screen includes a Name field for the activity as well as a Group dropdown menu. You can also choose to just leave an activity ungrouped by ignoring the Group dropdown.
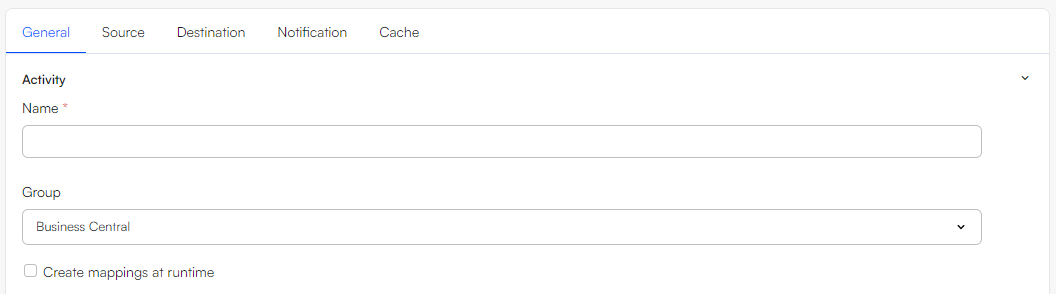 The general settings for a new activity
The general tab also includes a checkbox to Create mappings at runtime. When enabled, Dynamicweb will automatically generate mappings between source and destination columns with the same name every time an activity is run. This is handy when the data source matches the table schema of the destination - this would for example be the case, when importing data from an XML file generated by a DynamicWeb plug-in unit.
The activity overview
When you add a new activity to your DynamicWeb solution (or click an existing activity) you will be taken to the overview screen of that activity from where four widgets are visible:
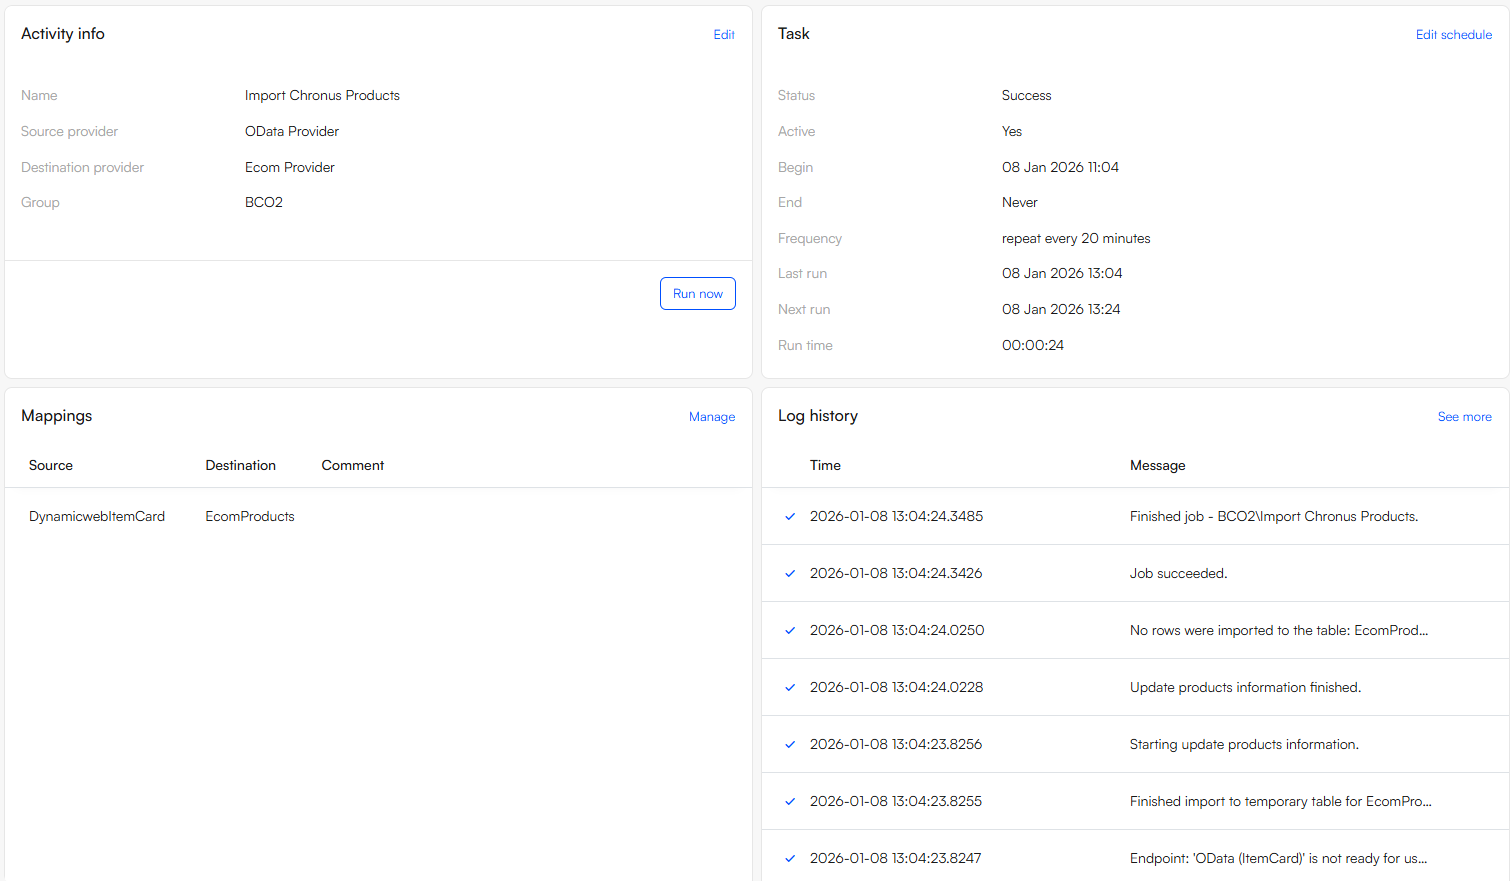
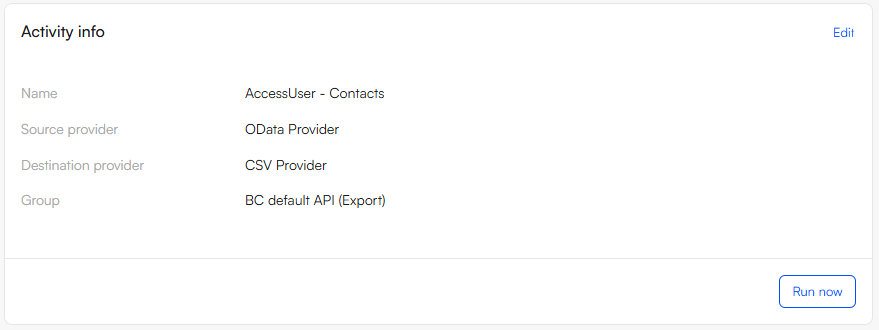
Activity info
Contains the basic information of selected providers and the activity group. By clicking Edit in the activity info widget, you can either revisit the edit screen that you manually defined earlier when adding the activity or access the activity settings that were predefined for you, when you applied an integration template.
You can change these settings at any time, but be aware that changing providers may clear custom defined data mappings.
Scheduling
Shows you the status of the activity ("Not scheduled"/"Has never been run" etc.) as well as information about when the last run was executed, when the next run is scheduled for and the details of the schedule such as frequency, begin time and end time.
An activity is scheduled by clicking Edit schedule in the scheduling info widget, which will bring forth a dialogue with the following fields:
- Begin - the time of the first scheduled run
- Refresh every - the rate of some unit of time (specified below) the activity should be rerun - takes an integer input
- Unit of time - Day/Hour/Minute
Click create to tie the defined schedule to your activity. Underneath the hood, the schedule is then added as a Scheduled task in Settings > Integration > Scheduled tasks triggering the activity.
When a schedule has been made, you can revisit the edit screen of the schedule by clicking Edit schedule in the Scheduling info widget. Further schedule settings will be visible from here:
- Active - Is checked automatically when adding a schedule, can be unchecked to temporarily disable the schedule
- End time - select a time to end the schedule
- Don't run if last job failed - check to stop future runs in case of a failed run
Data mappings
A central aspect of any integration activity is how data is mapped from the source to the destination. This is handled from the Mappings edit screen, which you can navigate to from the activity overview screen.
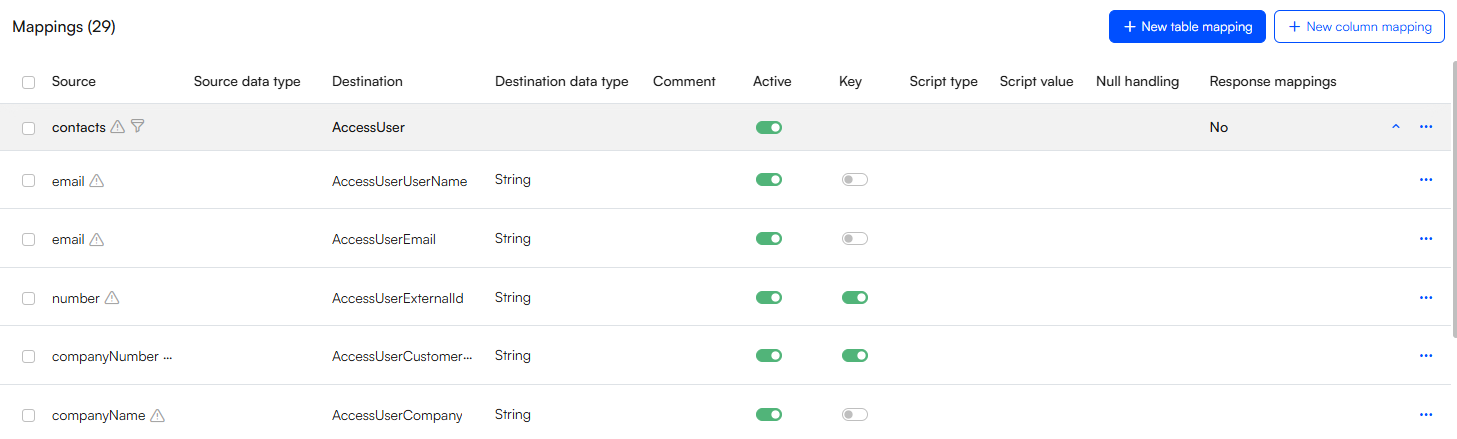
Table mappings
An integration activity revolves around the concept of mapping data from one table to another - and between those tables, mapping columns to columns. Click New table mapping to get started mapping your source to the destination.
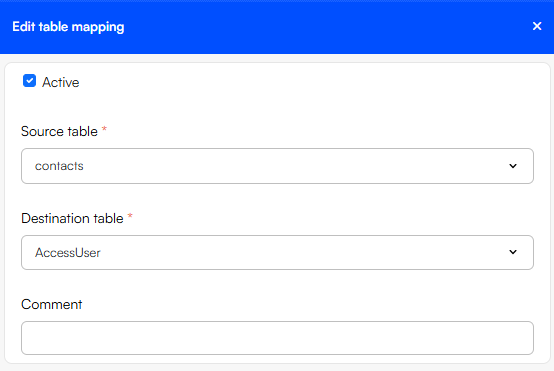
This will bring forth the New/edit table mapping slide over, from where you can select the source and destination tables. Which tables are available in these dropdowns depend on your selection of providers. In the example shown above, the OData provider is selected as source and the DynamicWeb provider as destination, so in this case, all of the tables exposed in the OData endpoint selected in source settings are available and all of the tables in the DynamicWeb database can be selected as destination table. Other providers such as the User or Ecom provider expose only a subset of these destination tables and in some cases, for example when exporting to an empty XML or JSON file, it may be that no tables exist in the destination beforehand. In this case, you can select Same as source in the destination table dropdown to copy the table structure from source to destination upon execution.
An activity can contain multiple table mappings with each grey row representing one table mapping as seen in the example above. This also means that you can map data from one source table to multiple destination tables or vice versa.
Key columns
When adding a table mapping or by clicking Edit table mapping in the context menu of an already defined table mapping, you have the option to manually select which columns should act as key columns. This is handy for uniquely identifying records both when importing and exporting data. By default the actual key(s) of the column will be selected. For instance, the default key settings for table EcomProducts is the composite key ProductID + ProductLanguageID + ProductVariantID. However, in some cases you may want to set the unique identifier to ProductNumber.
Important
When importing data to DynamicWeb, if you set the Id's (primary key) of tables, it is important that you use Id's that conform to Aa-Zz and 0-9 ONLY. Using space, comma, dot and/or any special characters may cause for the application to fail.
When exporting data, it may also be necessary to select a combination of columns that can uniquely identify records in the remote system. For example, the OData provider uses manually defined key columns to detect if it should POST a new record or PATCH an existing one.
Conditionals
From the table mapping context menu you can click Conditionals to set one or more conditionals that the records in the source table must match in order to be imported/exported.
This could be handy to e.g. export only products with a stock level below 10 or to import only user addresses from a list of countries.
The full list of conditionals includes:
- Equals (String)
- Less than (Decimal, string or datetime)
- Greater than (Decimal, string or datetime)
- Does not equal (String)
- Contains (String)
- In (List of comma separated string values)
- Begins with (String)
- Does not begin with (String)
- Ends with (String)
- Does not end with (String)
- Does not contain (String)
- Not in (List of comma separated string values)
- Less than or equals (Decimal, string, datetime)
- Greater than or equals (Decimal, string, datetime)
The source column data type is checked by the provider, so whether you are comparing strings, decimals or datetimes, you should always just insert the value without wrapping it in quotes - that part is handled by the provider.
When a conditional has been applied to a source table, a filter icon is shown next to the source table name in the mappings list screen.
![]()
Grouping conditionals
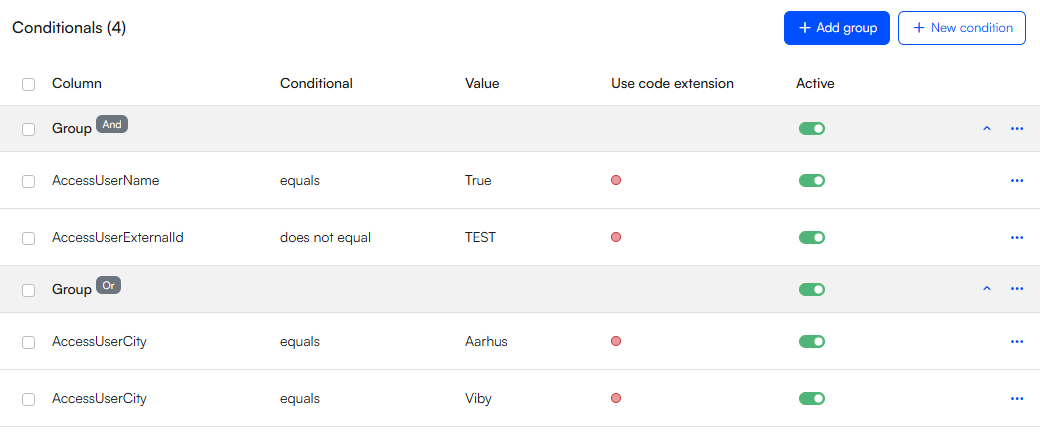
Conditionals can be grouped with an AND or OR operator by adding a Condition group to a table mapping.
Grouping conditionals means you can configure a more complex boolean logic, where a row is imported/exported only if all (AND) or at least one (OR) of the conditionals in the group evaluate to true.
A table mapping can include multiple conditional groups for an even more specific filtering.
Important
Please notice that the OR conditional group is currently not implemented for use with the OData provider as source.
Using code as conditional values
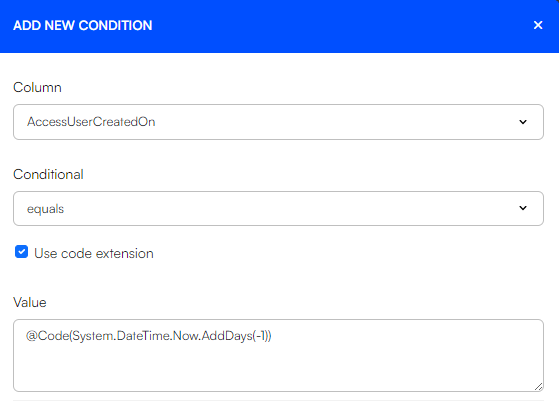
Besides using static values as a conditional value, it is possible to evaluate C# code and compare the result to a source value. To do so, check the Use code extension checkbox and insert a piece of C# sharp code wrapped in @Code()
The image below shows and example of using conditionals to filter the source on whether or not the user was created on a date equal to yesterday's date.
Column mappings
When a table mapping is specified, the next logical step is to specify how the columns of the source table should be mapped to the columns of the destination table. When the schema of the destination is an exact match to the source, it might be a tedious task to manually map every column - in this case, consider opting to the Create mappings at runtime setting in the general tab of the activity edit screen. When this is not the case, you might find an integration blueprint that comes with a list of predefined column mappings that suits the scenario.
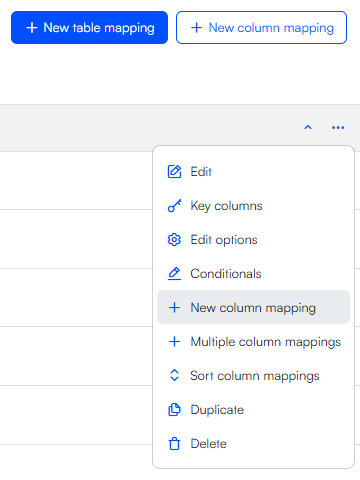
To add a column mapping manually, click Add new column mapping in the context menu for a table mapping or directly in the Mappings edit screen from where you can choose the table it should belong to.
When configuring a new column mapping, you have the option to enable the Don't update record setting. Enabling this setting ensures that the mapped value is inserted only when a new record is created, and that it will never overwrite an existing value. This feature is particularly useful in scenarios where you need to update all fields of a specific record, with the exception of one column that was initially populated with a GUID during the first run of the activity. In such cases, you should activate the Don't update record setting for that particular column.
Add multiple column mappings
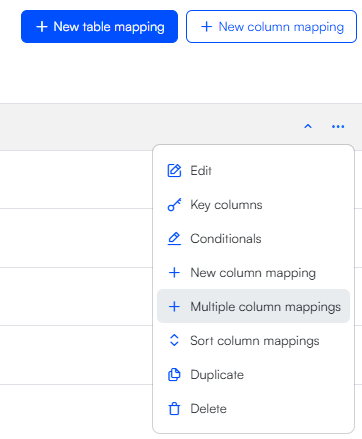
To quickly add multiple column mappings to an existing table mapping, open the context menu of a table mapping and click Multiple column mappings
Number format culture
If the number format culture of a remote system does not match that of your DynamicWeb solution, you can manually specify the Format culture of the source in the column mapping edit slideover. To do so, click Edit in the context menu of a column mapping in the mapping list screen and select the source format. When a format other than the default format is selected, DynamicWeb will automatically convert the content to match the destination format.
Null handling
Each column mapping can be configured to handle empty rows in the source table in one of three ways:
- Default - The activity inserts a Null value corresponding to the source data type in the destination table. That means that if the column expects an integer, the inserted value will be 0, if it expects a GUID, the provider will insert NULL, if it expects a boolean, it will insert false, etc. The specific null value is shown in the dropdown menu next to the default option.
- Constant - Define a constant that will be inserted in the column every time the source row is empty
- Skip row - Skip the entire row of an import if a particular column is empty. Useful for situations where rows with an empty cell are considered faulty data
To define a null handling for a column mapping, click edit in the context menu of a column mapping and expand the Null handling menu.
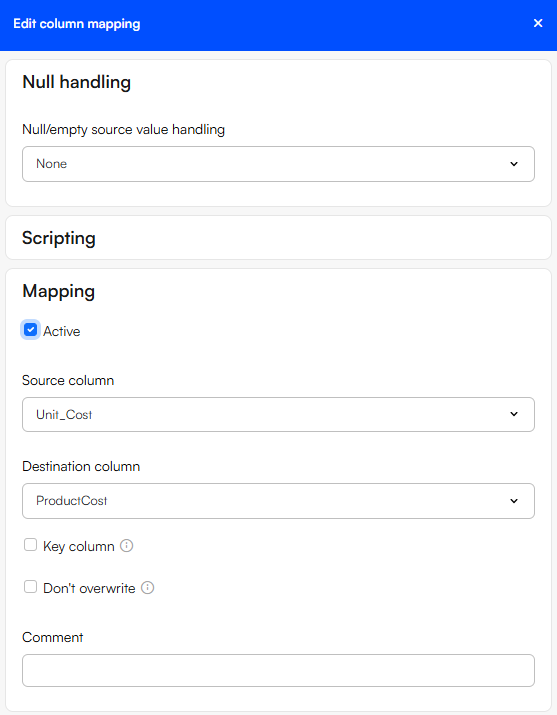
Scripting
The New/Edit column mapping slide over also features a set of tools for scripting the source data before inserting in the destination. The full list of scripting options are:
- Append - append any string to the source field before inserting, if the source field is null, the result will also be null
- Constant - set the contents of the destination column to a constant value. Ignores the source column
- New Guid - generate a Globally Unique Identifier (format: 00000000-0000-0000-00000000) to insert in the destination column
- Prepend - prepend any string to the source field before inserting, if the source field is null, the result will also be null
- Current time - set a constant of the current time. DD-MM-YYYY HH:MM:SS
- Substring - insert a substring of the source field in the destination field. The syntax is [START:END] where the end index is not included in the result. For example, taking the substring 0:3 of 'DynamicWeb' gives you 'Dyn'
- Invert - negate the boolean value of a column (true -> false, false -> true)
- Code - to script a column mapping with C# code, select any scripting type, check "Use code extension" and insert a script value of
@Code(YOUR-C#-CODE).The
@Codescripting type supports accessing the current row's source data using thedataproperty. This allows you to work directly with values from the integration row and transform them with C# logic:@Code(data["AccessUserAddressActive"]?.ToString() + "abc") @Code(Convert.ToDouble(data["PriceAmount"]) + 1000) @Code(Convert.ToDateTime(data["PriceValidFrom"]).AddMinutes(10000)) @Code(Convert.ToDouble(data["ProductWeight"]) + 1000)This allows you to:
- Reference other columns in the same row, not just the mapped field
- Perform numeric calculations, date transformations, and string concatenation
- Combine multiple source values into one destination field
Appending columns
When using the SQL provider or any provider that extends the SQL provider (DynamicWeb - Ecom, User, Order providers) as the destination, it is possible to append the content of one source column to the content of another source column and insert the combined value in the destination column.
To do this, simply add two or more column mappings with the same destination column. The content is added top-to-bottom as illustrated in the table below:
| Source column | Source content | Destination column |
|---|---|---|
| ProductNumber | ABC | ProductVariantId |
| ProductVariant | 123 | ProductVariantId |
Destination ProductVariantId field after the activity is run: "ABC123"
When multiple source columns are mapped to the same destination column, an append icon is displayed on the affected source column. Hovering over this icon shows the tooltip:
The source column is being appended due to the same destination column appearing more than once.
Custom destination tables and columns
When working with a file provider (i.e. the XML or the CSV provider) as destination provider, it is possible to add custom tables and columns to the destination file when exporting data from DynamicWeb.
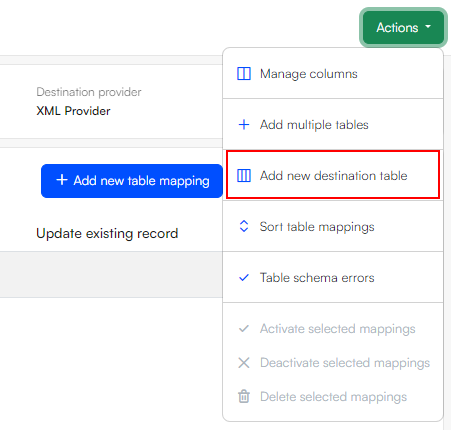
To add a custom table to the destination file, open the action menu in the mappings list screen of an activity and click Add new destination table, give the table a name and hit create. Afterwards you will be able to select the newly added table from the destination table dropdown.
To add a custom column to a destination table, open the context menu of the desired table mapping and click create new custom destination column, give the custom column a suitable name and click create. The custom destination column can then be selected from the destination column dropdown.
Running an integration activity
An integration activity can be run immediately by clicking Run now in the Activity info widget of the activity overview screen. Once started, the activity can be cancelled by clicking Cancel, which replaces the Run now button.
 Running an activity from the overview screen
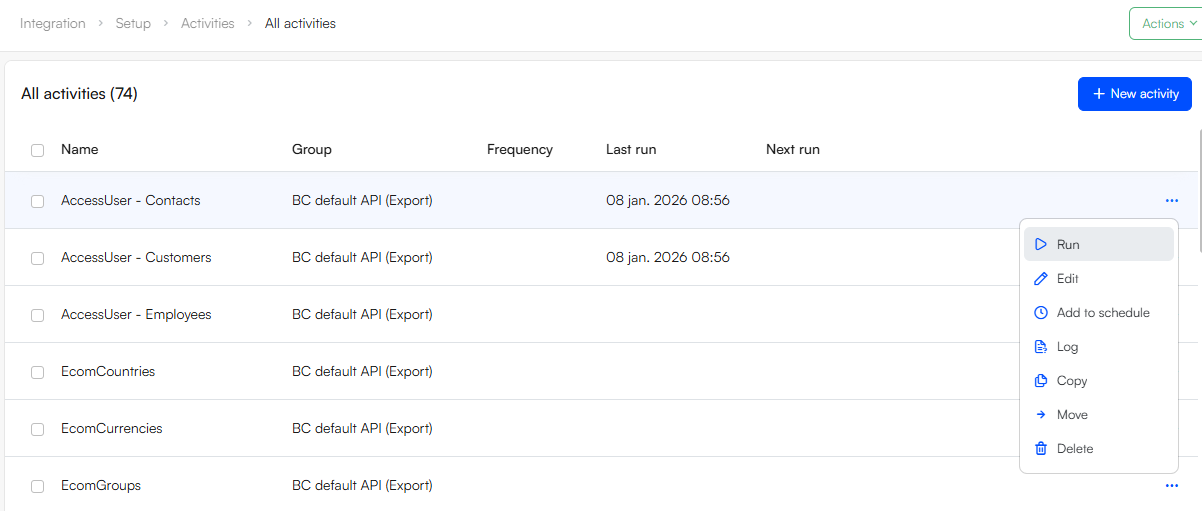 Running an activity from the context menu
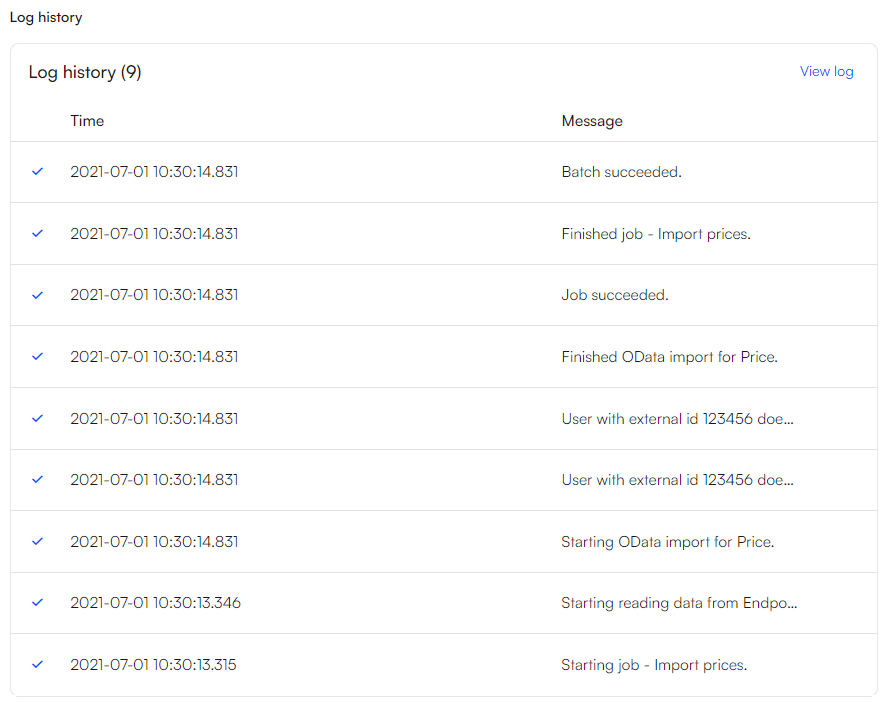
Activity log
Whenever an activity is run (either manually or by a scheduled task), a log is generated and stored on your DynamicWeb solution. The log can be accessed from the Log history widget in the activity overview screen.
The log can also be found in Assets > System > Log > Data integration. In here, you will find three distinct .log files:
- {activity name}_lastrun.log
- {activity name}_lastrunresult.log
- {activity name}+{timestamp}.log
The latter of these three files contains the full log history for the latest run.
Activity XML files
Behind the scenes, an integration activity with all of its configurations is stored as an XML file in Assets > Files > Integration > Jobs. This means that you can move an activity from one solution to another simply by copying the XML file to the same directory in another solution. If you have setup activity groups on your solution, you will also notice, that these are just folders inside the Jobs folder. Feel free to use the Assets area to add new groups or move activities between them.
Table schema check
When a new integration activity is created, the source and destination schema is saved in the activity XML file. If the schema changes in either the source or destination after the activity has been created, a Table schema error may occur.
If an activity fails or if you wish to modify or enrich an already existing activity with additional mappings, it is good practice to check for any Table schema errors and update the schema accordingly.
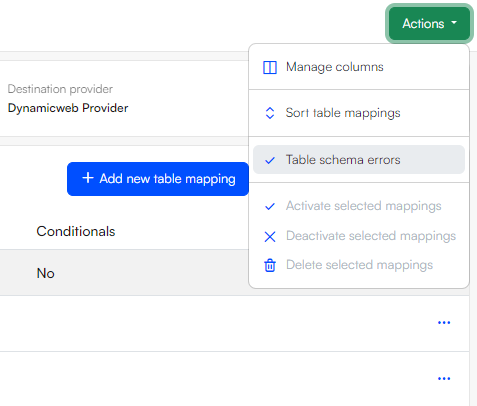
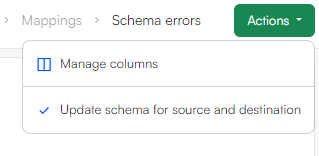
To review if any errors has occurred, open the Table schema errors list screen from the Action menu on the mappings screen as depicted below.
The Table schema errors list may also warn about any logical errors in the mapping, such as duplicated mappings.
To update the table schema of the activity XML file, click Update schema for source and destination in the Action menu of the table schema error list screen.
Context sensitive values
When setting up conditionals and scripting, it is possible to use context sensitive values in the input field. The list of context sensitive value methods include:
- @Request() – get value from System.Web.HttpContext.Current.Request
- @Session() – get value from System.Web.HttpContext.Current.Session
- @Page() – get value from current Page object, if any. (Current page exists if a valid PageID is in the query string)
- @User() – get value from the current User object
- @Paragraph() – get value from current paragraph object, if any. (Current paragraph exists if a valid ParagraphID is in the query string)
- @ProductID() – get value from current product object, if any. (Current product exists if a valid ProductID is in the query string)
Examples of usage:
- @Page(MenuText) – Get title of page
- @User(Name) – get name of user
- @User(Email) – get email of user