Creating an integrated webshop
Now that you have created a webshop, the next step may be to integrate it with an ERP. In this tutorial, we will focus on integrating product data from a cloud hosted D365 Business Central into your B2C DynamicWeb 10 solution. Many of the principles and methods used in this tutorial apply to numerous other scenarios though, so if the integration area of DynamicWeb 10 is new to you, this might be a good place to start.
To follow this tutorial, you need access to an instance of Dynamics 365 Business Central. If you do not already have one, you can register for a free trial here. We will be using the standard sandbox/demo data of the Cronus UK Ltd. webshop, but feel free to use any other product data available to you (Items and Item categories in Business Central).
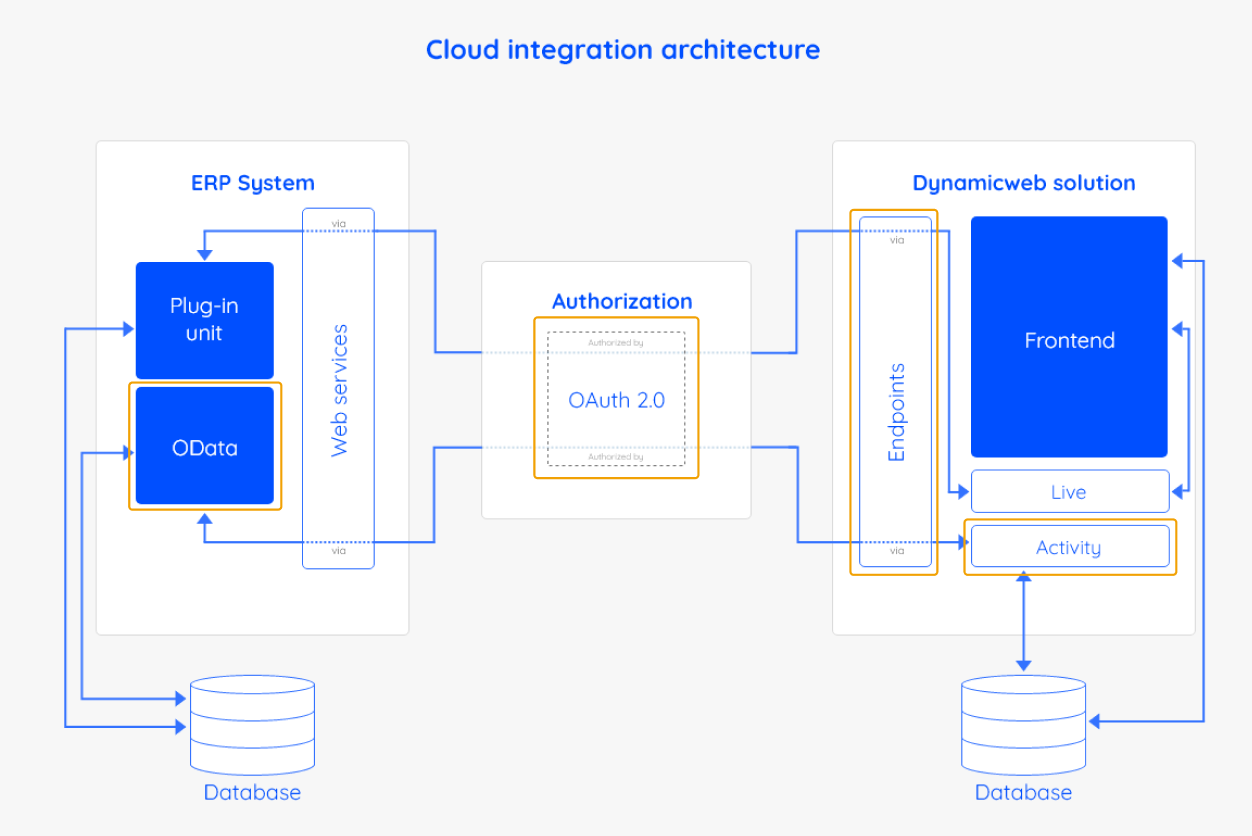
A DynamicWeb integration can consist of several components as illustrated in the figure above, but in this tutorial we will focus on those outlined in orange. This means that we will cover using Integration activities that utilize OData endpoints authenticated by OAuth 2.0 to import and export data to and from the DynamicWeb database.
Part 1: Authentication
The first step in next to any integration scenario is to authorize access to the remote source. Dynamics 365 Business Central endpoints require an OAuth 2.0 authentication, which leaves us with two choices:
The two types of authentication differ in how they administer permissions. An S2S authentication is configured to grant access on application level, while OAuth 2.0 User impersonation reflects the permissions given to a single user.
We recommend using S2S authentication, which you can learn to configure by following our extensive setup guide.
Part 2: Endpoint collections
Once the credentials for your authentication are obtained, it is time to configure an endpoint collection.
- Go to Integration > Connections
- Click the +-icon to add a new collection
- Give the collection a suitable name
- Select OAuth 2.0 - Service-to-service as the authentication type
- Paste in your credentials
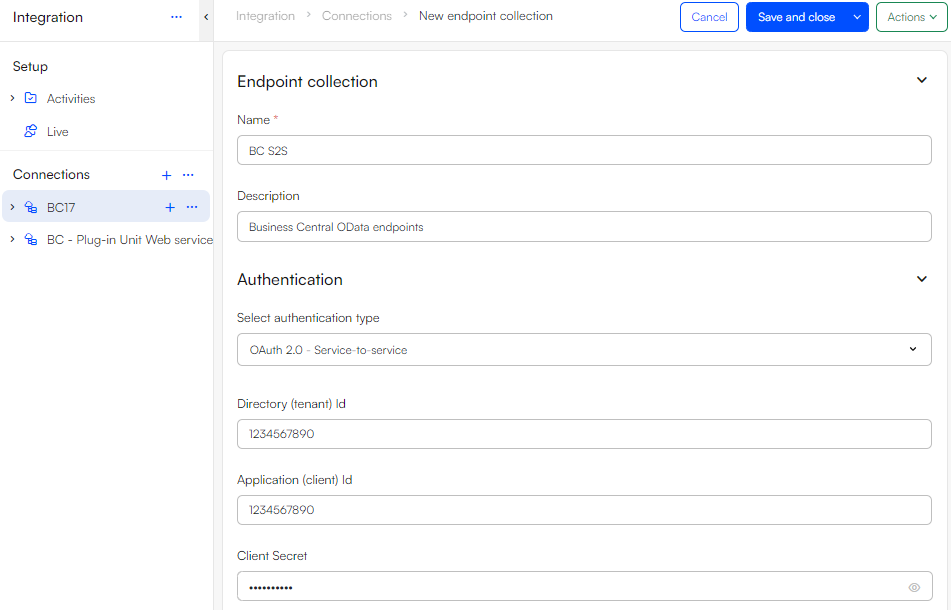
Now you can add your requests to your endpoint collection. Since we are configuring a simple setup in this tutorial, we can make do with a single request to the general OData API.
The URL for the Business Central OData API follows this structure:
https://api.businesscentral.dynamics.com/v2.0/[user-domain-name]/[environment-name]/api/v2.0
You can locate both the user domain name and environment name in the standard URL for your Business Central instance. Notice that the user domain name is equal to the tenantID located earlier in the authentication step.
If your Business Central environment contains more than one company, you must specify which one to query by adding the following at the end of the URL:
/companies(companyId)
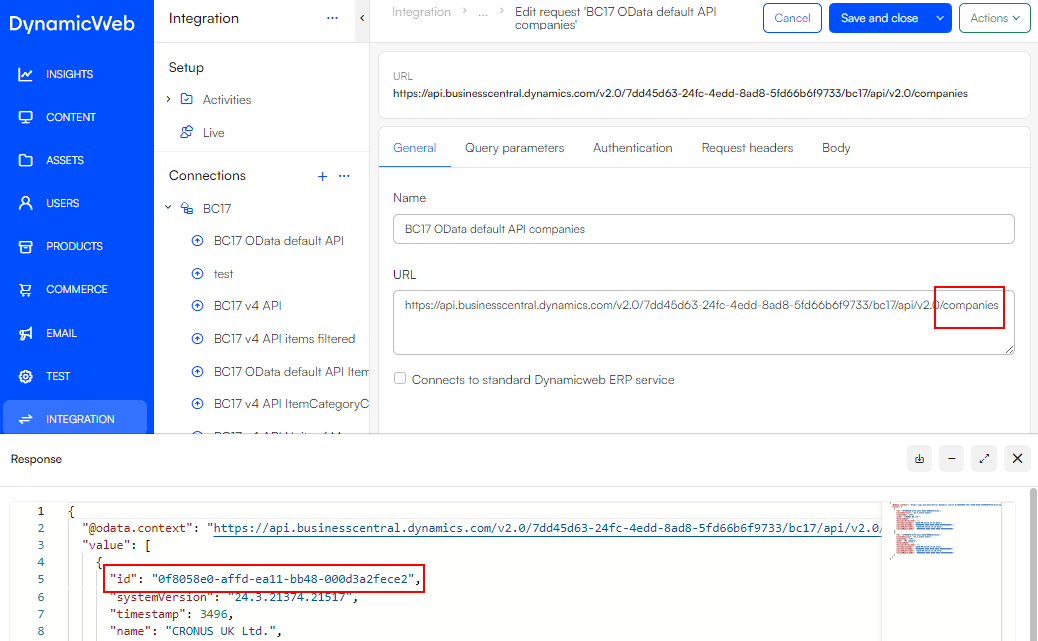
To find the companyID, we can use the default API and the testing capabilities of endpoint collections to request information about the companies:
- Save the request with the URL established earlier followed by /companies
- Hit Send request in the action menu
- Locate and copy the companyID and add it to the final API URL
Finish the endpoint configuration by testing the connection to ensure that everything works as intended.
Part 3: Activities and blueprints
Now that we configured our authentication, endpoint collection and request it is time to set up the integration activities that handle how data is mapped from one system to another.
Mapping tables and columns from Business Central to DynamicWeb requires knowledge about the database structure of both systems, but the DynamicWeb Business Central Blueprint can provide a standard configuration for importing the entities exposed through the Business Central API.
To download the blueprint:
- Go to Apps > Available Apps
- Locate the Business Central blueprint
- Click Install

When the blueprint is installed, a set of activity groups should appear in Integration > Setup.
The blueprint package includes two sets of activity groups:
- The BC Default API import and export groups (which we will be using in this tutorial)
- The BC v4 import and export groups
The latter is typically used for more complex integration scenarios, where further entities and custom fields are exposed through pages in Business Central. Check out the V4 blueprint guide to learn more about those.
For the purpose of our integrated B2C webshop, we will be using two of the activities in the BC default API (import) folder:
- ItemCategories (EcomGroups in DynamicWeb)
- Items (EcomProducts in DynamicWeb)
Starting with ItemCategories, click the activity in the navigation tree to open the activity overview screen:
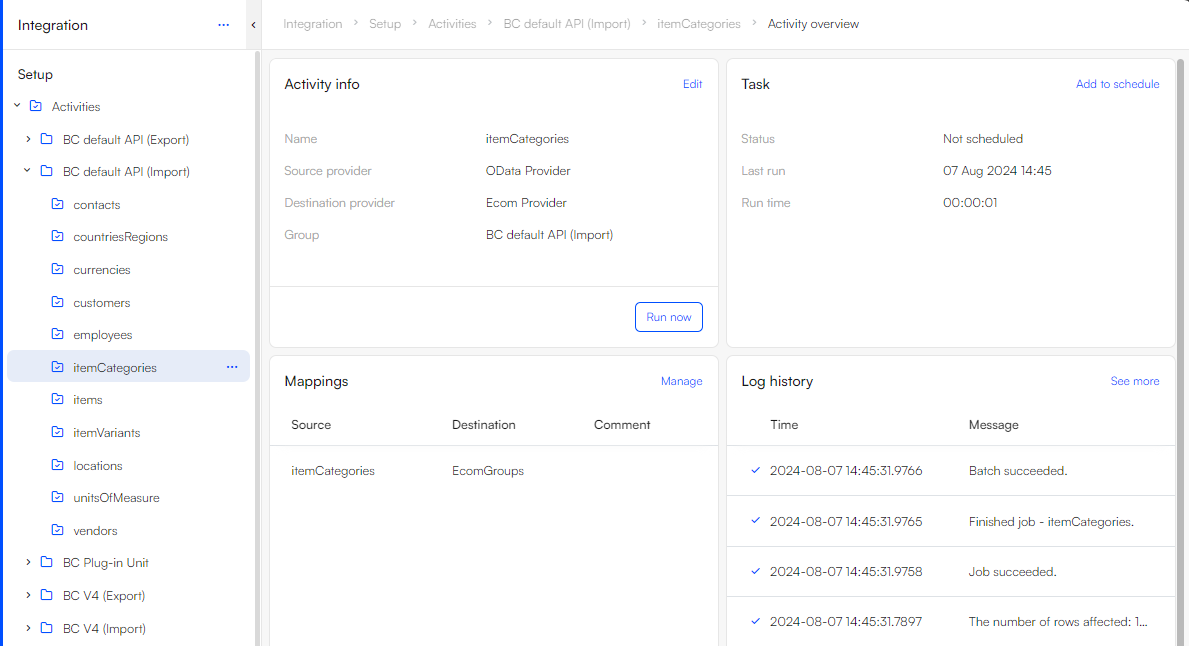
Notice that source and destination providers are already defined and that a source table is mapped to a destination table. You can click manage in the mappings widget to view and modify the table and column mappings of the activity, but the predefined mappings should suffice for now.
Before the activity is ready to run, we need to make a few manual configurations:
- Click Edit in the activity info widget
- Open the Source tab to select the predefined endpoint, that we defined earlier
- Open the Destination tab to select Default language and Shop
- Go to the Cache tab and select the GroupService option. This will clear the cached groups on execution ensuring that your newly added product groups are shown in the UI.
When using the OData provider to import data, the activity settings also let's you choose a Mode of import. Per default this is set to Full replication, but since we are going to configure a schedule for re-running the activity in the following section, it is recommended to switch the mode to Delta replication, which uses timestamps on the activity to filter the source data for new entries.
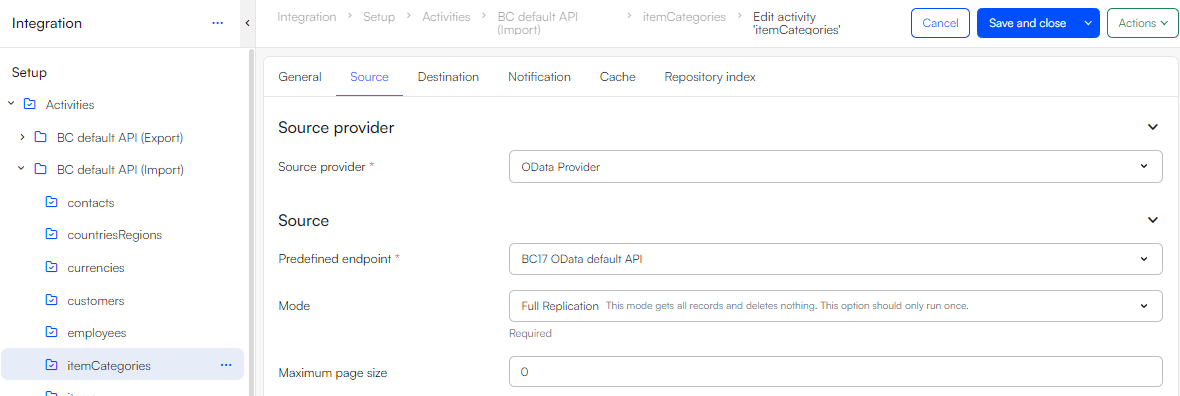
Once the configuration of the ItemCategories activity is finished, it is time to repeat the exact same steps on the Items activity of the blueprint:
- Select the Predefined endpoint
- Select Delta replication as the Mode
- Select your default Language and Shop
- Go to the Cache tab and select the ProductService option
- Go to the Repository index tab and select the Product index defined in tutorial 2 to be rebuild when the activity is run
Part 4: Run the activities
When both the ItemCategories and Items import activities have been defined, you can go ahead and run them manually, to check that everything works as intended. Starting with ItemCategories do as following:
- Open the activity
- Click Run now in the Activity info widget
- Check the Log history to confirm that everything was imported correctly
- Repeat the steps above for the Items activity
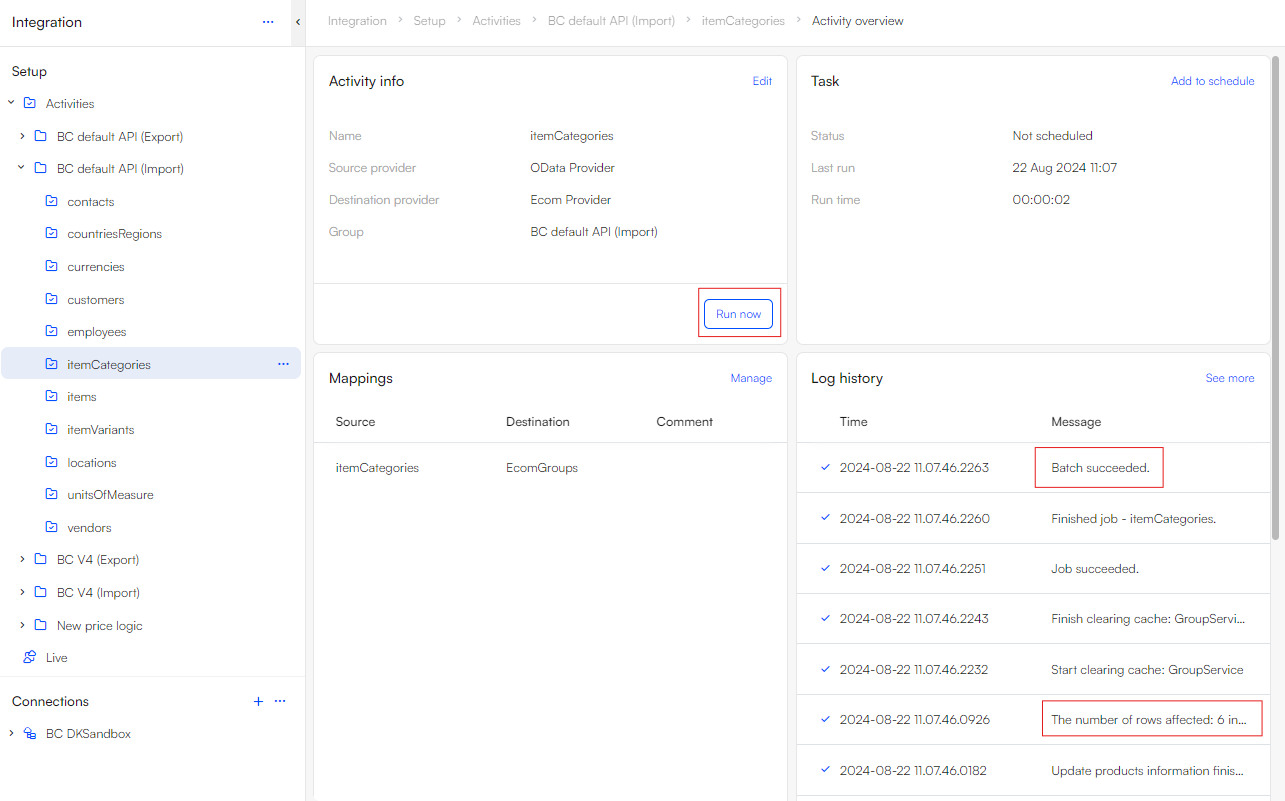
Navigate to the Products area to view the imported Product Categories and Products.
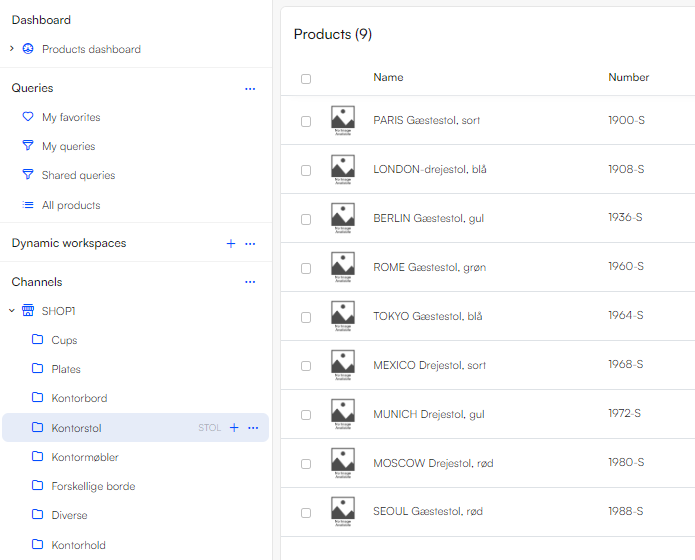
Part 5: Integrated products in the frontend
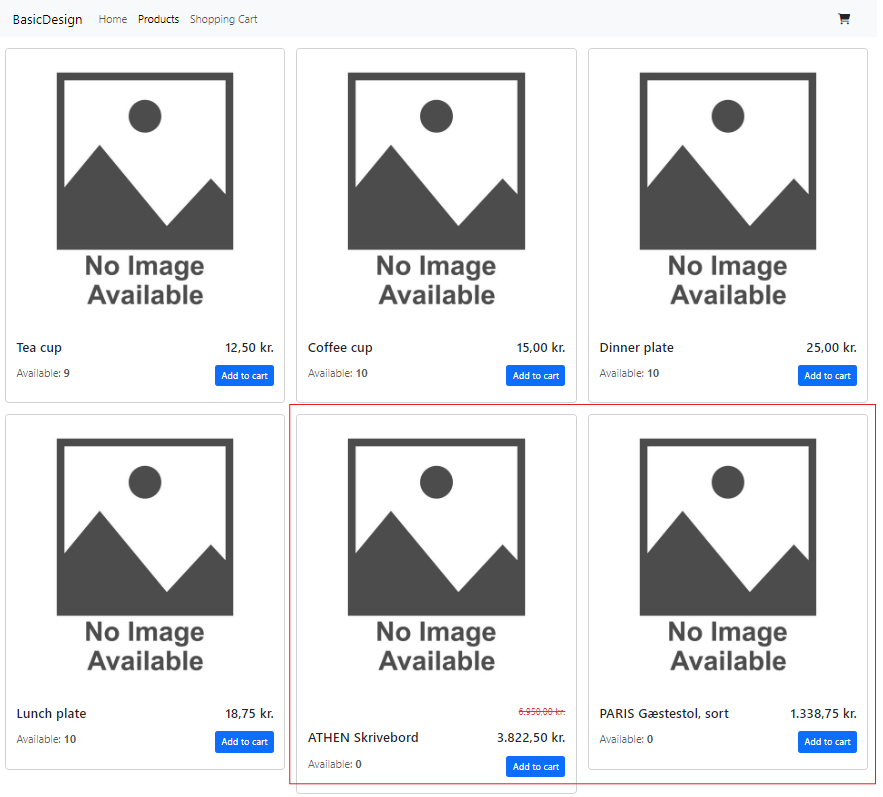
If the Business Central product data was imported correctly and the product index was successfully rebuilt, the imported products should now appear in the frontend of your webshop alongside the manually configured products.
Part 6: Scheduling
As mentioned earlier, each activity of your new Business Central integration can be run manually by clicking Run now in the activity overview, but why not spend a few clicks to automate this, so that new products or product updates are imported from Business Central on a regular basis?
To schedule a single activity:
- Click Add to schedule in the Task widget on the activity overview
- Select a start time, a refresh rate and a unit of time (e.g. "from todays date, run the the activity every 30 minutes")
- Save
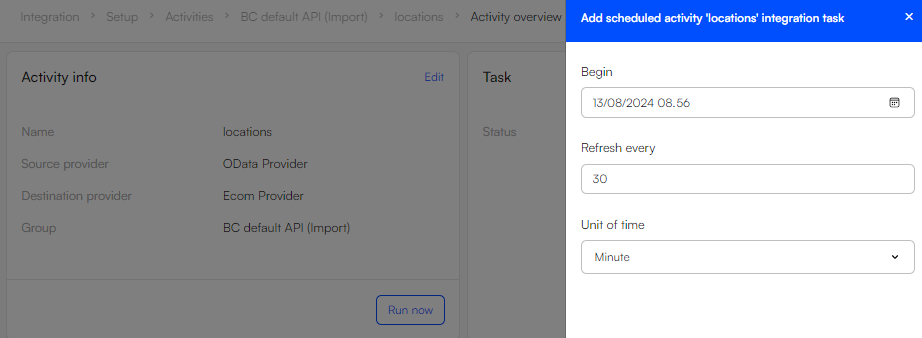
Adding a schedule in this manner creates a scheduled task with an Activity subtask in the background. Since scheduled tasks can contain more than one subtask, let's locate the task in Settings > Area > Integration > Scheduled tasks so that we can add both activities (ItemCategories and Items) to the same scheduled task.
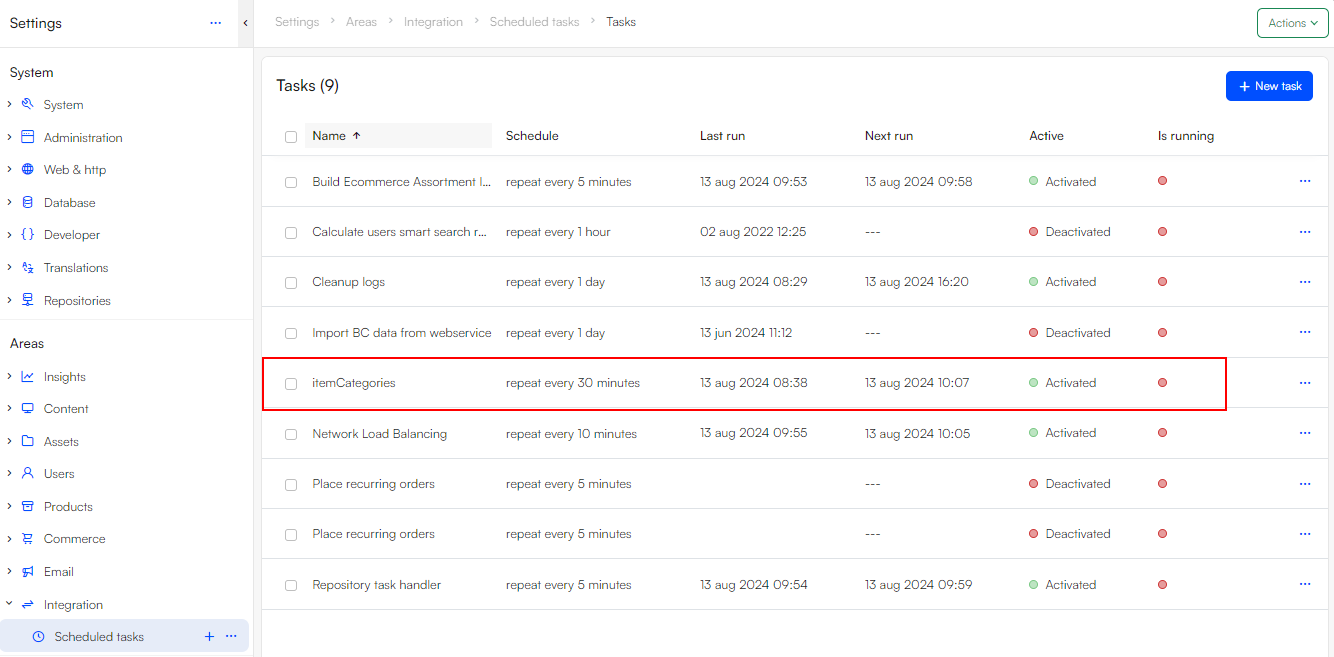
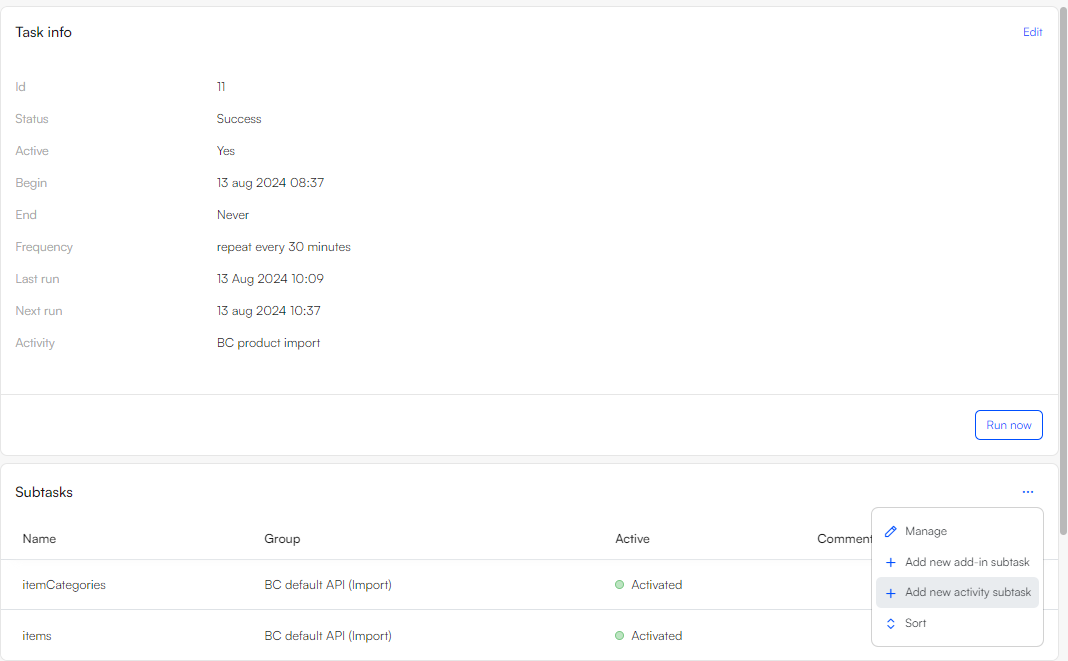
In the subtasks widget, click Add new activity subtask to sequence both the ItemCategories and Items activities within the same scheduled task. That way, both activities will be run in the order listed every time the task is scheduled to run.
Next steps
This concludes the third tutorial in our introduction series for DynamicWeb 10. In this tutorial we covered the following:
- How to authenticate yourself to access a remote source of product data
- How to create an endpoint collection and set up a connection to the remote system
- How to install and use the DynamicWeb Business Central Blueprint
- How to run integration activities - and how to schedule them to run periodically
In the next tutorial, we will explore how you work with product attributes in DynamicWeb 10 - both standard and custom.
Appendix A: Importing demo data from local XML files
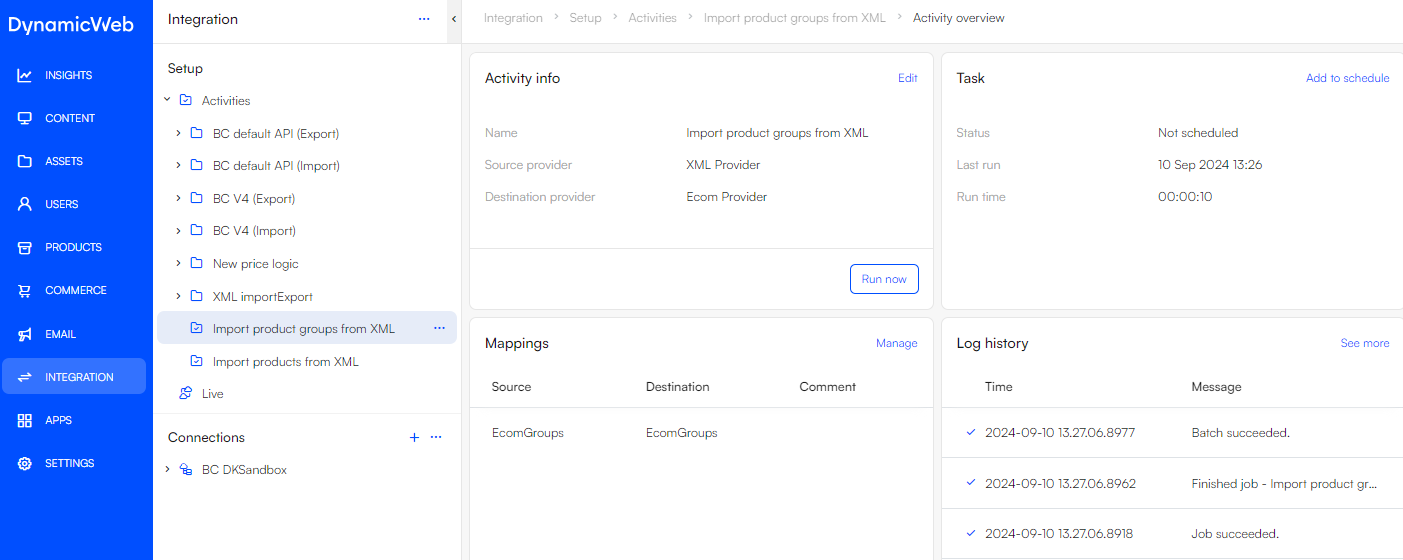
If you do not have access to a demo version of Business Central or simply want to skip the integration steps outlined in this tutorial, the BasicDesign repository includes a series of XML files, that let's you import the demo data without configuring the entire integration.
To import the demo product data from the BasicDesign XML files:
- Open the Assets area
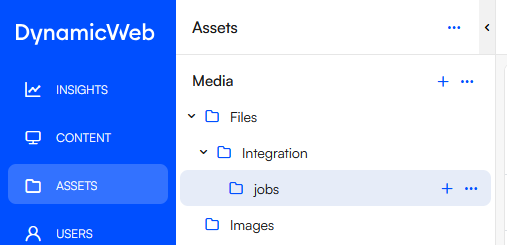
- Under Media > Files create two new folders under each other - //integration/jobs
- Navigate to System > Templates > Designs > BasicDesign > DemoProductDataImport
- Notice that this folder contains a total of four XML files:
- Two of them (ProductGroupsBCData.xml and ProductsBCData.xml) contain the actual demo data
- The two other files (Import product groups from XML.xml and Import products from XML.xml) are Integration activity configuration files.

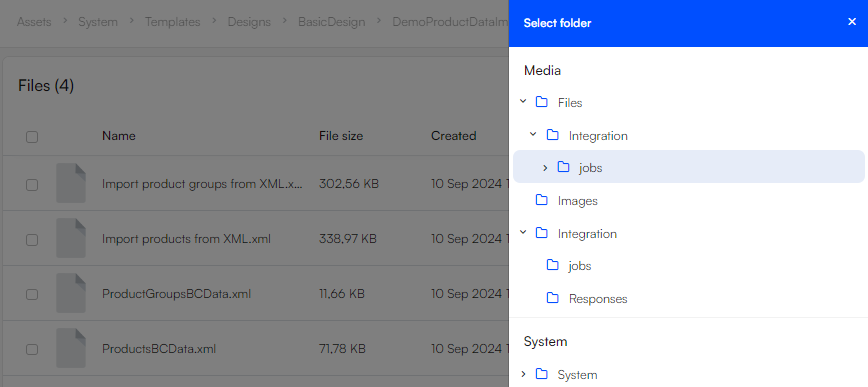
To use the integration activity files from within the Integration area, they must first be moved to the right directory. To do so:
- Select both activity files
- Open the Action menu and click Move files
- Select the folder you created - files/files/integration/jobs - as the destination
Next, install the add-ins which are used by the integration activities:
- Open the Apps-area
- In the navigation tree, select All apps
- From the list of apps, select the following:
- Ecom provider
- XML Provider
- In the action-menu, select Install/Update
Once you've installed these providers - which handle importing specific types of data - the activities which import the data can be run:
- Go to Integration > Setup > Import Product groups from XML
- Click Run Now
- Check the Log history to verify that the job succeeded
- Go to Integration > Setup > Import Products from XML
- Click Run Now
- Check the Log history to verify that the job succeeded
