Product enrichment
Welcome to the fifth tutorial in our introduction series for DynamicWeb 10. In this tutorial, we will explore the tools you have for controlling the product enrichment process in DynamicWeb 10.
In this tutorial, we will explore the following subjects:
- How to use queries to retrieve lists of products sharing properties
- How to use dynamic workspaces to auto-generate useful ways to approach the product portfolio
- How to use the Asset Manager to manage images and other assets
Warning
Please note that this tutorial builds upon the work done in Tutorial 1-4, and will be building on the solution and data created during the course of those tutorials. We strongly recommend that you complete tutorial 1-4 before starting this tutorial.
Queries
The first enrichment tool you should know about is queries - they're used to find all products which match the query criteria, e.g. All active products or All products not attached to a data model, etc.
They are created under the Queries-section of the Products-area - read about how to do so here, the process should be somewhat familiar to you as it is similar to the query you created during Tutorial 2.
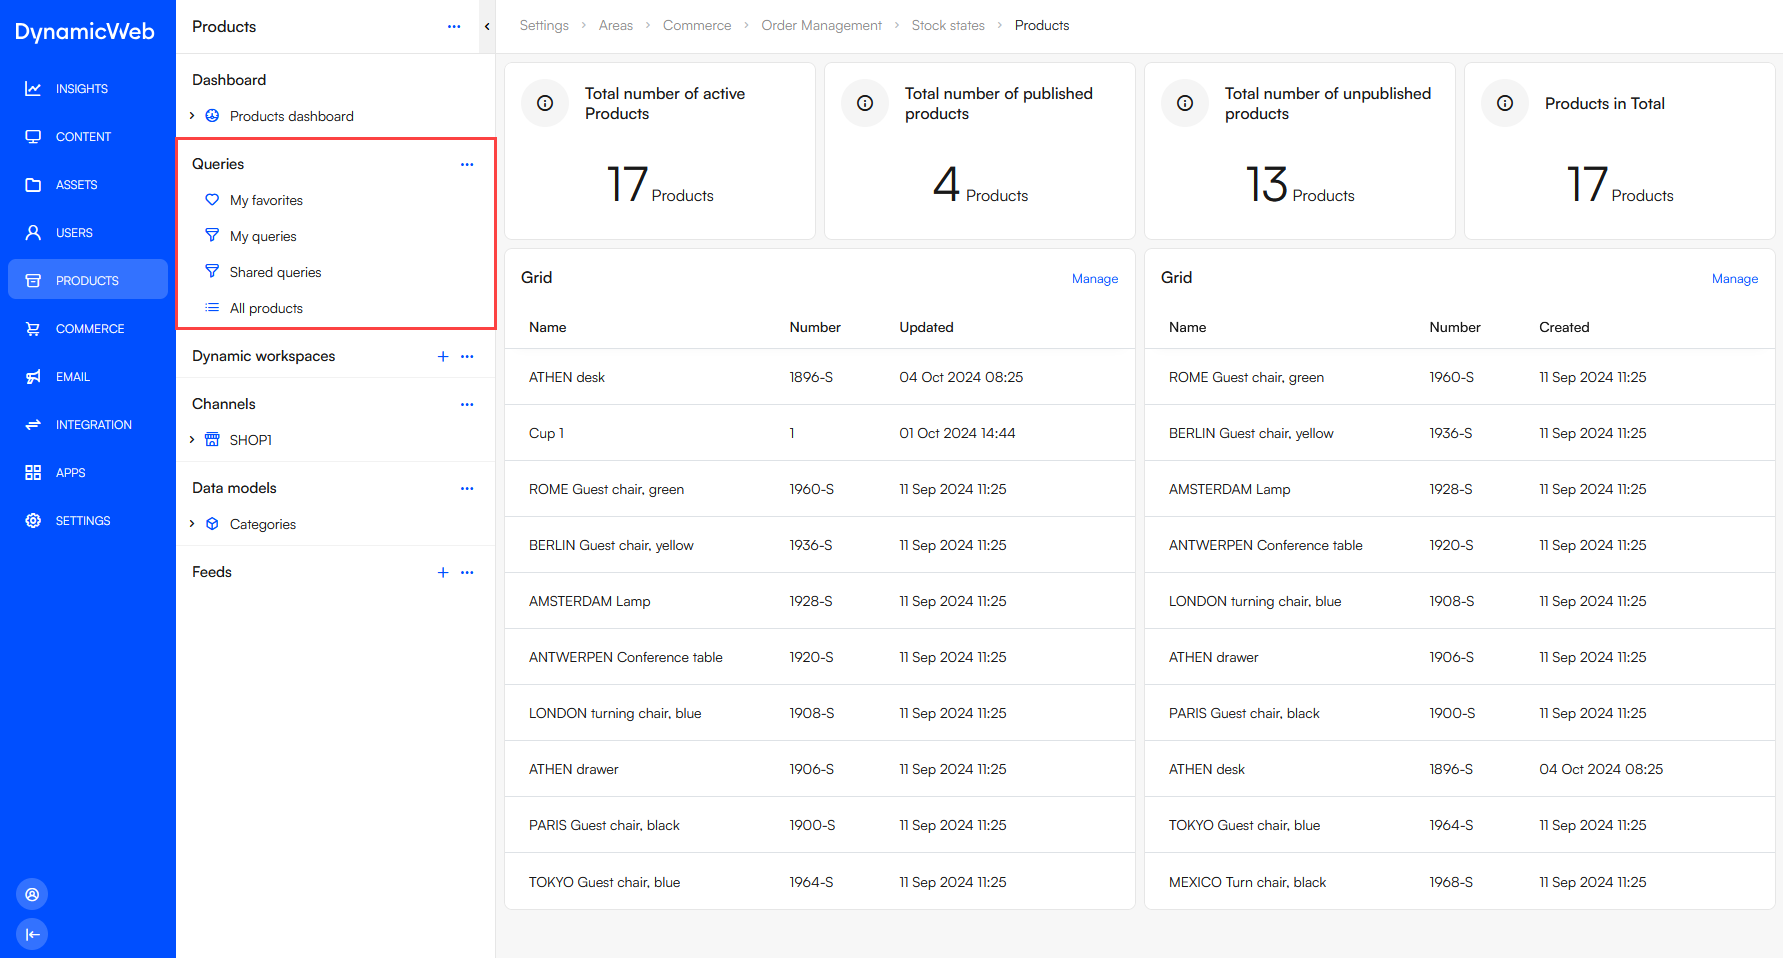
At the most basic level, you can create queries - personal or shared - which find products you're interested in, e.g. products without a description, products with no images, etc. Some of the queries will also be used by other enrichment features, e.g. dynamic workspaces which will be covered in the next section.
For our setup we will create:
- All products
- All products without a description
- All products not related to a category
In most real-world scenarios, customers will quickly discover a need for additional queries, and that's also how the tool is intended to be used; on the daily, creating and modifying queries to solve tasks in front of you.
All products
In our scenario, we need a query which returns all products - and while there's already a system-query that does that, you can't configure it further and we need to do that later on when we use if for more advanced scenarios.
To create an all products query:
- Under Shared queries click New query
- Name it All products
- Select the source index - this is always a product index
- Save and close
All products without a description
If you're looking for something specific, you can create queries which check for values in standard fields:
- Under Shared queries click New query
- Name it All products without a description
- Select the source index - this is always a product index
- Save
This creates the query - to limit what the query returns we will add expressions.
- Use the context-menu for the query and click Edit expressions
- Open the context-menu for the Root expressions group - then:
- Click Edit
- Select the OR-operator
- Save
- Open the context-menu again and click New expression - then:
- Field: Long description
- Operator: IsEmpty
- Repeat for the field
Short description
This query should now return all products which have no Long description OR no Short description, which should be most or all products on your solution. Try to add and remove expressions, see what your options are, to get a feel for what the queries tool can do.
All products not related to a category
For the final example, we will create a query which returns all products not related to a category:
- Under Shared queries click New query
- Name it All products not related to a category
- Select the source index
- Save
Now for the expressions - in this case the easiest way to do what we want is to create an expression which finds all products related to the Categories data model and then negate it so it returns the inversion of what the expression says:
- Use the context-menu for the query and click Edit expressions
- Click the New Group button - then:
- Select the And-operator
- Check Negate
- Save
- Open the context-menu for the group and click New expression - then:
- Field: ShopIDs
- Operator: Contains
- Type: Constant
- Data type: System.String
- Value: SHOP2 (the ShopID for the Categories-data model structure)
- Save
When you click this query it should return a list of all products not related to the Categories data model - what that means on your solution depends on how you approached tutorial 2 and tutorial 4. In my case I see the three products I created during tutorial 2, as they were not added to a data model in the previous tutorial.
Adding descriptions
Use the All products without a description query to find some products without descriptions, then enrich them:
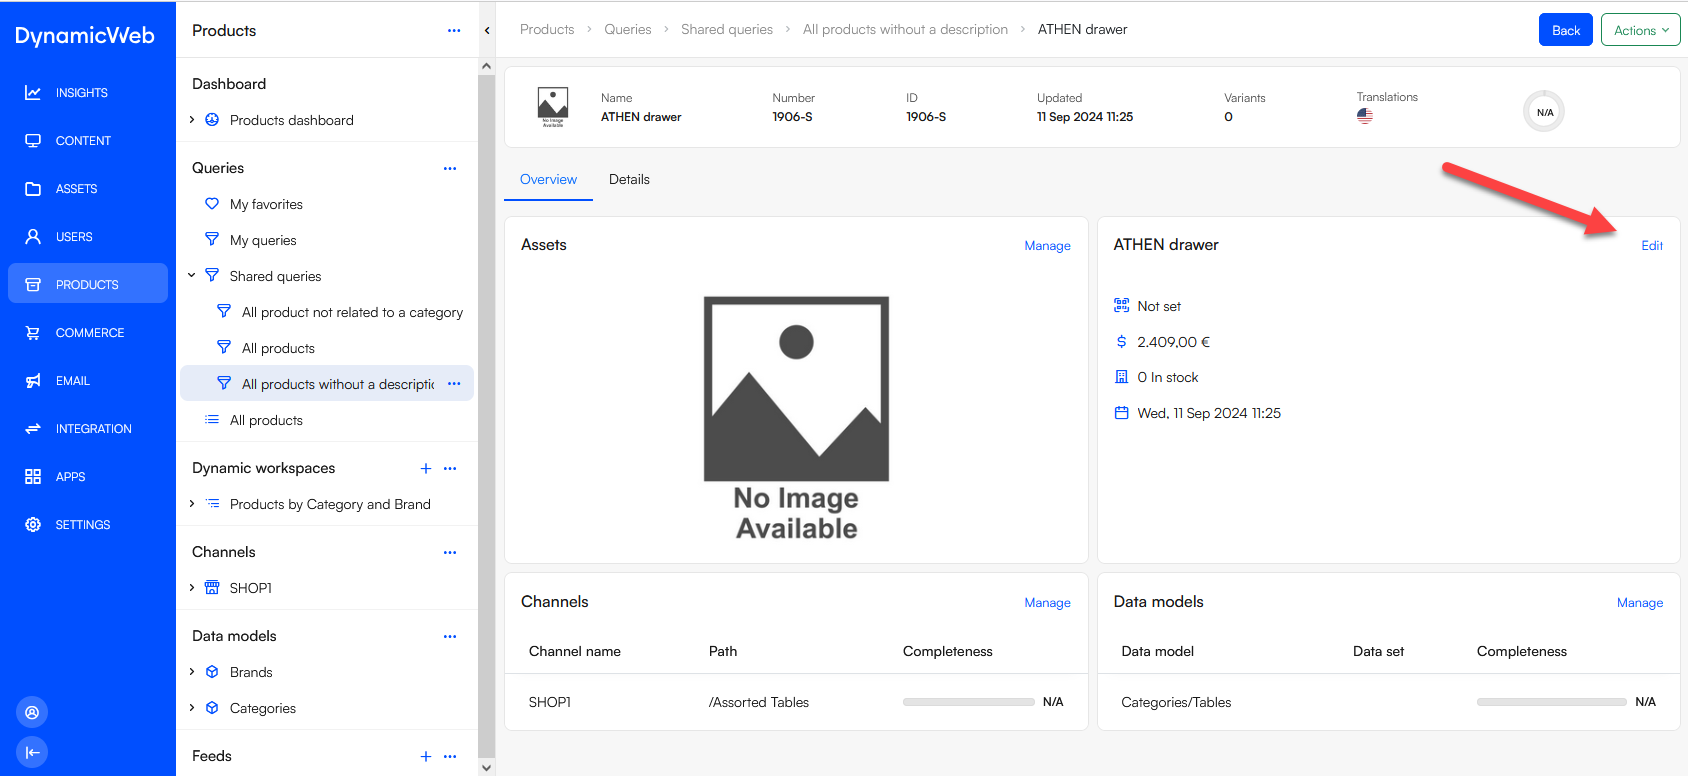
- Open the product details view
- Click Edit on the details widget
- Fold out the Description-section and add descriptions
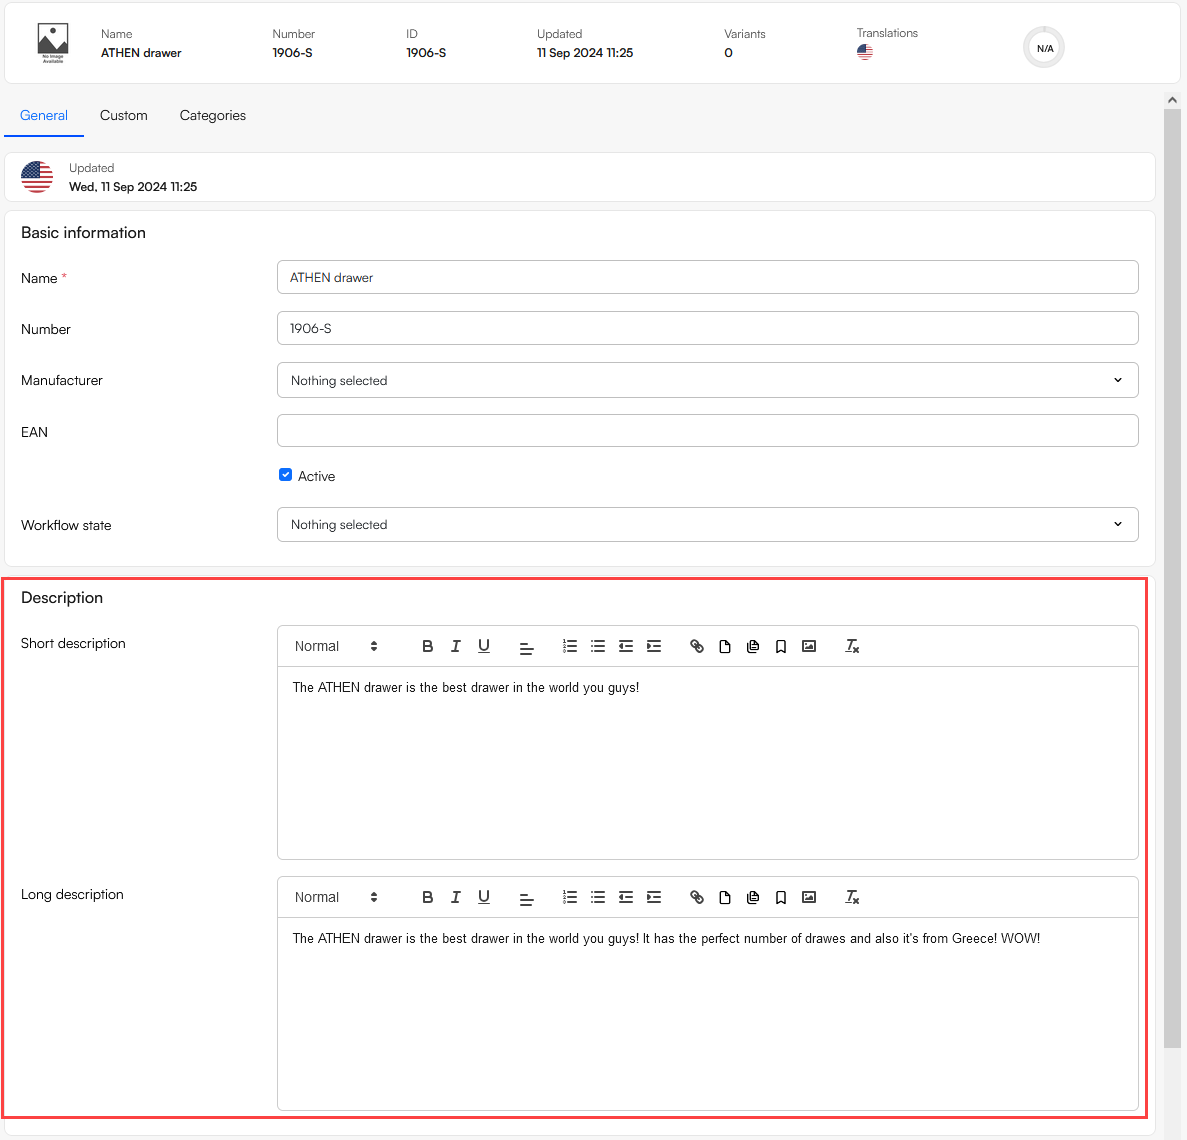
- Save
Dynamic Workspaces
The next tool we will explore is dynamic workspaces - auto-generated group-like structures which makes it possible to approach the same product portfolio from different angles.
The general idea is that you specify some levels - e.g.:
- Level 1: Category
- Level 2: Brand name
A dynamically generated group-like structure is then created, with all level 1 folders reflecting the values in the Category data model, and all level 2 folders corresponding to the value in the Brand name attribute.
First create the workspace:
- Click Add workspace
- Name it Products by Category and Brand
- Select the All products query
- Save
Next create two levels:
- Use the context menu for the dynamic workspace and click Edit
- On the overview screen click Manage for levels
- Click New level and configure it:
- As the source-field select the DataModelCollection Categories
- Check Assign on create
- Save
- Click New level again to create level 2:
- As the source-field select the DataModel Brand (not the collection Brands)
- Check Assign on create
- Save
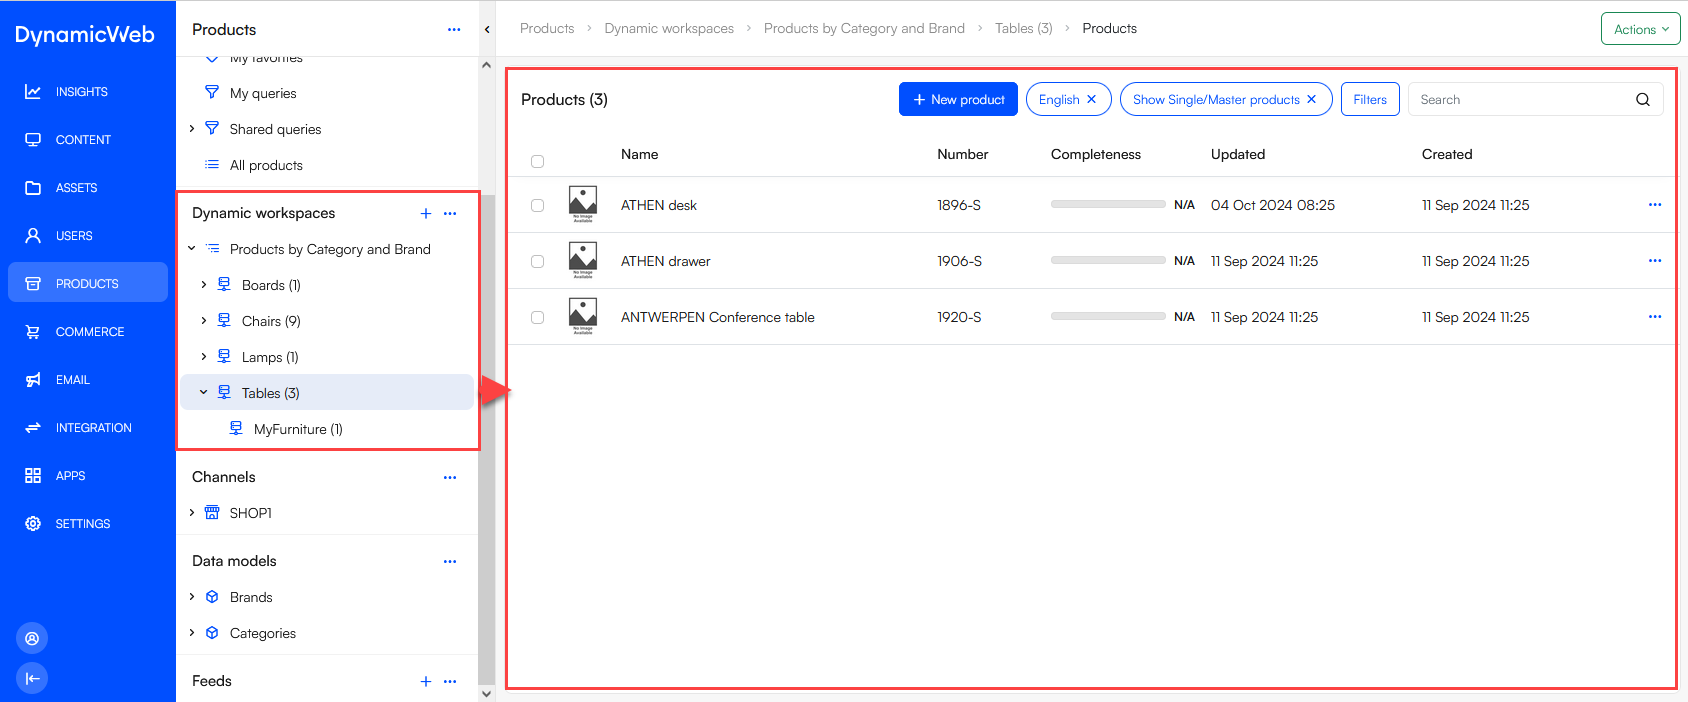
You can now fold out the dynamic structure - as you can see, the first level consists of the data models you created, and the second level consists of the Brands you created in the previous tutorial, in my case a MyFurniture-brand:
Assets
Assets are files - e.g. images or data sheets - which are associated with a product. DynamicWeb contains two distinct systems for assigning images to products:
- Image Patterns auto-match images in a folder to products based a pattern such as {ProductNumber}.png
- Asset Categories are used in more advanced scenarios where you want a human to be able to upload, categorize, and manage assets (not just images) as a part of the enrichment process
Since this is an enrichment-focused tutorial, we will explore Asset Categories - but you can read more about Image Patterns here.
In our scenario we want to have two types of assets:
- Product images
- Technical downloads - e.g. product sheets, assembly instructions
Open the Assets-area and create a folder for each under Media - this is where the files will be stored.
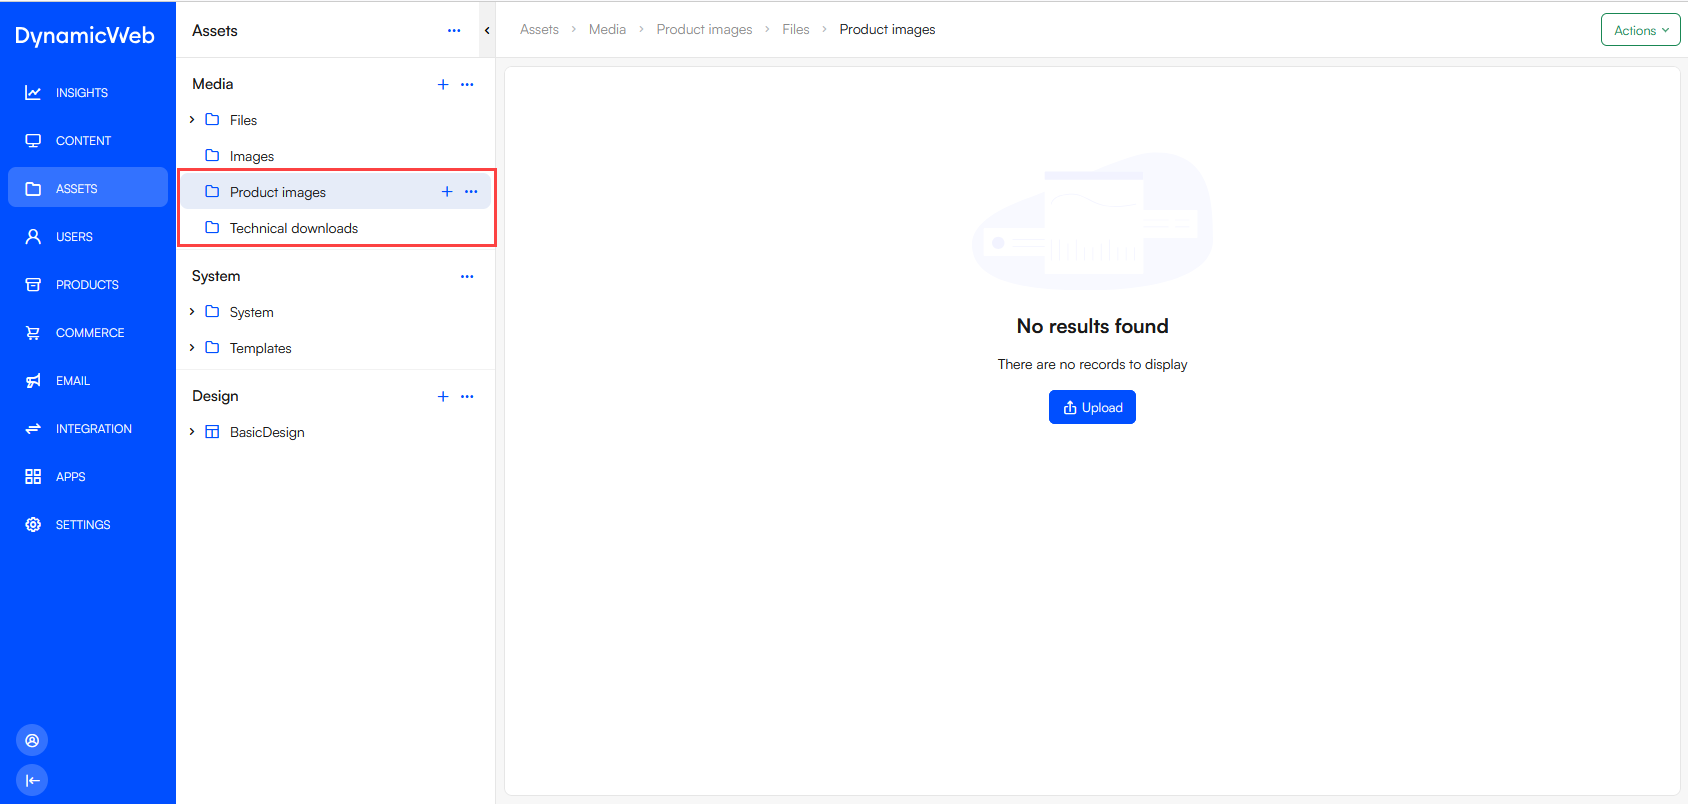
Find some product images which match your products - tables, chairs, lamps if you're using the example data we supplied - and add them to the product images folder. Then find some technical documents - pdf, ppt, docx - and add them to the technical downloads folder.
Creating asset categories
There's a standard category for product images, but we will need to create one for technical downloads:
- Go to Settings > Areas > Products > Assets > Asset Categories
- Click New asset category - and fill in the details:
- Name: Technical downloads
- System name: technical_downloads
- Inheritance type: None
- Control type: File selector
- File extensions: docx, pdf, ppt, xlsx
- Folder preset: Select the folder you created for technical downloads
- Save
Note that we set Inheritance type to None - that's because we're not using multiple languages, nor do we have variant-products, and as such we don't need to define how assets are inherited. But make a note of how you can define different types of inheritance behavior here.
We've also restricted the allowed file extensions a bit - this is to ensure that only certain types of files can be assigned to this category.
Before leaving the Asset categories-node, open the standard Images asset category and set the upload folder preset to the folder you created for the purpose.
Managing assets
To enrich a product with assets you can use the asset manager tool. Open it by entering a product details screen and clicking Manage on the Assets-widget.
You will see this screen - it features the two asset categories we have on the solution, and a faux-category for image pattern images.
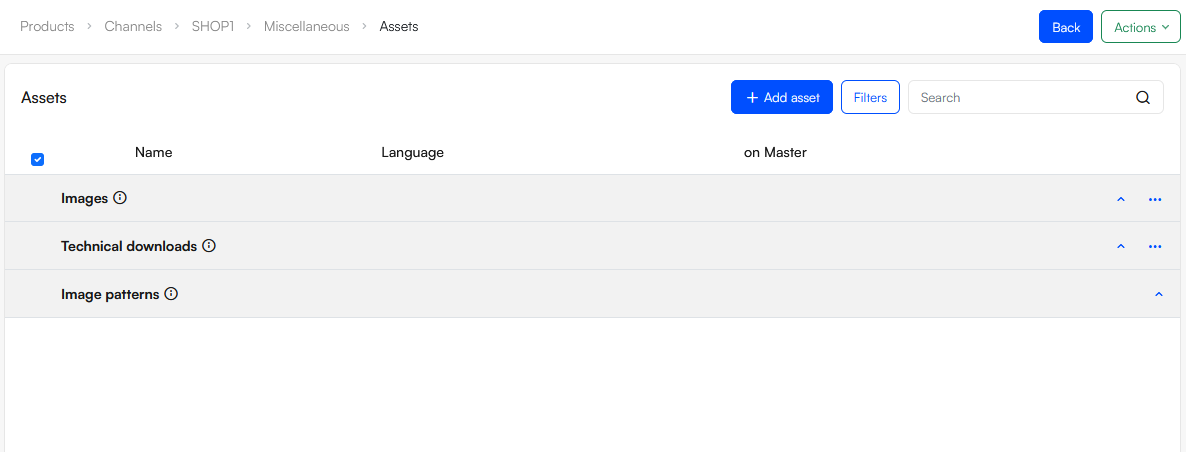
Let's add a couple of product images and technical documents to the product.
First we'll add product images:
- Click Add asset
- Select the asset category Images (should be preselected)
- Select the assets (files)
- Select a primary image
- Click Create
Then repeat the process for technical downloads - you should of course select the appropriate category.
Next Steps
This concludes the fifth tutorial in our introduction series for DynamicWeb 10. In this tutorial we covered:
- How to use queries to retrieve lists of products sharing properties
- How to use dynamic workspaces to auto-generate useful ways to approach the product portfolio
- How to use the Asset Manager to manage images and other assets
In our next tutorial, we will explore some of the tools available to you to control the product publication process.