Product attributes and data models
Welcome to the fourth tutorial in our introduction series for DynamicWeb 10. In this tutorial, we will delve into standard and custom product attributes in DynamicWeb 10.
Since this is a subject which depends heavily on the concrete data you're working with, we recommend that you follow our previous tutorial and import product data from a Dynamics 365 Business Central trial instance - or follow the alternative process outlined in the appendix to get up to speed.
In this tutorial, we will explore the following subjects:
- Standard and custom product attributes
- Data modeling
Part 1: Types of product attributes
Product attributes are used to hold information about products which is then used in frontend or by the system in other ways.
All products on a DynamicWeb 10 solution have access to the same set of standard fields - fields such as stock, price, name, and a bunch of other attributes which are assumed to be universal to products.
While these standard attributes are a good start, they are typically not enough - to account for the complexity of product information in the real world, you need to create custom product attributes.
Your options are:
- Global custom fields which are available globally, i.e. on all products
- Attribute groups which are available only on a subset of products
The overall idea is that you analyze your product portfolio and determine which non-standard properties are global and which should only be applied to a subset of products.
Part 2: Analyzing product data
In our case, the products we imported can be roughly classified as:
- Chairs
- Tables
- Lamps
- Boards
In most cases, business will already have a (often huge) list of attributes associated with their product portfolio which you will have to figure out how to structure. This is a thought example, so we will have to imagine that part. So if you think about some of the non-standard attributes these product types have, you might come up with:
- Chairs
- Upholstered (true/false)
- With armrests (true/false)
- Height adjustable (true/false)
- Washable cover (true/false)
- Tables
- Extendable (true/false)
- With drawer (true/false)
- With shelves (true/false)
- Height adjustable (true/false)
- Material (select)
- Oak
- Beech
- Laminate
- Lamps
- Solar powered (true/false)
- Dimmable (true/false)
- Light source (select)
- Integrated LED
- E14
- E27
- Boards
- Type (select)
- Smart board
- Noticeboard
- Whiteboard
- Type (select)
I am sure you can think of other properties, and you could also create subdivisions like dinner tables, desks, conference tables, and so on - but for now, we will keep it relatively simple and go with the above.
We'll also imagine that all of these items are designer-items - and so we will need a global Designer-attribute.
Finally, we want to relate each product with the Brand they're from, so that you can show brand-related information in frontend, e.g.:
- Brand name
- Brand description
- Brand website
- Brand logo
Part 3: Creating custom attributes
First, create the global custom field 'Designer':
- Go to Settings > Areas > Products > Attributes > Product Fields > Global custom fields
- Click New field and fill in the details
- Name: Designer
- Field type: Long text
- Save
Now for the attribute groups - to start with, we want to add all the properties that occur several times to a special kind of collection which is called a reference collection. You can then reuse them across other categories, which makes it easier to filter on them in frontend later on.
Right now that's only relevant for Height adjustable:
- Go to Settings > Areas > Products > Attributes > Product Fields > Attribute groups > Reference groups
- Click Create new reference group
- Name: Reference fields
- System name: Reference_fields
- Save
- Click on the group to open it
- Click New field - then fill out the details:
- Name: Height adjustable
- Field type: Checkbox
- Save
On integrated solutions where product attributes come from an external system, many implementers choose to import all properties as reference fields and then construct the categories manually afterwards, as it can be difficult to determine if an attribute will be needed on more than one product category in the future. In this example, we will stick to the default approach though.
Next we will construct the category groups with category-appropriate fields:
- Go to Settings > Areas > Products > Attributes > Product Fields > Attribute groups > Category groups
- Create four categories:
- Chairs
- Tables
- Lamps
- Boards
- Open each group and create the attributes we outlined above
- For most of the properties you can use the checkbox field type
- For those where you need to add options:
- Select the field type list box
- Save (and not close), and then switch to the options tab to:
- Create options
- Select how the field should be presented - checkbox list, dropdown list, radio button, etc.
- Finally, create a brand information category with the four properties discussed previously. For Brand logo use the File field type
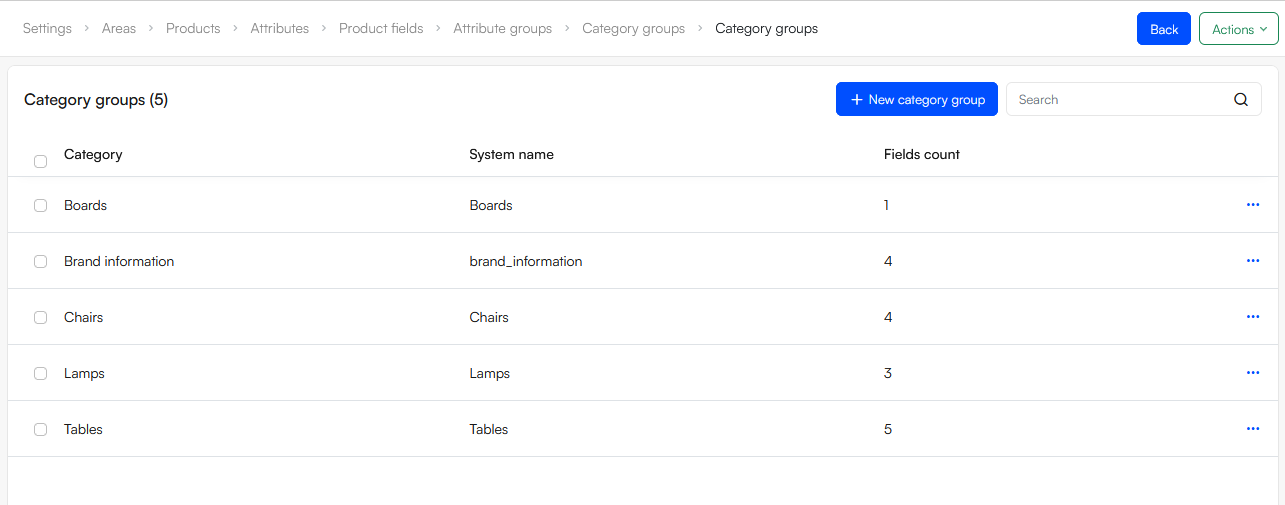
Once you're done, you will have 5 product categories with custom attributes defined:
 Now you're probably wondering - how are these custom attributes added to the correct products?
That's what we'll dive into in the next section!
Part 4: Data Modeling
There are two ways to apply product categories to products:
- By adding them to product groups in a shop - in your case SHOP1
- By creating a separate data model structure and associate the categories with them, then relate products to data models during the enrichment process
The first option is typically used on smaller solutions without a PIM license, but is has some clear drawbacks:
- Your shop structure must be identical to your category structure for fields to be applied properly
- A product cannot be a member of two product groups - and you might want e.g. an Outlet group
So - we will go with creating a dedicated data model structure:
- Go to Settings > Areas > Products > Attributes > Data model
- Create a data model node called Categories
- Go back to the Products-area and create the four relevant data models - Boards, Chairs, Lamps, Tables
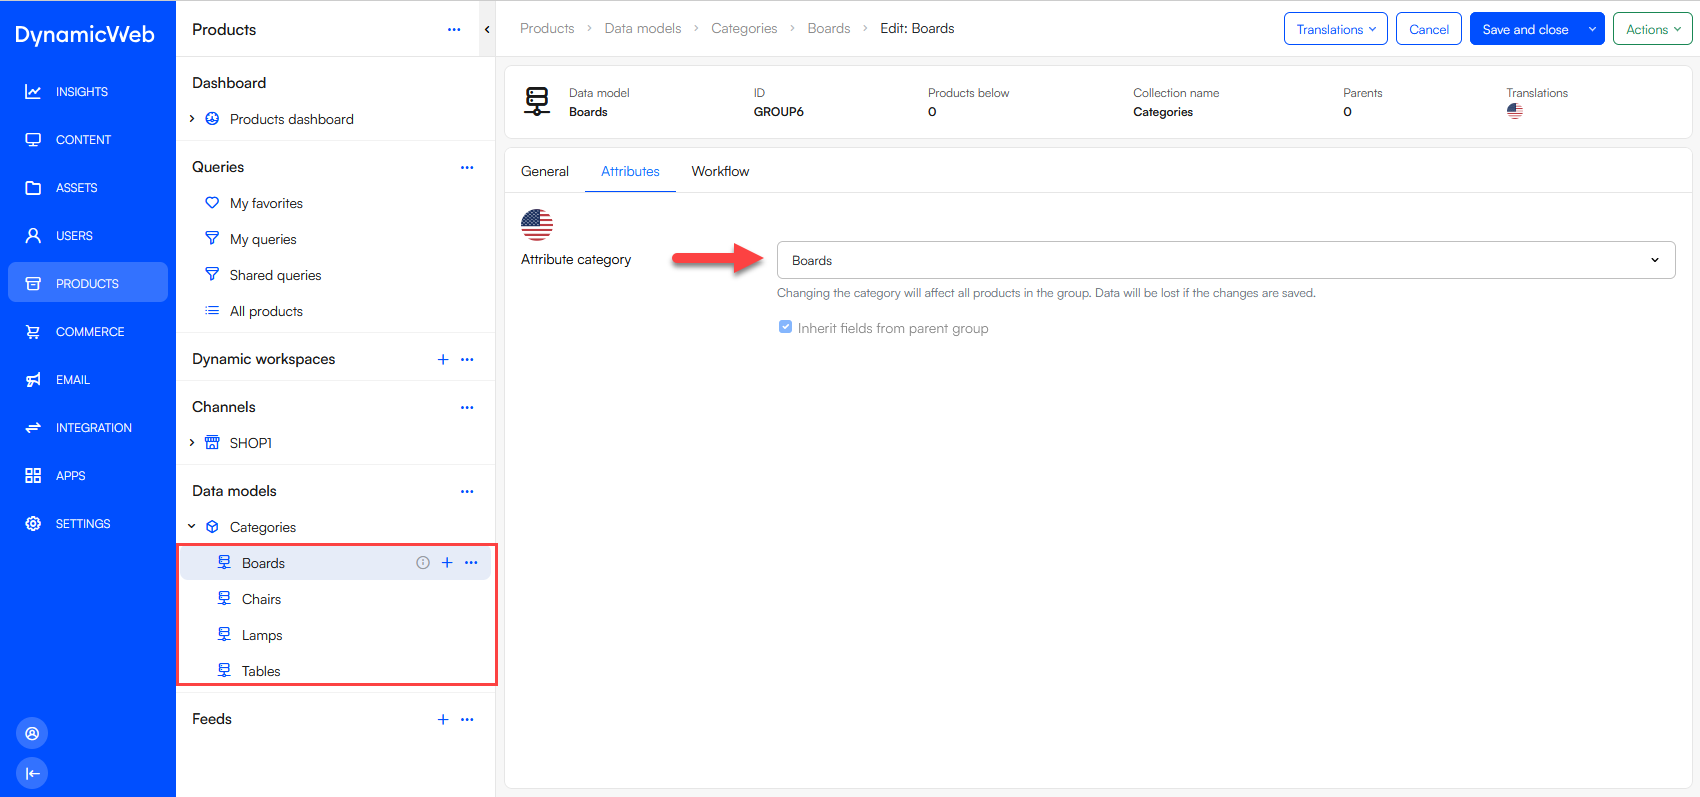
- On each data model, select the appropriate attribute category - please note that you need to save each category before you can select an attribute category. So, after saving your data model, click the three vertical dots and click Edit data model, switch to the Attributes tab, and select the appropriate attributes category
So that takes care of the categories - but what about the Brand-related information we created? In most cases you want to add this type of information to a separate data model:
- Go to Settings > Areas > Products > Attributes > Data model
- Create a data model node called Brands
- Go back to Products and create a Brand data model
- On the data model select the Brand information attribute category
Keeping brand-information separate from category-related information is a more flexible solution, because it means the PIM-manager doesn't always have to fill in brand related information, but can make the fields available only when necessary. For more information on a component-based approach see here.
Now, compared to many other properties, Brand-information is relatively standardized. We will therefore create some pre-configured data sets which editors can relate products to:
- Click the Brand-data model, then click New data set
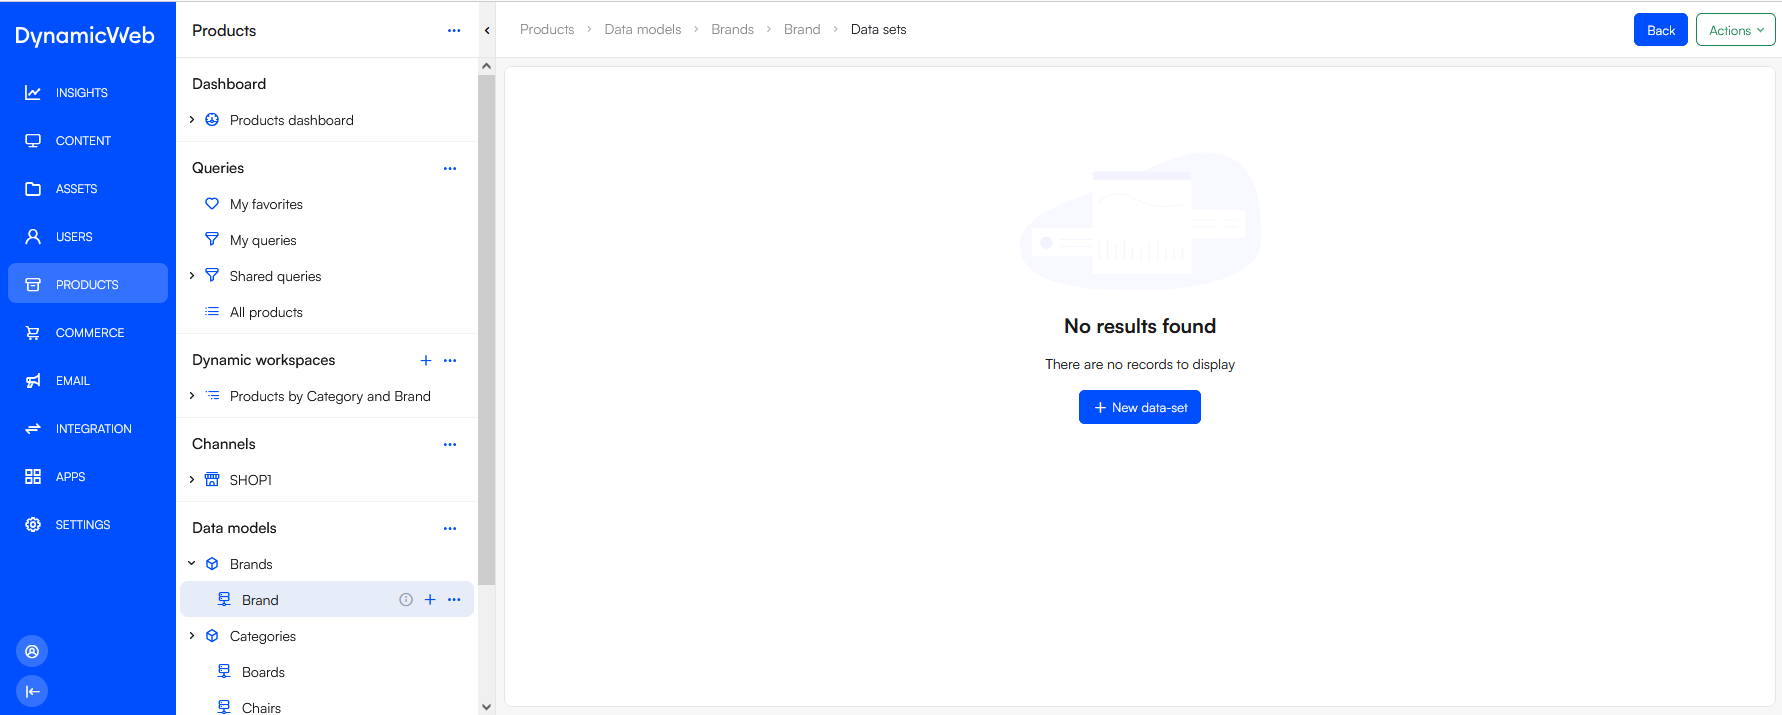
- Provide a Name
- Save and close
- Reopen the data set and fill in the details:
- Brand name
- Brand description
- Brand website
- Brand logo
- Save and close
Invent 2 or 3 different brands and create them - we will use them in the next section.
Part 5: Adding products to data models
It is very easy to make a product inherit fields from a data model:
- Go to the Products-area and open a product group - e.g. Office Chairs
- Select all products
- In the action-menu select Add to data model
- Select the data models to add - in this case Chairs
- Click Select and confirm
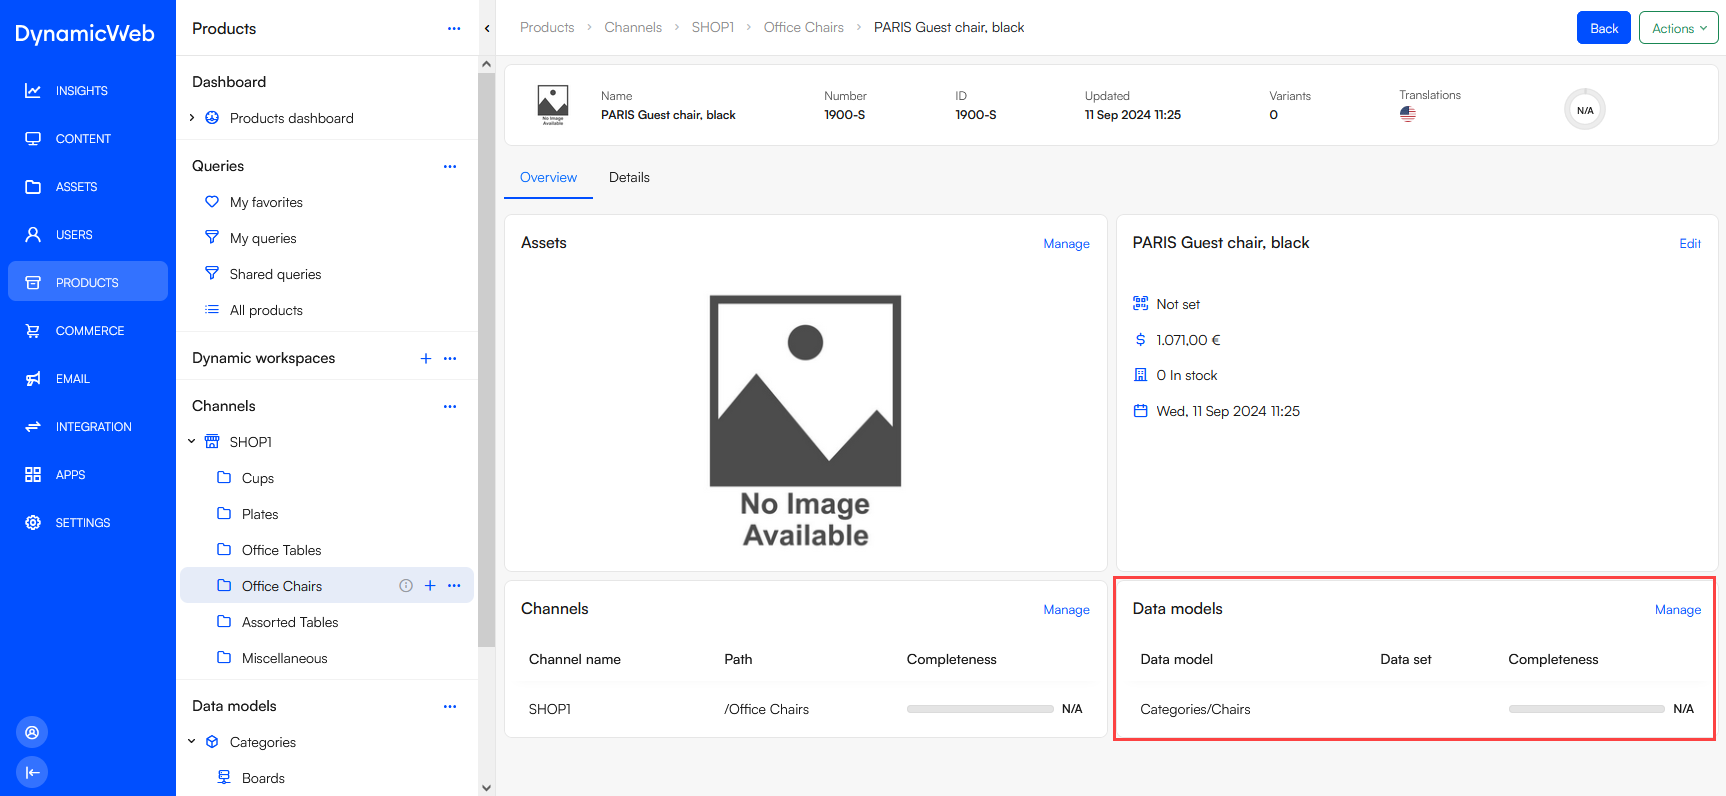
Click on one of the products to open the product details view - as you can see, the product is now associated with the Chairs-data model:
 Open the edit-view for a product - all attribute category fields can be found under the Categories-tab:
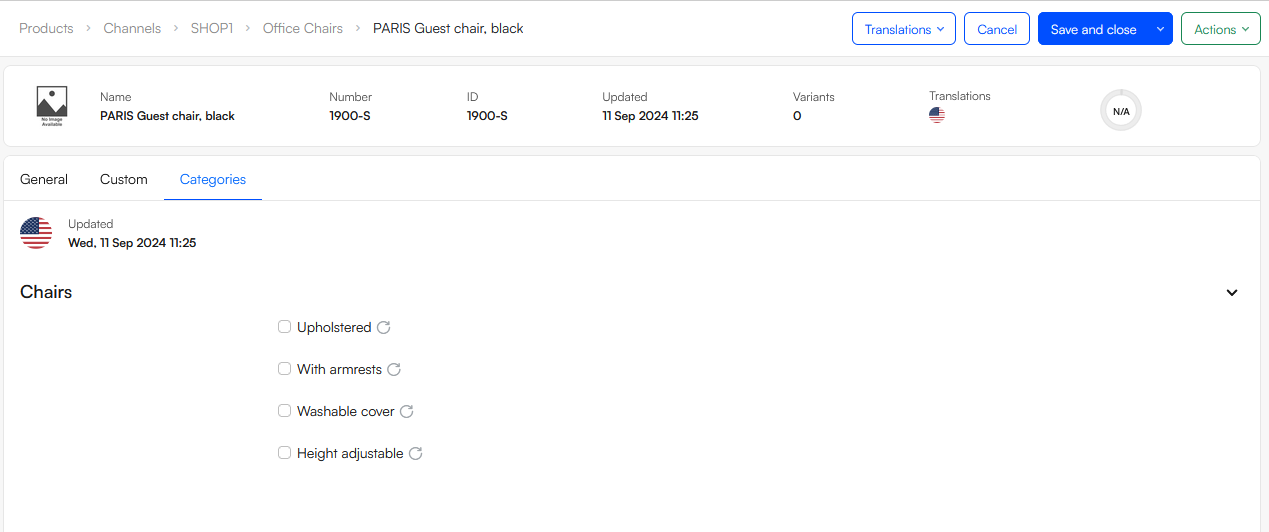
Repeat this process for all the products you imported - so they inherit the right category fields from the data model. The category fields are empty - of course - because you haven't added any values to them yet. That's because the information is pretty non-standard.
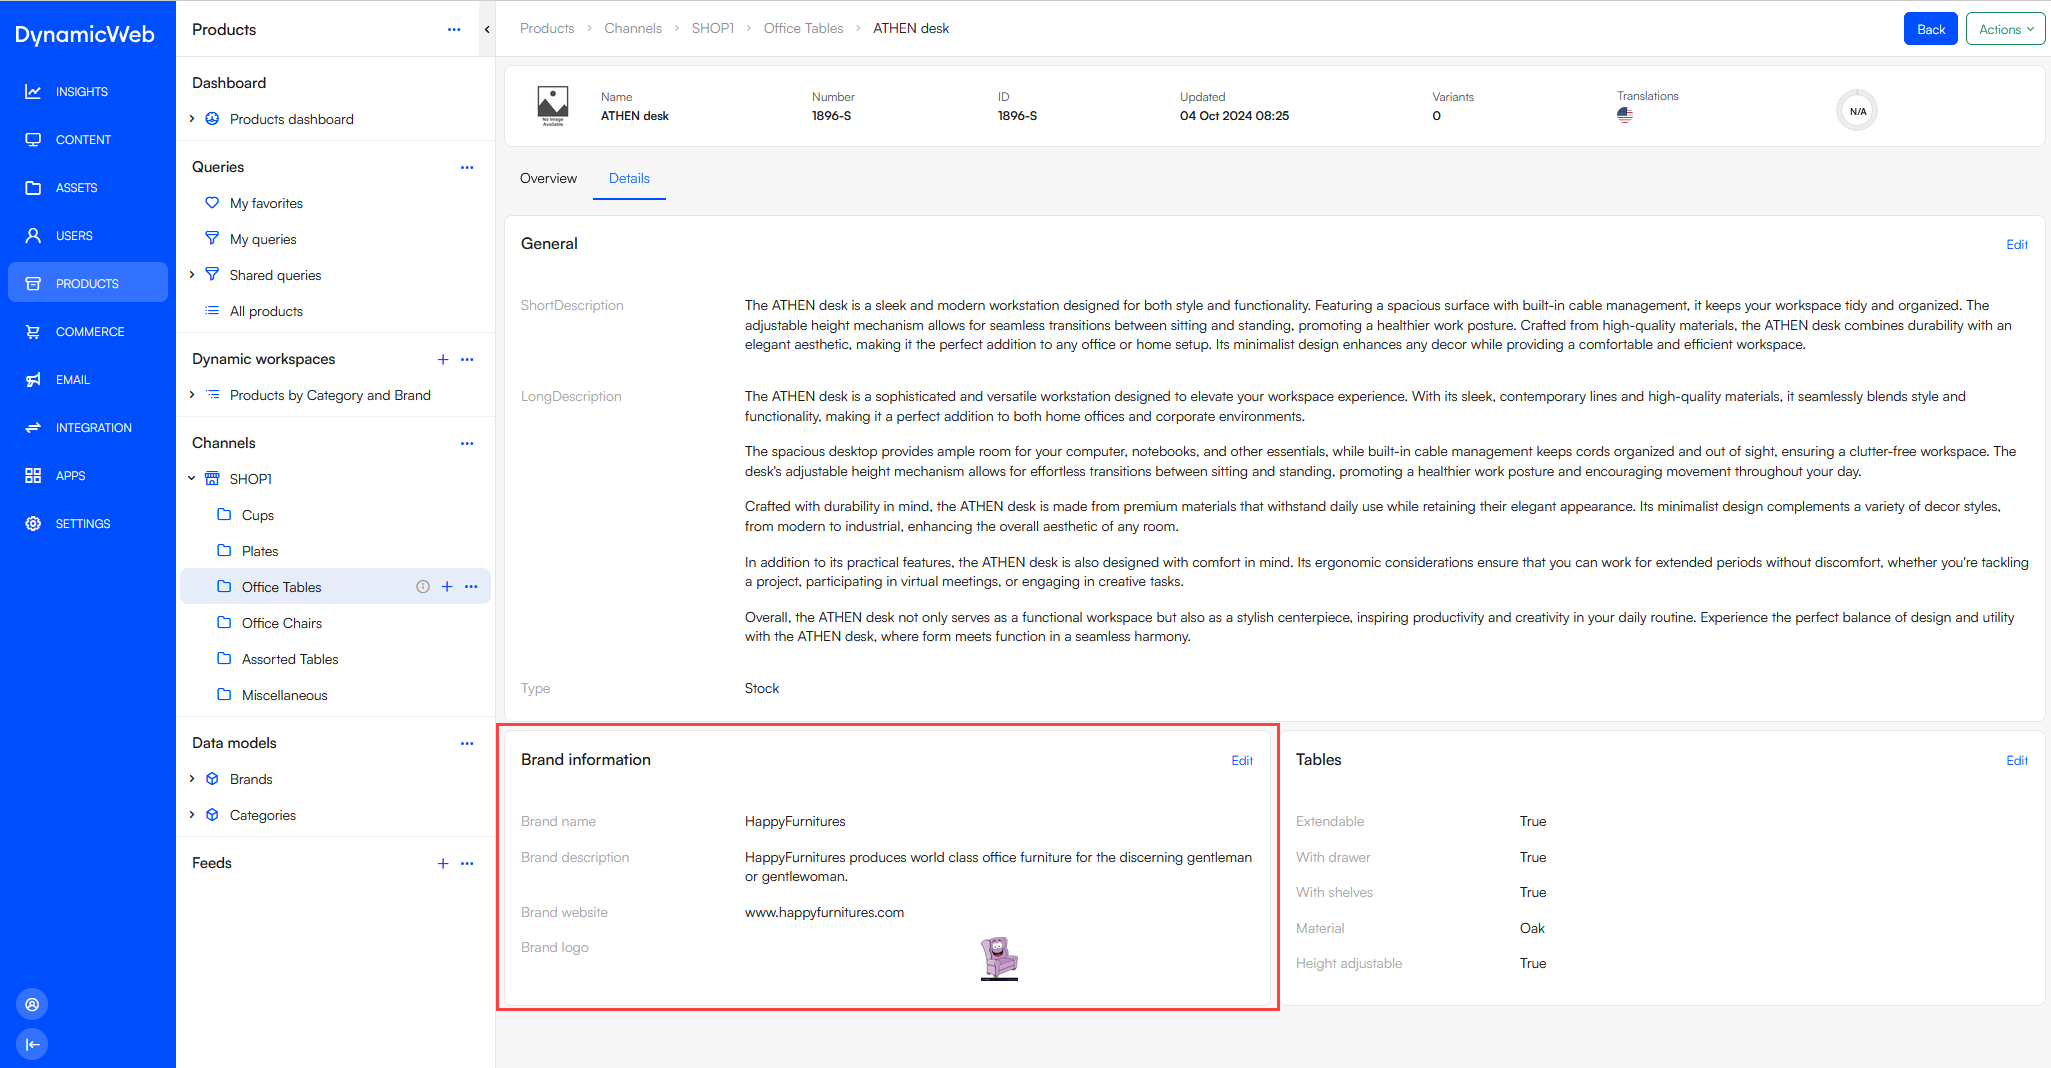
Brand information is typically static, though, which is why you could create data sets for your brands; the website link or the description of the brand doesn't change on a product to product basis. In practical terms, this means you can relate a products to a data set and it will automatically inherit the data model fields and the values from the data set.
To relate a product to a data set:
- First assign it to the data model as per usual
- On the list of data models, open the context menu for the data model and select Assign to Data-set
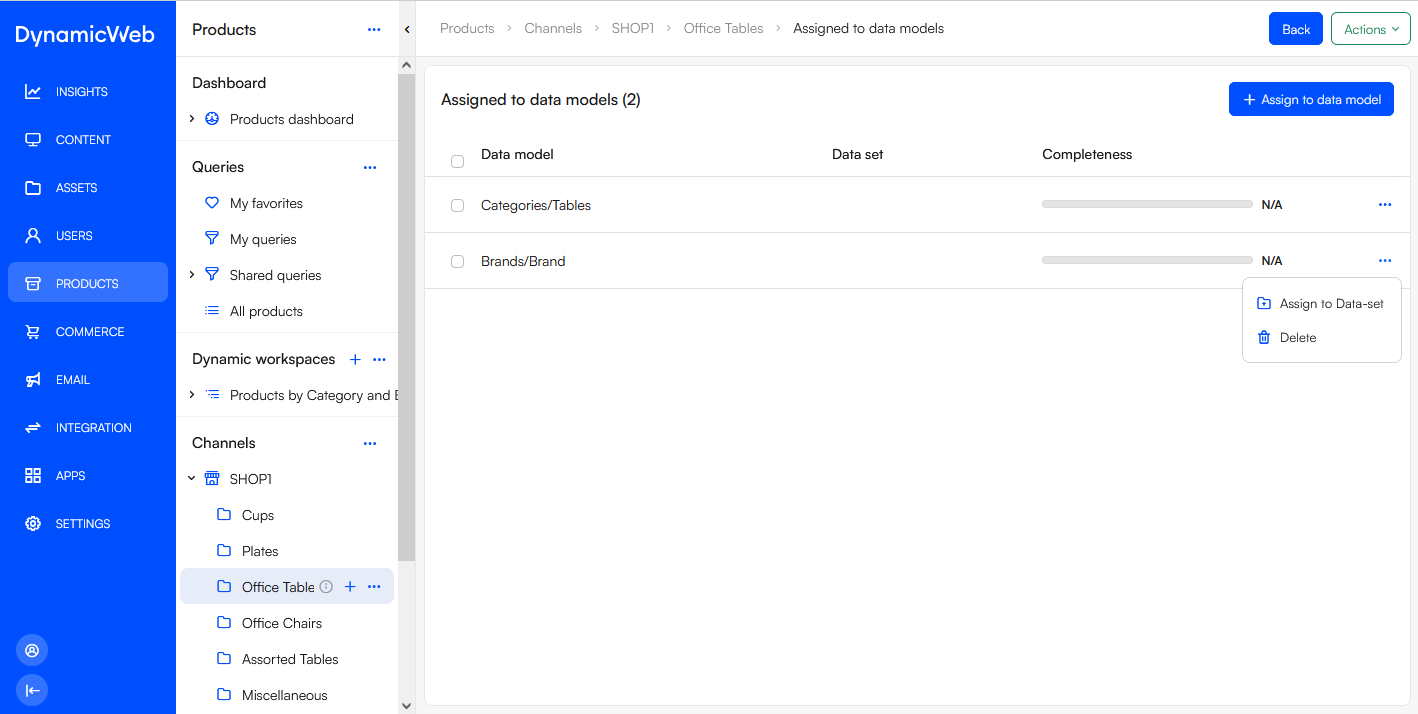
- Select the data set
- Repeat the process for a subset of your products
After assigning a product to a data set, the product inherits not only the attributes but also the data-set values - switch to the Details-tab and observe:
Next steps
This concludes the fourth tutorial in our introduction series for DynamicWeb 10. In this tutorial we covered:
- Standard product attributes
- Your options when creating custom product attributes
- How to analyze product data and translate the knowledge into attribute groups
- How to create global custom fields
- How and when to create different attribute groups:
- Reference groups
- Category groups
- How and when to to create and use data models & data sets
- How to relate products to data models & data sets to make them inherit fields from attribute groups
In our next tutorials, we will explore the tools and features you can use to streamline and structure the product enrichment process.