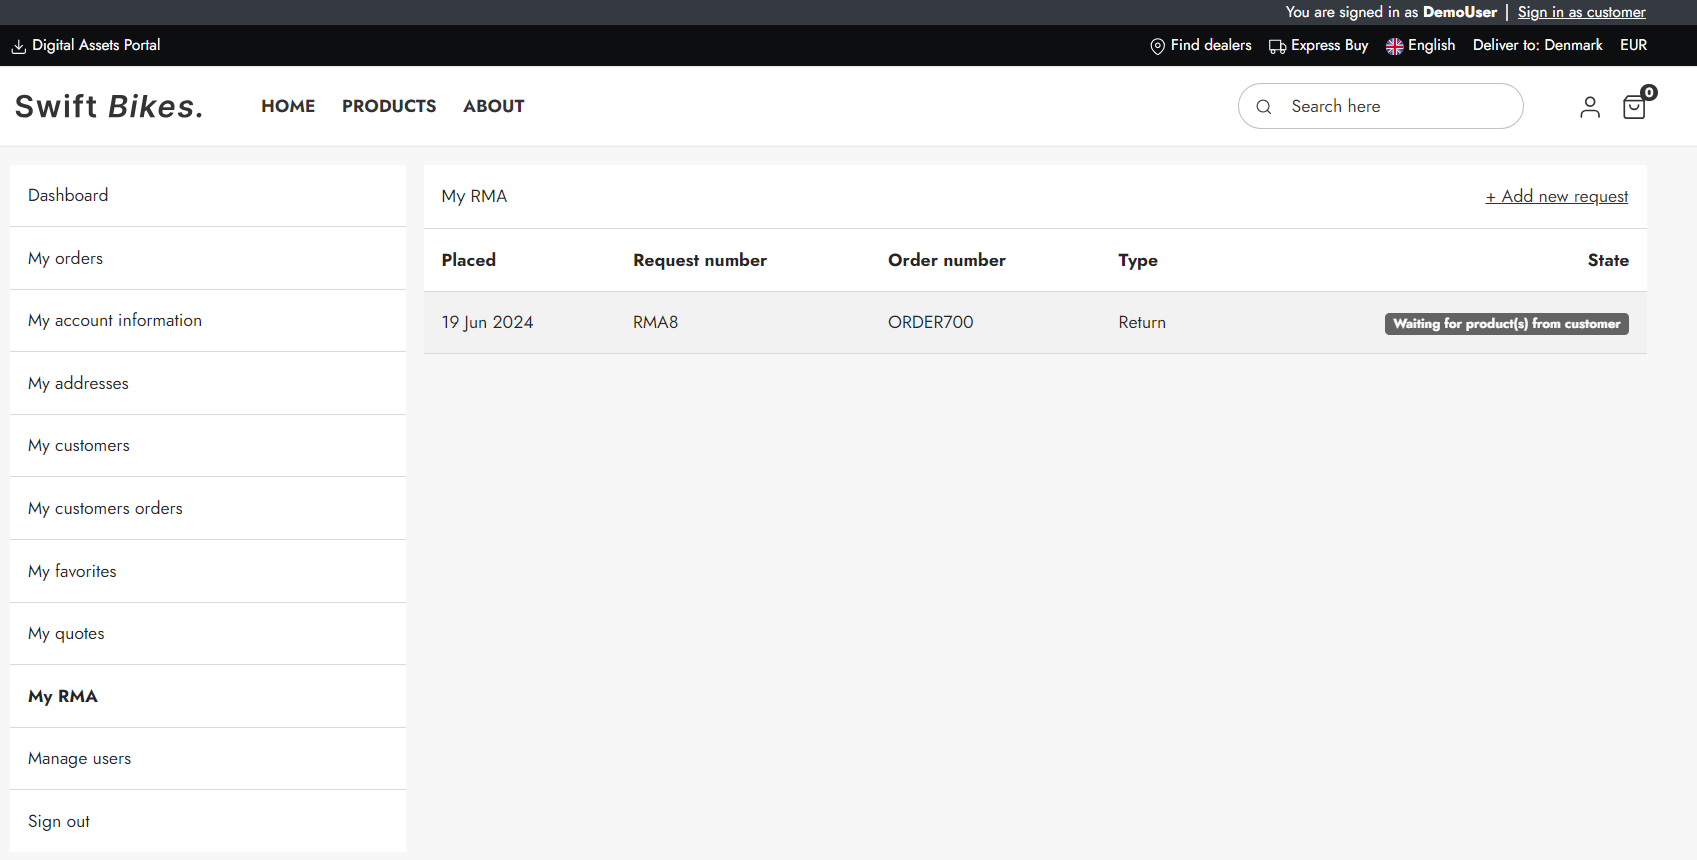
The Return Merchandise Authorization (RMA) page allows customers to create and track return requests for their orders. When a customer creates a new request, they choose the request type: Return, Defect, or Exchange. Next, they select the order they wish to return. Upon selecting the order, they will see the items included in that order and can choose to return all items or specific ones. Customers also have the option to provide additional information about the return before clicking the "Create request" button. If any required information is missing, the user will be notified.
In a standard Swift solution, this is included. However, if you are interested in setting it up manually for any reason, please read the tutorial below.
Manual setup
The manual setup will take place in the "My account" folder, which can be found here Content > Navigation > Utilities.
Here are the step to recreate the Swift RMA page:
- Create a new page and provide it with a appropriate name, e.g. “My RMA”
- Enter the Visual Editor on the newly created page
- Add a 2 columns 3/9 row to the empty page
- Add a Vertical navigation to the first empty column – Set the Navigation root to the “My account” folder
The second column is where the RMA feature should be placed.
- Add a “Customer center app” item to the second column
- Set the title to “My RMA”
- Link the Cart page field to your cart page
- Link the Product list page to your product list
- Go to the App section
- Select the Customer center app
- Scroll to the Default View section. In the Default View dropdown choose RMA
- Scroll further to the Templates section. In the RMA list dropdown choose “RMAList.cshtml”. In the RMA details dropdown choose “RMADetails.cshtml”
The RMA page is now finished. To check if it is working make sure to log in in the frontend using a user with processed orders.