Table of Contents

Using an existing ScreenType

Creating a custom screen using one of Dynamicweb's built-in screen types

Dynamicweb provides three built-in screen types that cover the vast majority of admin UI patterns. Inherit from one of them to get a complete, consistent screen with topbar, keyboard shortcuts, column management, and more — all for free. You only need to supply your data and layout choices.

All three base classes live in Dynamicweb.CoreUI.Screens.

Screen type Base class Use when
Edit screen EditScreenBase<TModel> Editing a single record via a tabbed form
List screen ListScreenBase<TRowModel> Browsing a collection of records
Overview screen OverviewScreenBase<TModel> Showing a high-level summary of one record, with widgets for related data

Each article covers the required overrides, optional hooks, and a worked example. The sections below show the minimum viable implementation of each screen type so you can compare them at a glance.

Minimal list screen

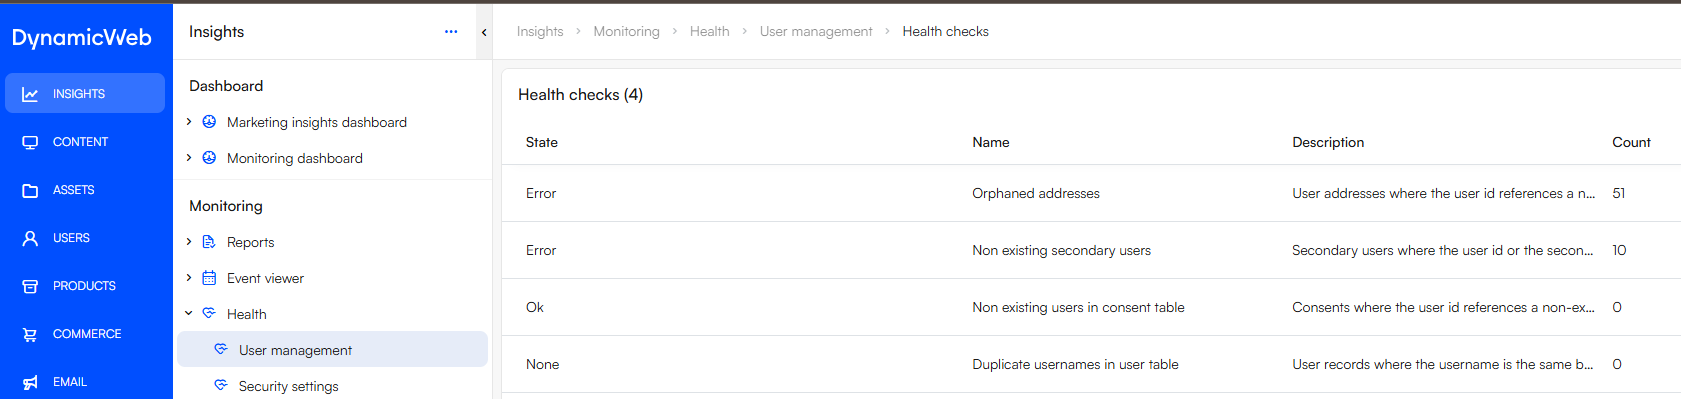
public sealed class HealthProviderCheckListScreen
    : ListScreenBase<HealthProviderCheckDataModel>
{
    protected override string GetScreenName() => "Health checks";

    protected override IEnumerable<ListViewMapping> GetViewMappings() =>
    [
        new RowViewMapping
        {
            Columns =
            [
                CreateMapping(p => p.State),
                CreateMapping(p => p.Name),
                CreateMapping(p => p.Description),
                CreateMapping(p => p.Count)
            ]
        }
    ];
}

Minimal edit screen

public sealed class ApiKeyEditScreen : EditScreenBase<ApiKeyDataModel>
{
    protected override string GetScreenName() => "Edit API Key";

    protected override CommandBase<ApiKeyDataModel>? GetSaveCommand()
        => new ApiKeySaveCommand();

    protected override void BuildEditScreen()
    {
        AddComponents("General", new LayoutWrapper[]
        {
            new LayoutWrapper("Details",
            [
                EditorFor(m => m.Name),
                EditorFor(m => m.Prefix),
                EditorFor(m => m.Description),
                EditorFor(m => m.ExpiryDate)
            ])
        });
    }
}

Minimal overview screen

public sealed class ApiKeyOverviewScreen : OverviewScreenBase<ApiKeyDataModel>
{
    protected override string GetScreenName() => "API Key";

    protected override void BuildOverviewScreen()
    {
        AddWidget(CreateDetailsWidget(), Group.GroupWidth.Col_12);
    }

    private Widget CreateDetailsWidget() => new Widget
    {
        Label = Model?.Name ?? string.Empty,
        Component = new InfoCardDisplay
        {
            Value = new InfoCardDisplay.InfoCardValue
            {
                Description = Model?.Description ?? "",
                AdditionalInfo = new Dictionary<InfoCardDisplay.InfoLabel, InfoValue>
                {
                    { new("Prefix"),  new InfoValue(Model?.Prefix ?? "") },
                    { new("Expiry"),  new InfoValue(Model?.ExpiryDate) },
                }
            }
        }
    };
}

Making your screen reachable

A screen class alone is not visible in the administration UI. You must link to it from an area tree node. The typical pattern is a NavigationNodeProvider that returns ActionNode instances:

new ActionNode
{
    Name = "API Keys",
    Icon = Icon.Key,
    NodeAction = NavigateScreenAction.To<ApiKeyListScreen>()
        .With(new ApiKeyListQuery())
}

See area tree for the full setup.

Extending screens you do not own

If you need to add fields, columns, or buttons to an existing Dynamicweb screen (or a screen from another add-on), use a screen injector — you do not need to subclass the screen. See Screen injectors for EditScreenInjector, ListScreenInjector, and the general-purpose ScreenInjector.

To top