Pages are default building blocks primarily used for two things:
- To define the content structure of a website
- To act as containers for content coming from paragraphs
As an editor, you interact with pages via the content area tree. You can use the plus-button as well as the page context menu to add and interact with pages.
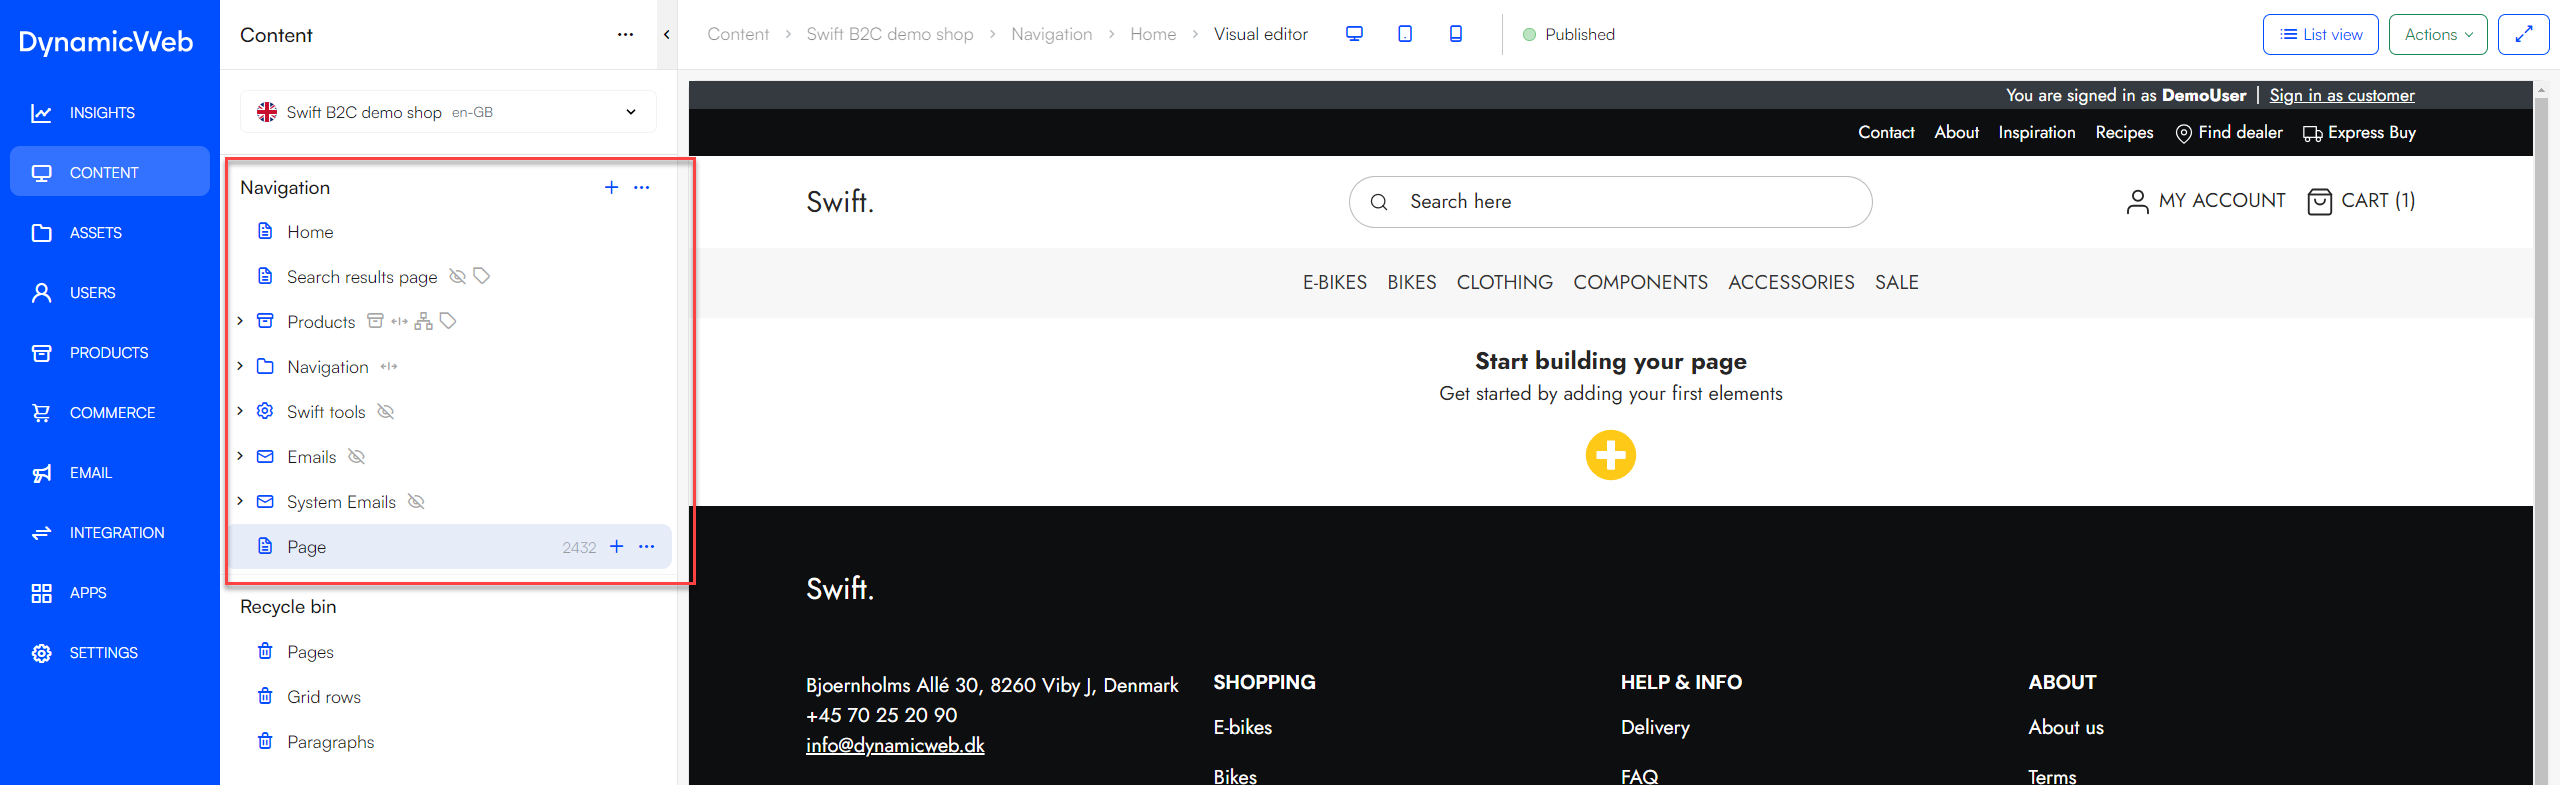
When you click on a page, the workspace will show the page content in either list view or visual editor mode, depending on the design. You can then create and edit content using either of these modes.
Page Settings
Pages are rich objects with lots of settings for tweaking or configuring page behaviour, accessible from the page context menu or via the Settings-button in Visual Editor mode. The page settings are organized into tabs of related settings, you can read more about each tab below.
The General-tab is either very important or not at all important, depending on the website design. If the design does not use items to extend page settings, the only thing on this tab is the Page title field.
 On the other hand, if the design does use an item type to extend page settings (via the Advanced-tab for the website), this tab also contains the fields from this item type. This is extensively used in DynamicWeb Swift.
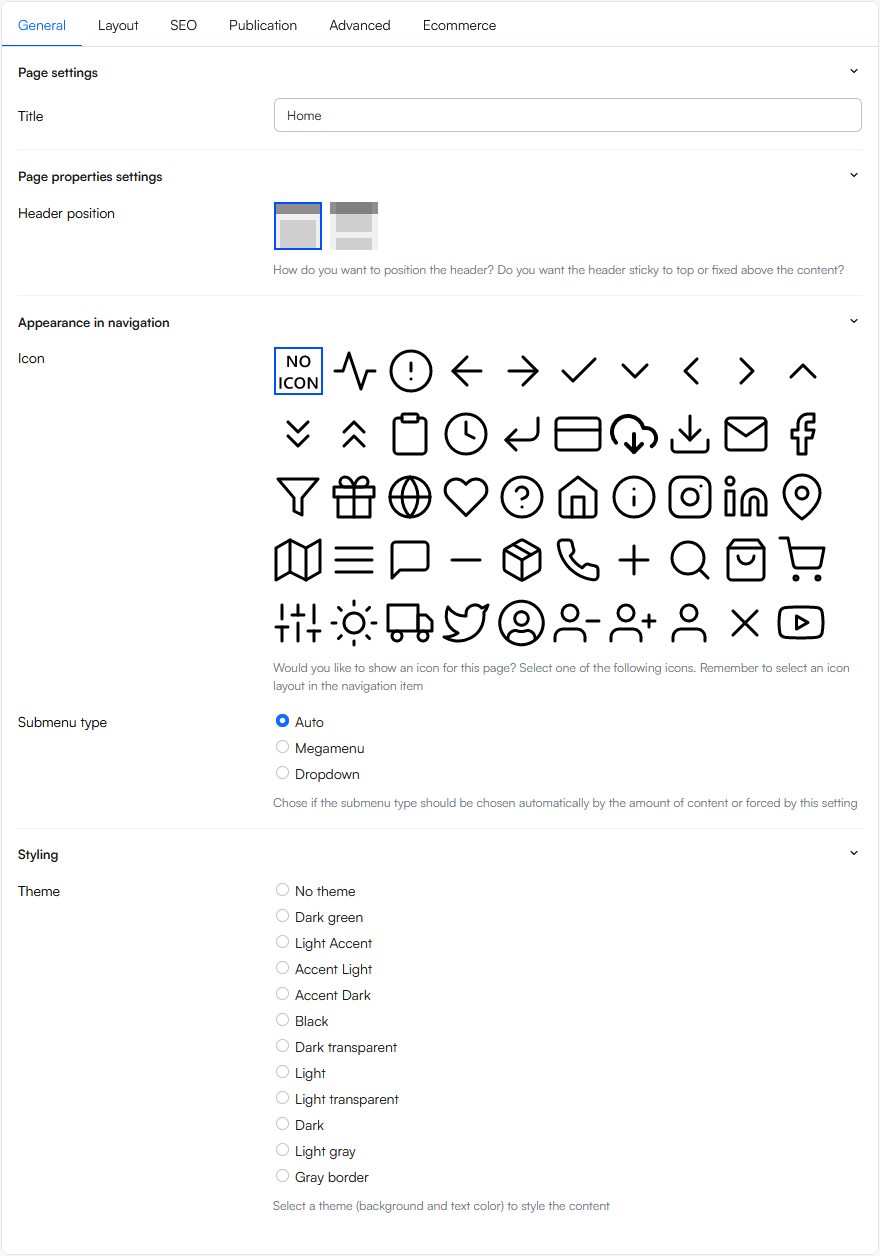
 The following settings are available:
 The following settings are available:
 The following settings are available:
 From the advanced tab you can:
 To set up Ecommerce navigation: