Although your Swift solution most likely will have a wide range of different campaigns to place products in, you could end up in situations where you, as an editor, will need to create new campaigns and badges.
In this guide we will explain how to:
Note
If you want a general understanding of the Ecommerce badges concept, you can check out our technical documentation here.
Creating a new Campaign
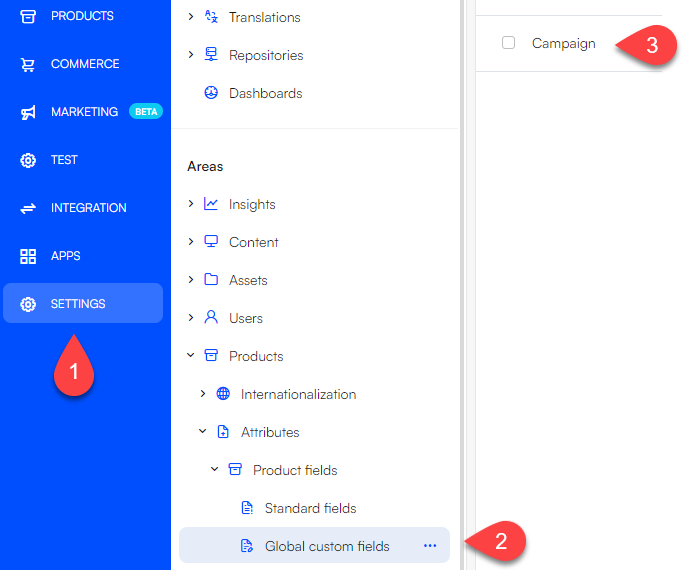
The creation of new campaigns begins in the backend. You will have to locate the Campaign product field in Global custom fields in Settings.
- Click on Settings
- Navigate to Global custom fields in Products > Attributes > Product fields > Global custom fields
- Click on the Campaign field
On the campaign field page, you will be presented with all settings for the campaign field. The only thing you need to worry about is the Options section.
- Enter the Options tab. Here, you can see a list of the current Campaigns
- Click New option
- Enter the name of your campaign. The name of your new campaign is what will be shown as text on the badge
- Enter the value of your campaign. The value should be similar to the name, though without spaces
- Remember to save your changes
Styling the Campaign
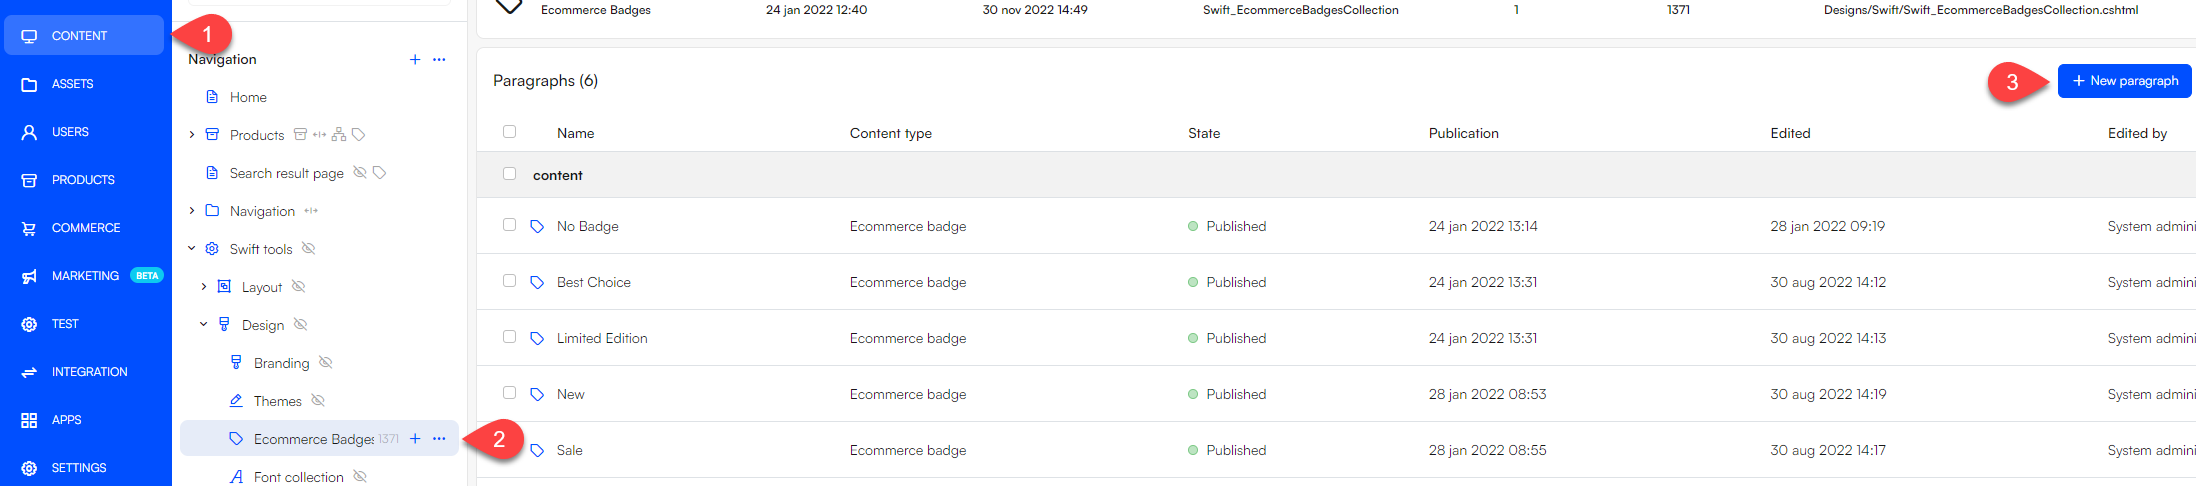
Next, you will need to design the badge. This is done in the Content section.
- Enter Content
- Navigate to Ecommerce Badges in Swift tools > Design > Ecommerce Badges
- Add a New paragraph and select Ecommerce Badge
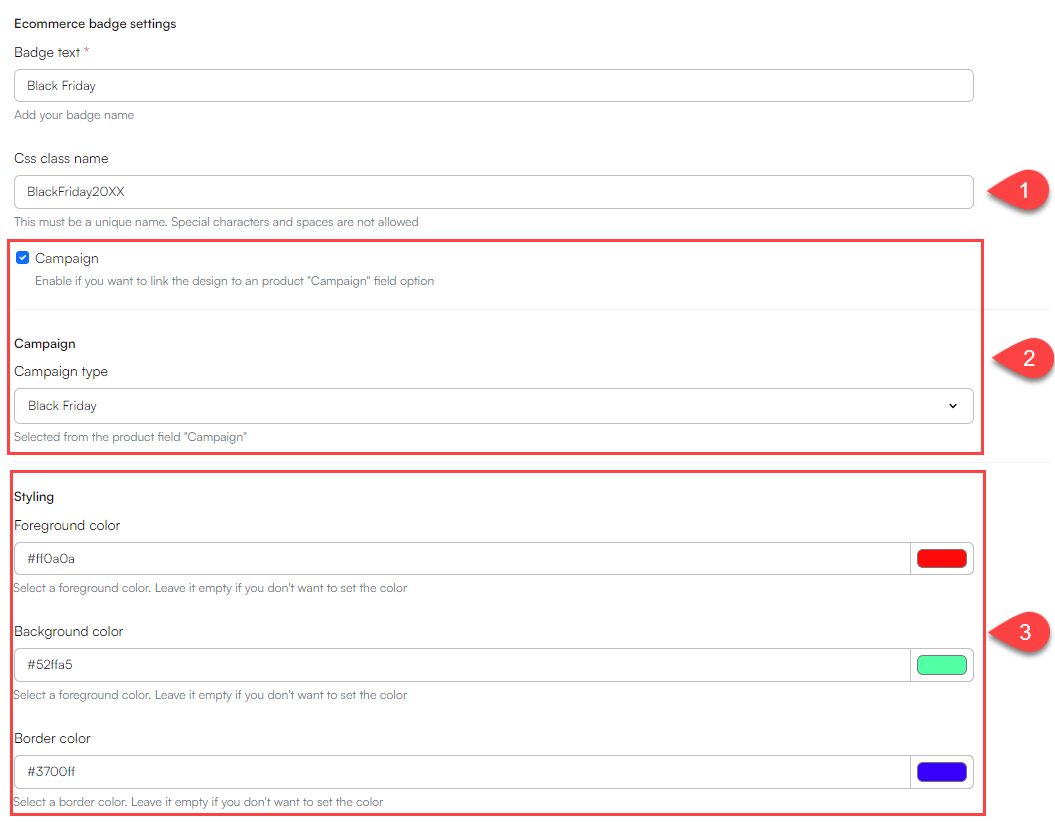
On the paragraph page you can style the badge and link it to the campaign you created earlier:
- Name the badge the same as the campaign you are creating
- Give your paragraph a css class name – it is important that it is a unique name
- Make sure to check the Campaign checkbox. This will reveal a dropdown menu where you can link the paragraph to the campaign field you created earlier
- Style your badge
- Foreground color will set the text color
- Background color controls the color of the badge
- Border color controls the border color of the badge
- When you are done styling, hit Save and close
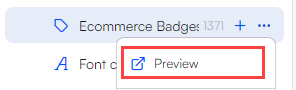
To render the colors of the new badge, you will need to load the ecommerce badge page. To do this, locate the three dots to the right of Ecommerce Badges and select Preview.
Now, the last thing you need to do is to add your new badge to the ecommerce columns on your site. Which columns and how many you need to configure depends on your setup, but generally speaking you have to configure the columns where a product is shown. This includes product sliders on your site and ecommerce columns on your product list page and product details page. At the top of the ecommerce badges setup guide we have listed the columns that can use badges. You can check out the list here.
Adding Products to Campaigns
You might have created a new campaign or imported some new products and now want to link the campaign with the products. This is done in the Products section.
Note
Please note that linking a product to a campaign differs based on the product's characteristics. If the product has multiple variants, the linking process is slightly different than if it has only a single variant.
If a product does not have any variants, do the following:
Head to Products
Under Channels, select the channel you wish to find a product in
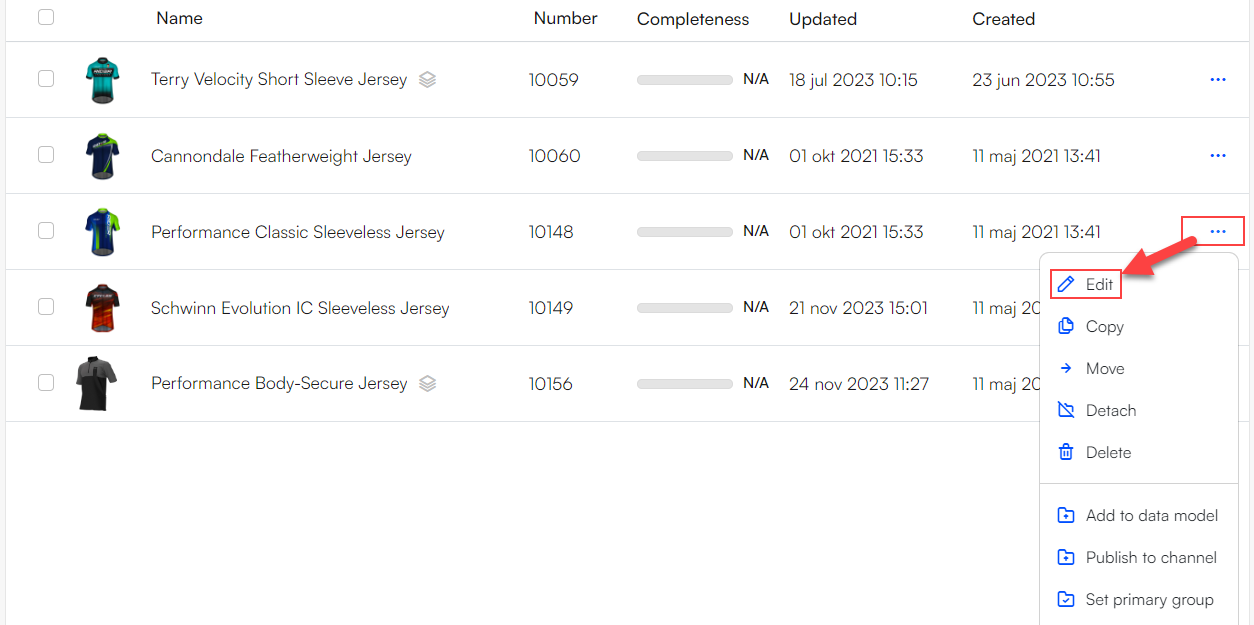
Locate the product you wish to add to a campaign, click the three vertical dots to the right, and click Edit
Enter the Custom tab and locate the Campaign section
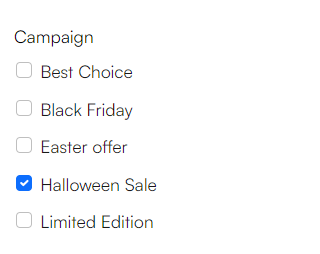
Check the boxes for the campaigns you wish to add to the product
When a product includes multiple variants, the approach in linking it to a campaign involves an additional step: selecting the specific variants that will be associated with the campaign. For instance, you might want to include only the green variant of a shirt in a sale, not the red variant.
To add a campaign to one or more variants of a product, you need to:
- Enter the product by clicking it
- Head to the variants section
- The variants section contains a list of the variants of the product
- Click Manage in the top right corner of the 'Combinations' list
- Check off the variants you wish to include in the campaign
- Click Actions in the top right corner and select Grid Edit
- Scroll to the right until you reach the Campaign column
- Click the dropdown arrow of the top row and select Set value
- Select your campaign and click Ok
The last thing to do is to clear your browsing data of cached images and files. That way your system will load the latest changes and you will be able to check if everything is as it should be.