This guide will describe how to set up a DynamicWeb 10 solution on an IIS server. There are two options:
- A single-tenant setup is a setup where each solution has a dedicated application
- A multi-tenant setup is a setup where multiple solutions share a single application
Typically, for local installations or demanding production environments you want a single-tenant setup. A multi-tenant setup makes sense if you're running staging and production solutions on the same environment, but may also be of use in other cases.
As per usual, what matters most of how you dimension your servers.
Before you can run a DynamicWeb 10 solution in IIS please ensure that:
- You have IIS 10 or newer installed and configured
- You have ASP.NET Core Runtime 10.0 Hosting Bundle installed
![Note] Make sure that LoadUserProfile is set to true on the IIS-server or at least on all application pools serving a DynamicWeb site
Single-tenant setup
A single-tenant setup is a setup where a DynamicWeb 10 solution runs on a dedicated application, which is to say the application is not shared with other solutions. This setup is typically used for local installations, installations with custom extensions, and in production if the staging environment is not located on the same server as production.
There are two steps to setting up a single-tenant DW10 solution on an IIS-server:
- Installing the application
- Creating the website in IIS
Installing the application
There are multiple ways to install a DynamicWeb 10 application - choose one which fits your scenario:
- Install using .NET CLI
- Install using a MAC
- Install using VS Code
- Install using a zipped milestone release
If you installed DynamicWeb 10 using our .NET project templates you need to manually add a web.config file to the root of your application folder, so it will work together with IIS:
<?xml version="1.0" encoding="utf-8"?>
<configuration>
  <location path="." inheritInChildApplications="false">
    <system.webServer>
      <handlers>
        <add name="aspNetCore" path="*" verb="*" modules="AspNetCoreModuleV2" resourceType="Unspecified" />
      </handlers>
      <aspNetCore processPath="dotnet" arguments=".\bin\Dynamicweb.Host.Suite.dll" stdoutLogEnabled="false" stdoutLogFile=".\logs\stdout" hostingModel="inprocess" />

      <!--security related settings START - not strictly needed, but recommended-->
      <httpProtocol>
        <customHeaders>
          <remove name="X-Powered-By" />
        </customHeaders>
      </httpProtocol>
      <security>
          <requestFiltering removeServerHeader="true" />
      </security>
      <!--security related settings END-->
    </system.webServer>
  </location>
    <system.web>
        <customErrors mode="On" />
    </system.web>
</configuration>
Note
The entry point path in the example may need adjusting if you have built your application from the template package with a different name. If in doubt locate the .exe file in your bin folder, it will have a .dll counterpart with the same name - > point your web.config to that
Creating the website
Once the application has been installed, you can set up a website on IIS:
Open IIS Manager
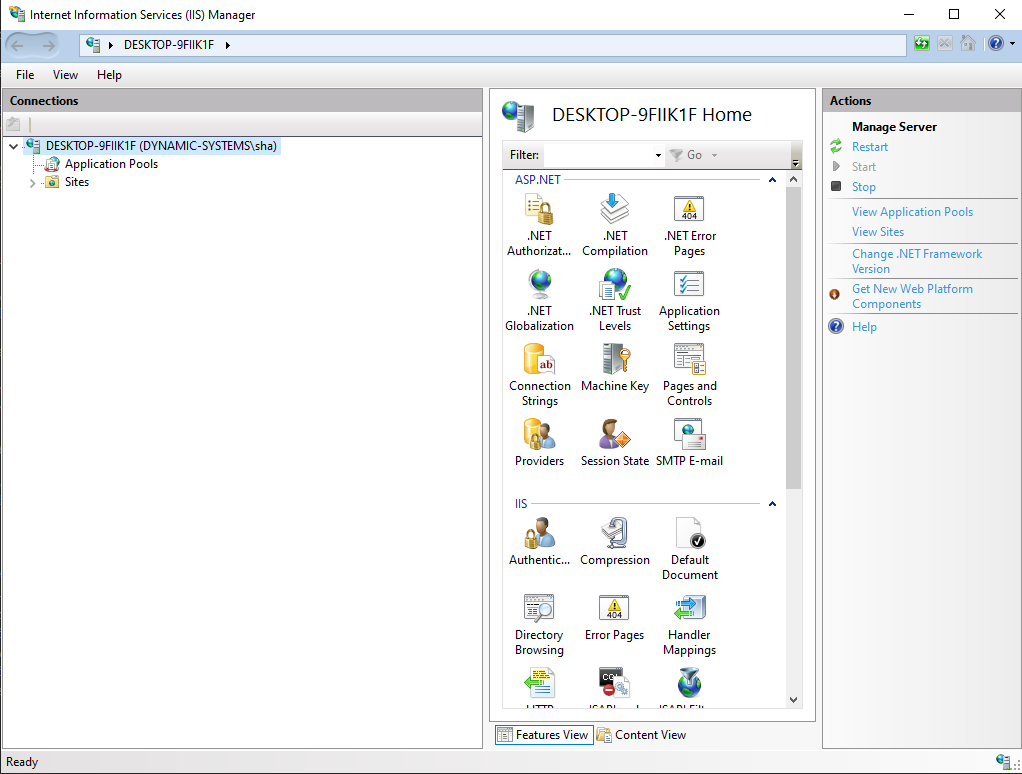
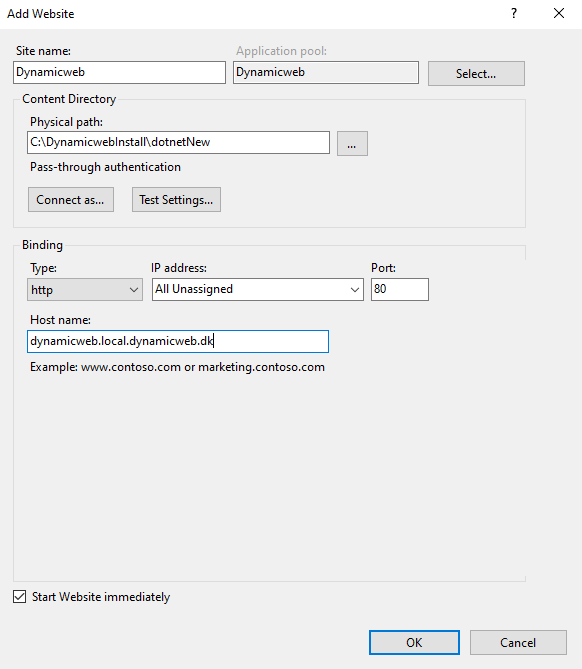
Right-click Sites > Add website – then configure it:
- Add a site name
- Point the physical path to the application folder (where the bin-folder is)
- Give it a host name – for local installations use yoursitename.local.dynamicweb.dk or add a record to the hosts file and use that
- Click OK
Access the URL in a browser to launch the Setup Guide.
Multi-tenant setup
A multi-tenant setup is a setup where multiple solutions share a single application. This is sometimes employed when you run both staging and production on the same environment, or if you have a set of solutions which need to always be on the same application version.
This section will outline the recommended structure for a multi-tenant setup, and guide you through the necessary steps for getting it up and running.
We recommend that you place the DynamicWeb 10 application in a separate folder from your solutions:
- Drive root
- DynamicWeb
- DW10
- bin
- DW10 Solutions
- DW10
- DynamicWeb
This folder structure is identical to the one used by DynamicWeb Cloud hosting.
Installing an application
The DW10/bin folder contains the application and libraries shared by the solutions located under DW10 Solutions. Typically, for multi-tenant setups, you will want to use the zipped milestone packages provided by DynamicWeb. Unpack the latest release and move the contents of the /bin folder to DW10/bin
To upgrade versions you:
- Download a more recent milestone release
- Stop all websites using the application (
iireset /stopin terminal is recommended) - Overwrite
/binwith the new application
It is possible (but not recommended) to operate with multiple /bin folders (and thus have solutions running of different milestone releases). If you elect to do this, you will need to manually adjust the web.config of individual solutions to point at the correct /bin when upgrading.
Installing solutions
Each solution should be placed in a separate directory under DW 10 Solutions:
- Drive root
- DynamicWeb
- DW10
- bin
- DW10 Solutions
- solution1.yourdomain.com
- solution2.yourdomain.com
- solution3.yourdomain.com
- DW10
- DynamicWeb
web.config
In the root of each solution folder place a web.config with content like:
<?xml version="1.0" encoding="utf-8"?>
<configuration>
  <location path="." inheritInChildApplications="false">
    <system.webServer>
      <handlers>
        <add name="aspNetCore" path="*" verb="*" modules="AspNetCoreModuleV2" resourceType="Unspecified" />
      </handlers>
      <aspNetCore processPath="dotnet" arguments=".\bin\Dynamicweb.Host.Suite.dll" stdoutLogEnabled="false" stdoutLogFile=".\logs\stdout" hostingModel="inprocess" />

      <!--security related settings START - not strictly needed, but recommended-->
      <httpProtocol>
        <customHeaders>
          <remove name="X-Powered-By" />
        </customHeaders>
      </httpProtocol>
      <security>
          <requestFiltering removeServerHeader="true" />
      </security>
      <!--security related settings END-->
    </system.webServer>
  </location>
    <system.web>
        <customErrors mode="On" />
    </system.web>
</configuration>
In this web.config file you instruct IIS to use the application located in the DW10/bin-folder by adjusting the arguments in this line to reflect the proper path for your server:
<aspNetCore processPath="dotnet" arguments="E:\Dynamicweb\DW10\bin\Dynamicweb.CoreUI.Host.dll" stdoutLogEnabled="false" stdoutLogFile=".\logs\stdout" hostingModel="inprocess" />
Your setup now looks like:
- Drive root
- DynamicWeb
- DW10
- bin
- DW10 Solutions
- solution1.yourdomain.com
- web.config
- solution2.yourdomain.com
- web.config
- solution3.yourdomain.com
- web.config
- solution1.yourdomain.com
- DW10
- DynamicWeb
Files & Database
You now need to add a Files-folder to each solution and connect each solution to a database.
In each solution folder:
- Create a wwwroot-folder
- Copy the entire Files-folder from your staging environment it
- Inside /Files, edit the GlobalSettings.Database.Config file and add the access information for your SQL-server
See the Install Swift guide if you're not familiar with connecting to a database using a GlobalSettings file.
<?xml version="1.0"?>
<Globalsettings>
  <System>
    <Database>
      <SQLServer>.</SQLServer>
      <UserName>sa</UserName>
      <Password>sa</Password>
      <Database>DocumentationSamples</Database>
    </Database>
  </System>
</Globalsettings>
Your folder structure should now look like:
- Drive root
- DynamicWeb
- DW10
- bin
- DW10 Solutions
- solution1.yourdomain.com
- web.config
- wwwroot
- files
- GlobalSettings.Database.config
- files
- solution2.yourdomain.com
- web.config
- wwwroot
- files
- GlobalSettings.Database.config
- files
- solution3.yourdomain.com
- web.config
- wwwroot
- files
- GlobalSettings.Database.config
- files
- solution1.yourdomain.com
- DW10
- DynamicWeb
IIS configuration
Finally, create each solution in IIS-Manager:
- Open IIS Manager
- Right-click Sites > Add website – then configure it:
- Add a site name - e.g solution1.yourdomain.com
- Point the physical path to the solution folder (where the wwwroot-folder is)
- Give it a host name – e.g solution1.yourdomain.com
- Click OK
Once each solution is created you can access the URL you gave it and the proverbial Bob is likely to be your uncle!